Fifty fairy party snack ideas that go past the usual pretzel wands and fruit skewers, with real how-tos folded right in so you’re not guessing. Nothing here needs a pastry degree.
Heads up: This post may include affiliate links. As an Amazon Associate, I earn from qualifying purchases—at no extra cost to you. Full privacy policy and disclosure here.
Fairy Wands & Sticks
1. Toadstool Marshmallow Pops
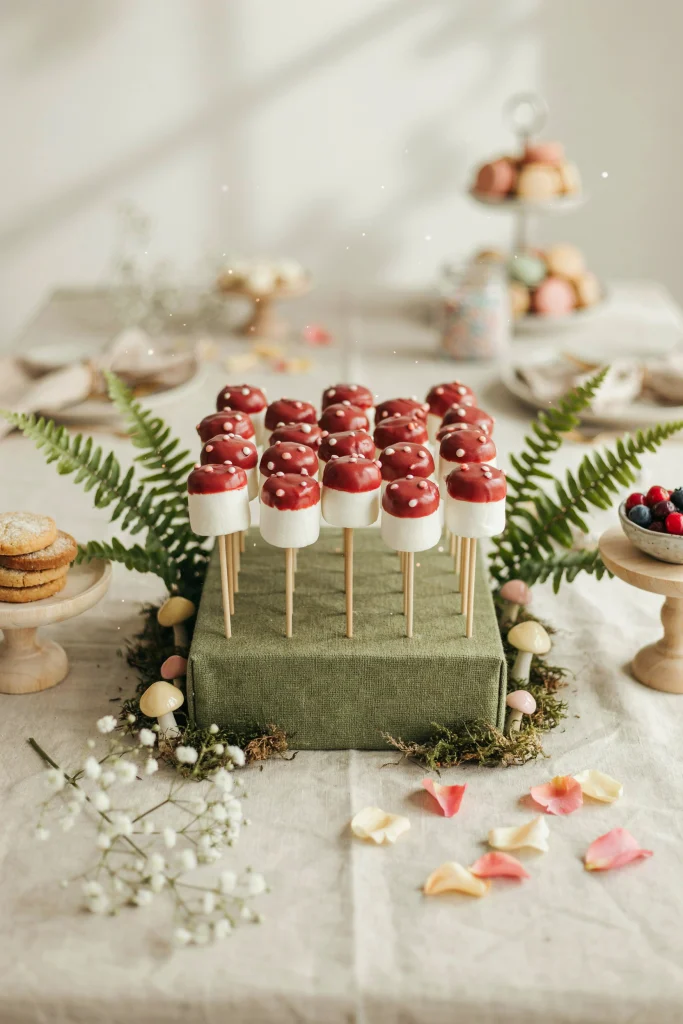
Skewer a marshmallow, dip the top half in red candy melts, and dot on white icing spots once it sets, and you’ve got a mushroom cap that reads instantly as fairy-tale. Stand them in a block of styrofoam wrapped in moss-colored fabric so the whole thing looks like a toadstool patch growing out of the table. A set of chocolate dipping tools keeps the coating even.
2. Honeycomb Wands
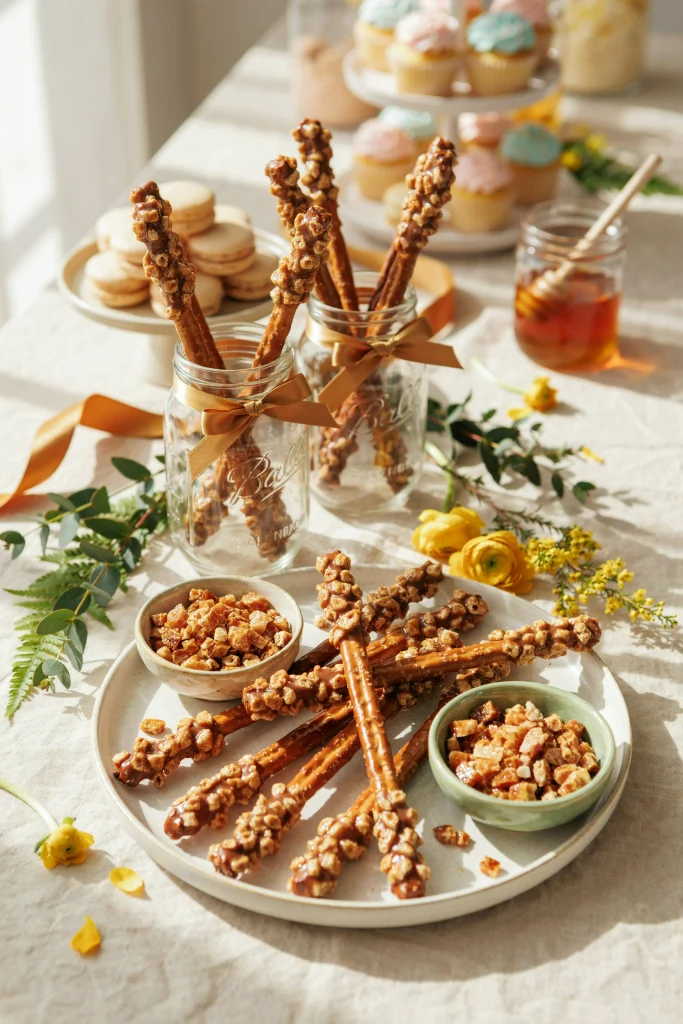
Dip pretzel rods in melted caramel instead of white chocolate, then roll them in crushed honeycomb candy (like Crunchie bars or Violet Crumble, crushed in a bag with a rolling pin) for a golden, textured wand that smells like honey. Stand them in a mason jar tied with a gold ribbon for a “bee fairy” theme twist. Lay everything out on parchment paper while it sets.
3. Rock Candy Wands
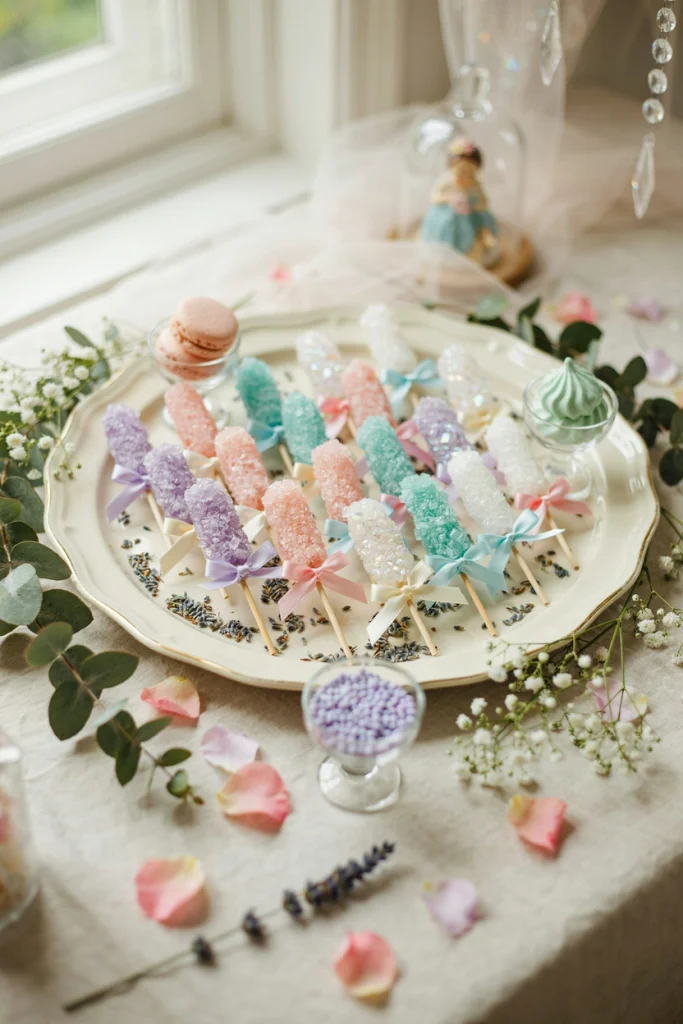
Buy rock candy sticks (or make your own a week ahead with a simple sugar syrup), tie a scrap of tulle or ribbon just below the crystal, and lay them across a tray lined with dried lavender. Zero cooking day-of, and the crystalline shape does the “magic” work for you.
4. Frosted Grape Wands
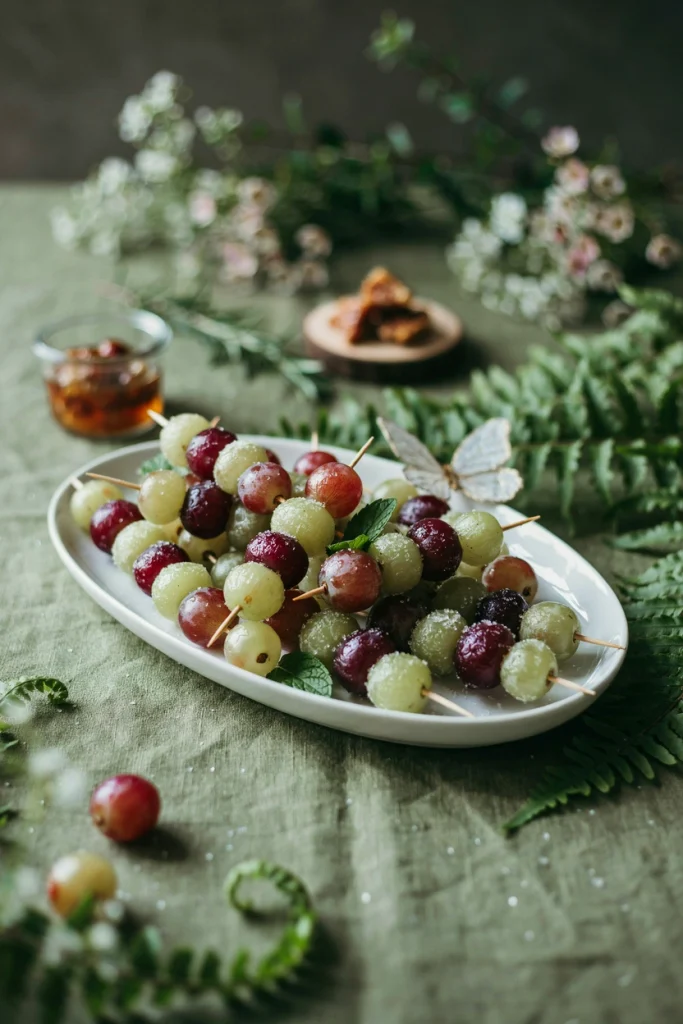
Thread grapes onto short bamboo skewers, brush lightly with corn syrup or egg white, roll in sanding sugar, and let dry for 20 minutes. They look frosted and jewel-toned with almost no effort, and they’re one of the few “sparkly” snacks that’s actually good for you.
5. Licorice Wand Bundles
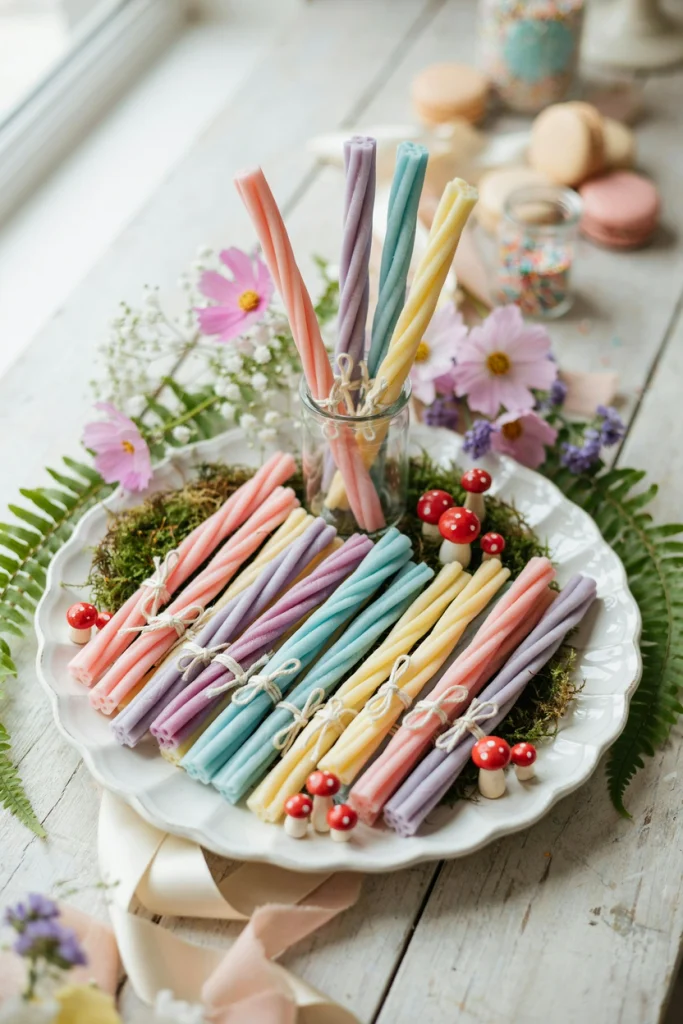
Gather three or four strands of pastel licorice laces, tie them at one end with baker’s twine, and fan the other ends out like a wand tip. Kids can “cast spells” with these before eating them, which buys you a solid ten minutes of quiet.
Sparkly Sweets
6. Stained Glass Fairy Wings (Hard Candy)
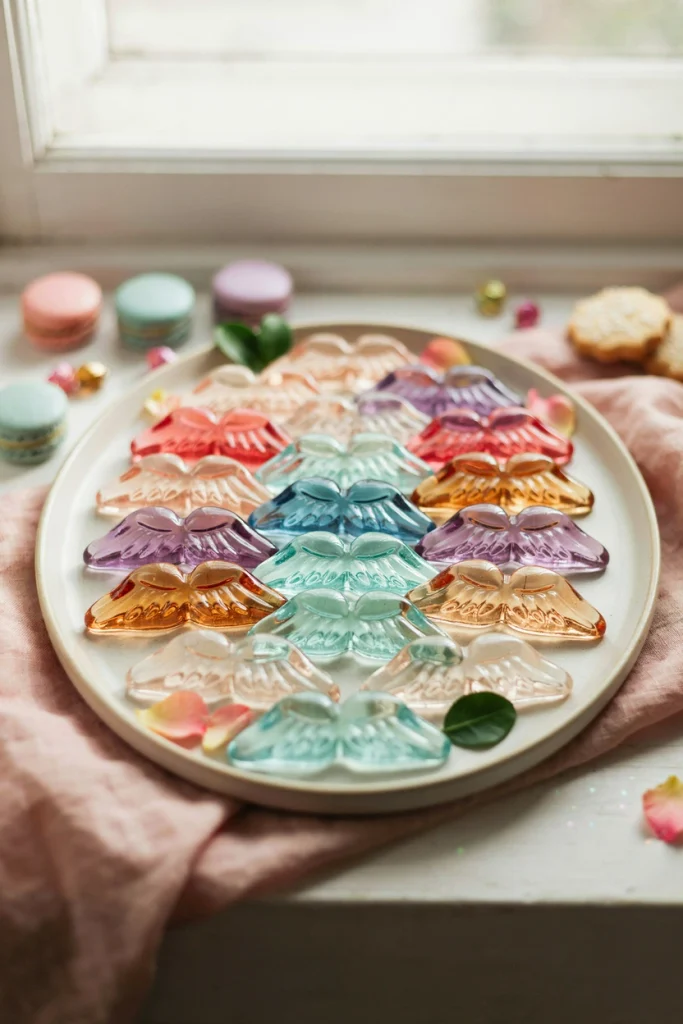
Melt crushed hard candy (Jolly Ranchers work great) in wing-shaped silicone molds at 300°F until liquid, then let cool completely before popping out. Set them on a light-colored plate near a window and they genuinely glow like stained glass, which is the closest thing to actual fairy magic you’ll pull off in a home kitchen.
7. Moonstone Meringue Kisses
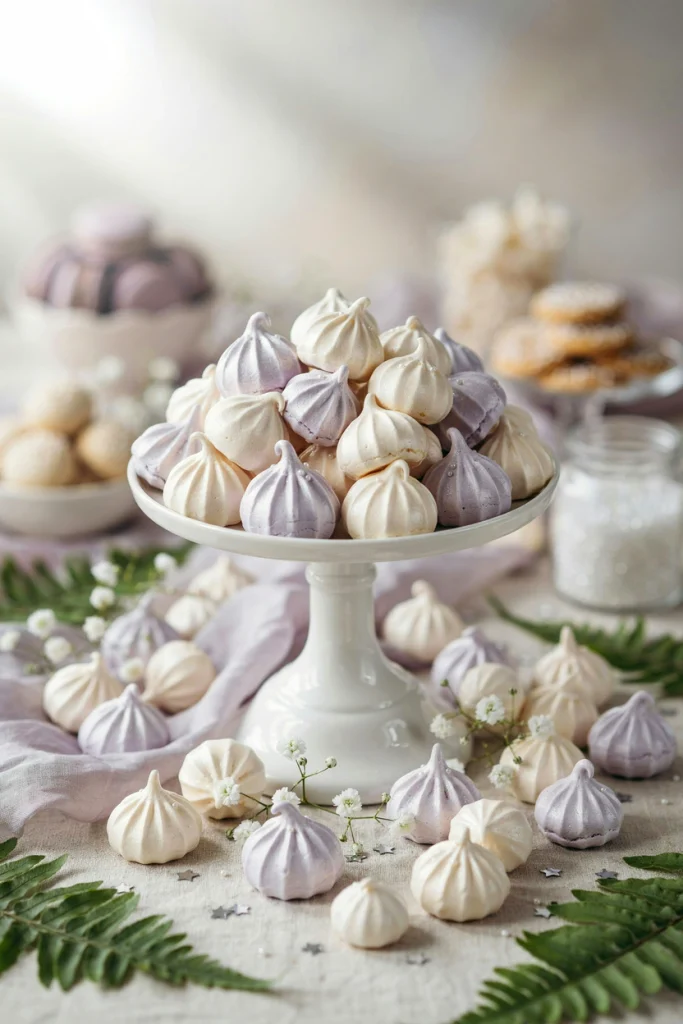
Pipe small meringue kisses with a set of piping bags and tips, tint half the batch a very pale lavender with a toothpick of gel color, and bake low and slow (200°F for about an hour) until crisp and dry. Dust with pearl luster dust once cooled for a “moonstone” look that photographs beautifully and stores for days in an airtight tin.
8. Fairy Ring Donut Holes
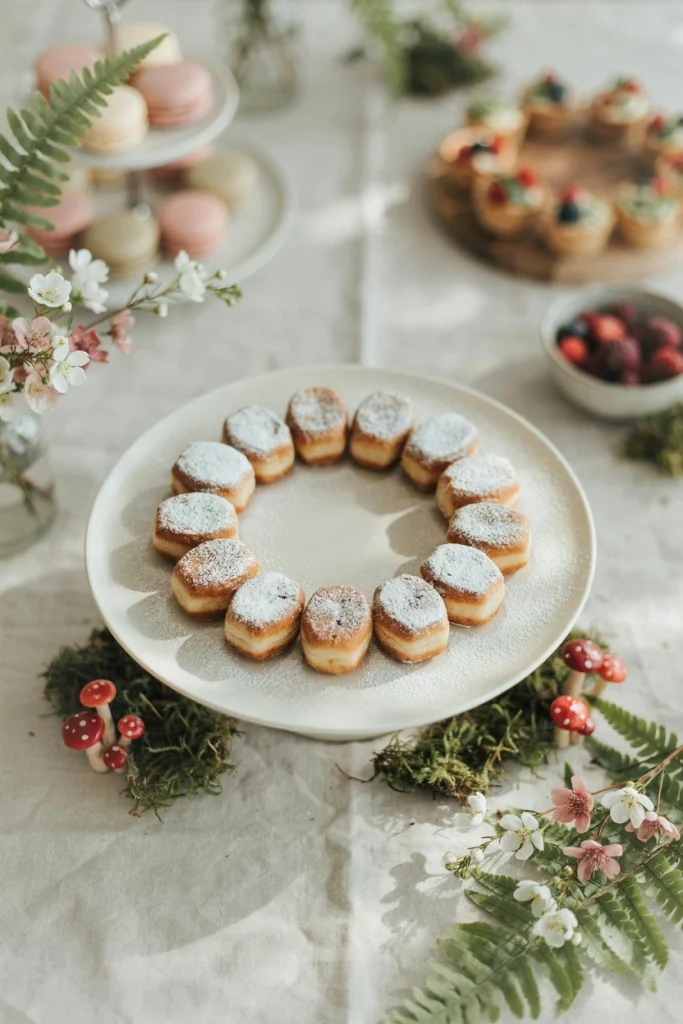
Buy mini donut holes, arrange them in a circle on a plate (a real “fairy ring” is a circle of mushrooms in folklore), and dust powdered sugar around the outer edge like ground mist. It’s a two-minute assembly that tells a tiny story on the table.
9. Glitter Geode Rock Candy Bark
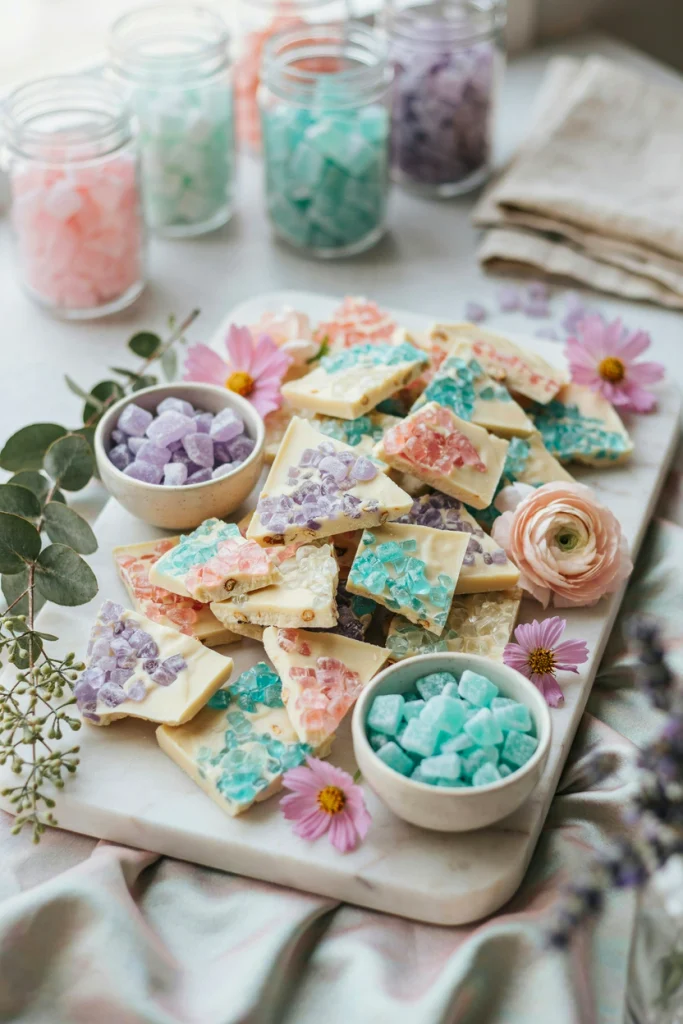
This is a step up from plain candy bark: press chunks of colored rock candy into melted white chocolate before it sets, dust with edible glitter, so when you break it apart, each piece looks like a cracked-open geode. Store flat in an airtight storage tin the day before so nothing chips.
10. Enchanted Forest Chocolate Bark
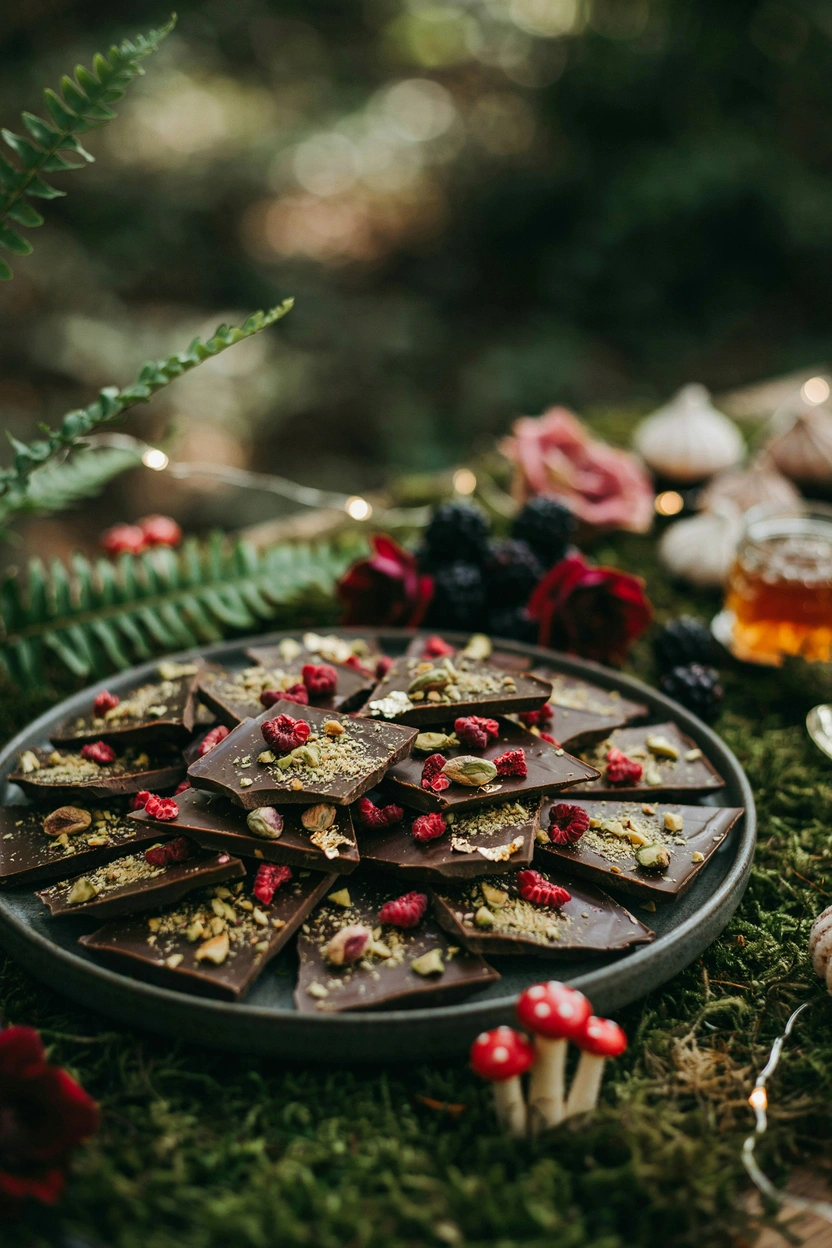
Swap the usual white chocolate for dark, and top with crushed pistachios, freeze-dried raspberry pieces, and a few flecks of edible gold leaf for a moodier, more sophisticated “forest” bark that works well if you’ve got grown-ups grazing too.
11. Sugar-Spun Cloud Cupcake Toppers
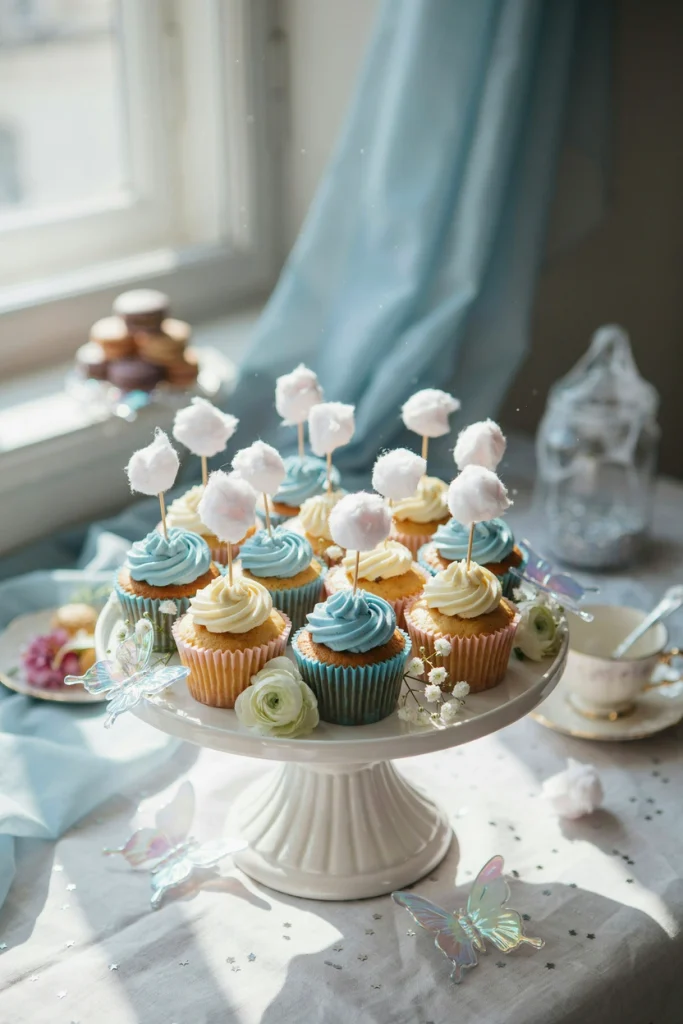
Buy pre-made cotton candy, pull off small wisps, and set them on toothpicks stuck into cupcakes baked in pastel liners right before serving (it melts fast, so this is a last-15-minutes job, not a make-ahead one). It looks like each cupcake has its own little cloud floating above it.
12. Dewdrop Jelly Bites
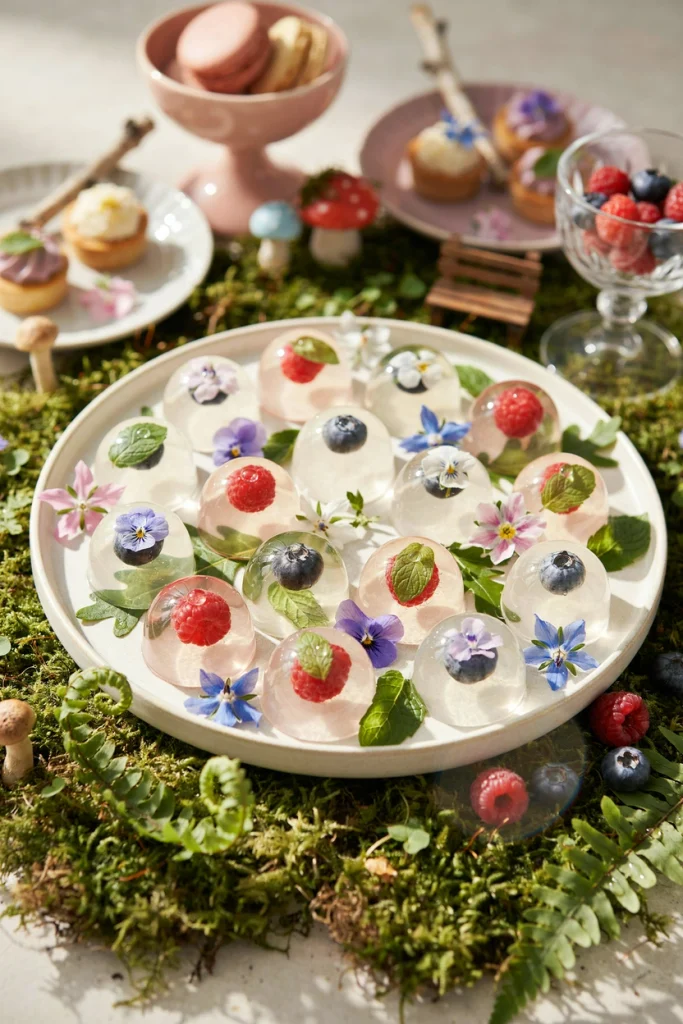
Make a clear gelatin or agar mixture, pour a thin layer into small dome silicone molds, drop in a tiny edible flower or berry, then top with more gelatin and chill until set. They look like dewdrops caught mid-fall and can be made two days ahead.
13. Firefly Jar Jellybeans
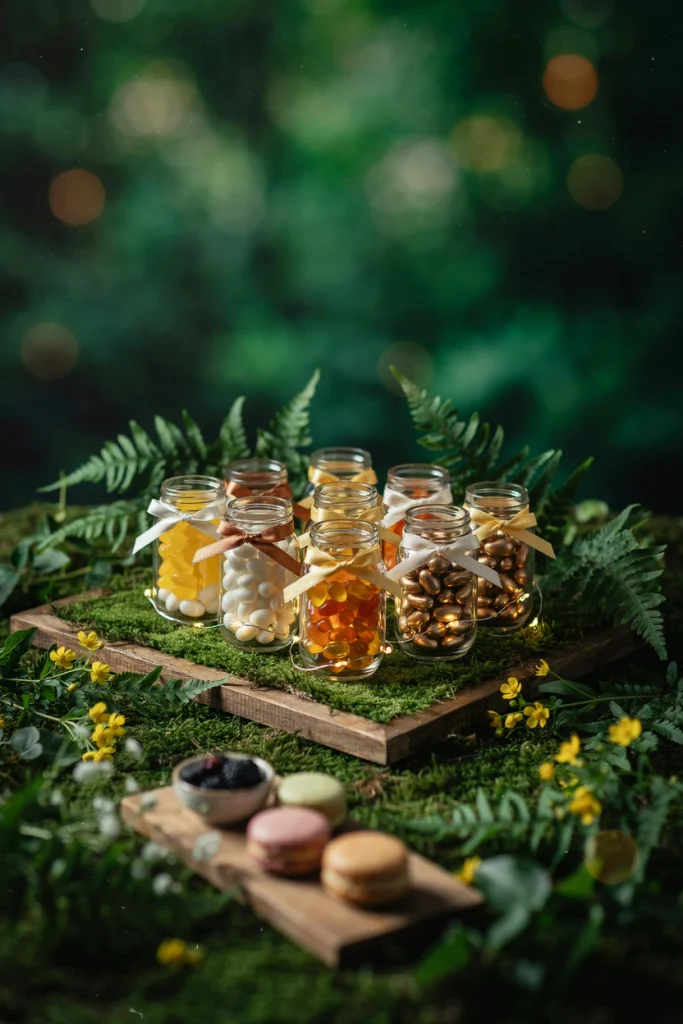
Fill small mason jars with yellow, gold, and white jellybeans, then set each jar on top of a flickering battery tea light so it glows like fireflies caught in a jar. Kids can take these home as favors, which quietly checks a second item off your to-do list.
14. Pixie Puff Cake Pops
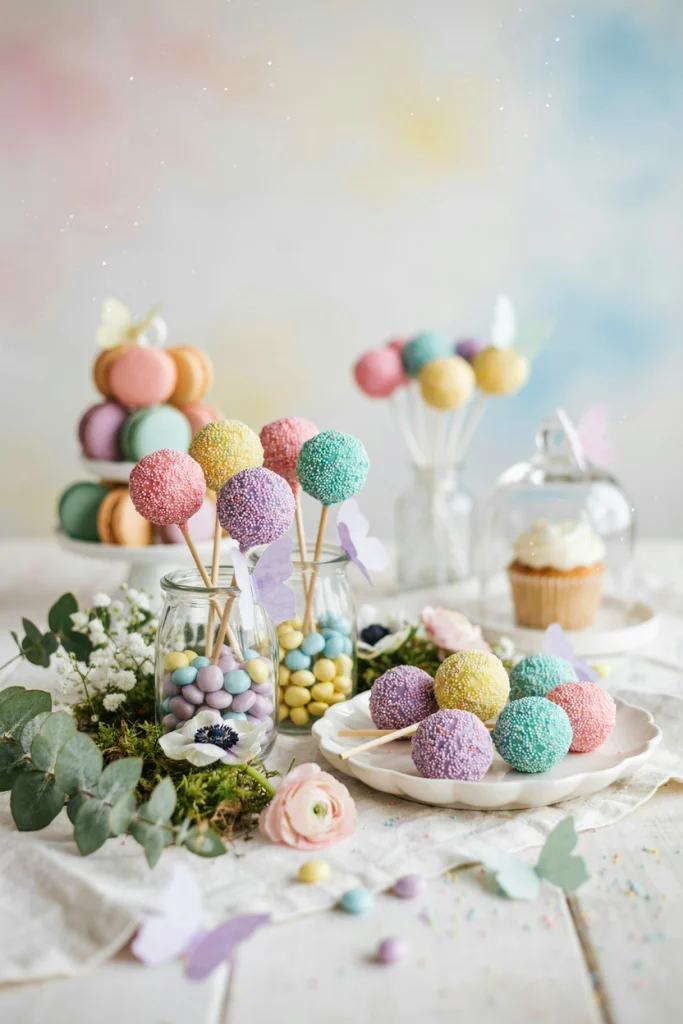
Instead of the usual dipped cake pop, roll uncoated cake balls on cake pop sticks straight in a bowl of mixed pastel nonpareils so the color is the whole coating, no melting chocolate required. It’s faster than traditional cake pops and just as photogenic.
Savory Bites
15. Gnome Hat Cheese Bites
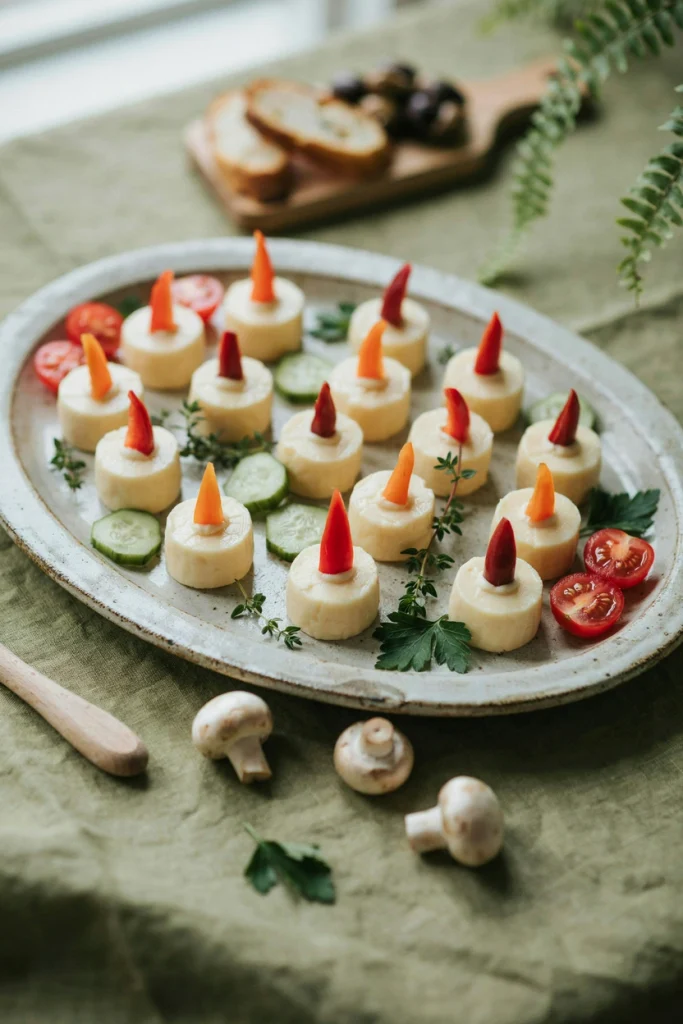
Peel the wax off mini Babybel cheeses, cut a small triangle of red or orange bell pepper, and perch it on top like a pointed hat. It’s a thirty-second assembly per piece and gives you a savory option that still fits the whimsical theme.
16. Toadstool Cheese & Cracker Stacks
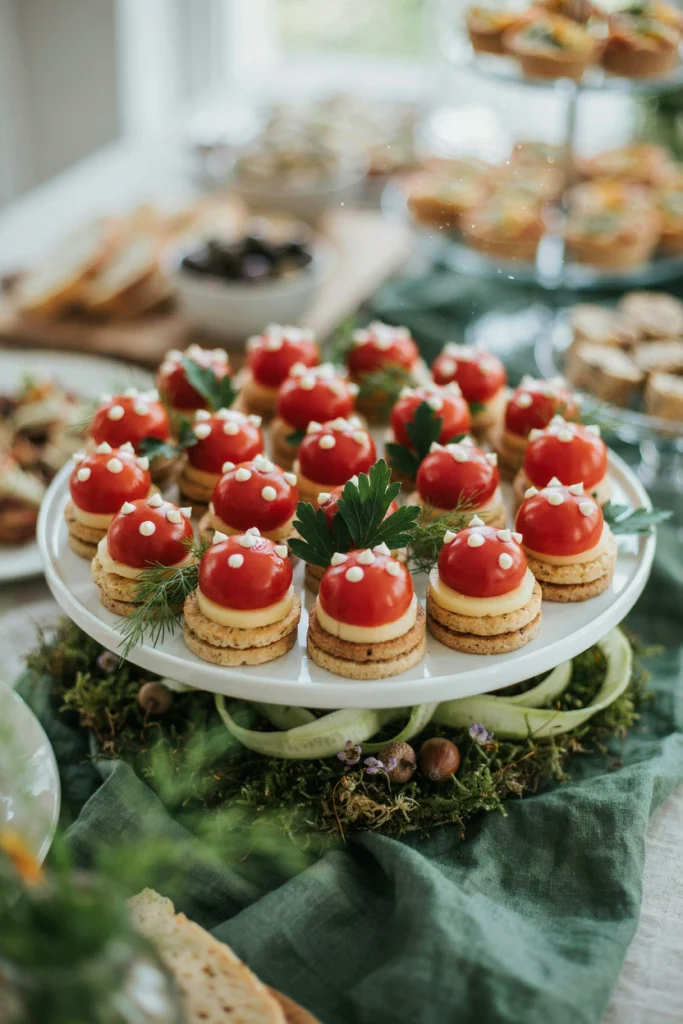
Top a round cracker with a small slice of mild cheese, then a halved cherry tomato dressed with tiny dots of cream cheese piped on with a toothpick, and you’ve built the same mushroom look as the marshmallow pops, just in savory form.
17. Fairy Garden Hummus Cups
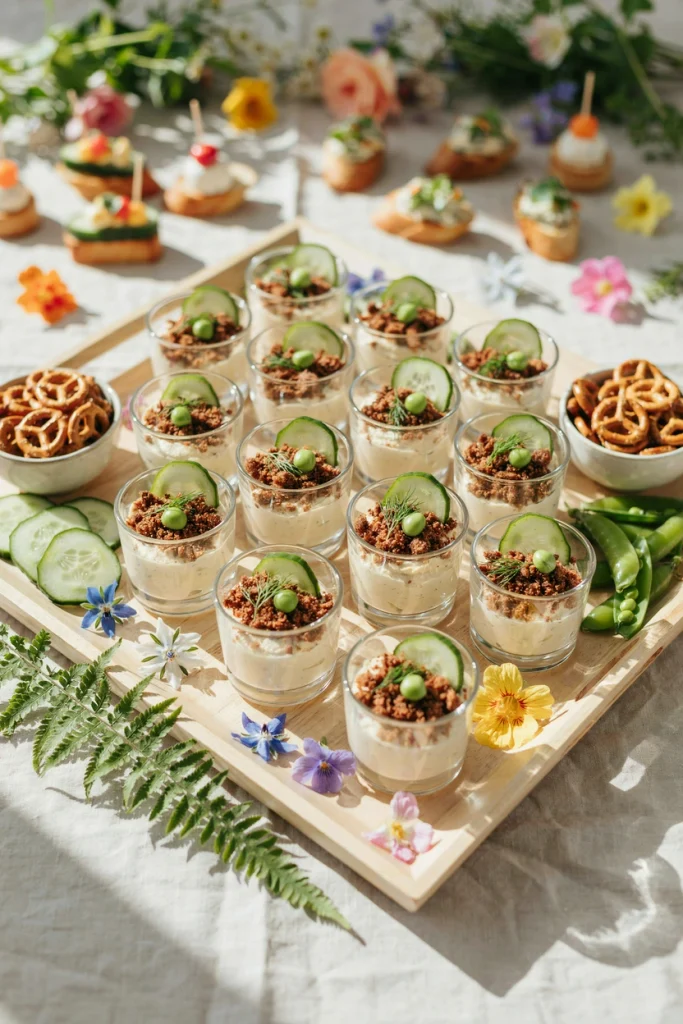
Layer hummus and a thin layer of crushed pretzels (for “dirt”) in small clear cups, then top with a cucumber round cut into a leaf shape and a single pea for texture. It’s a savory option that’s genuinely healthy and still on-theme.
18. Spiderweb Flatbread Crisps
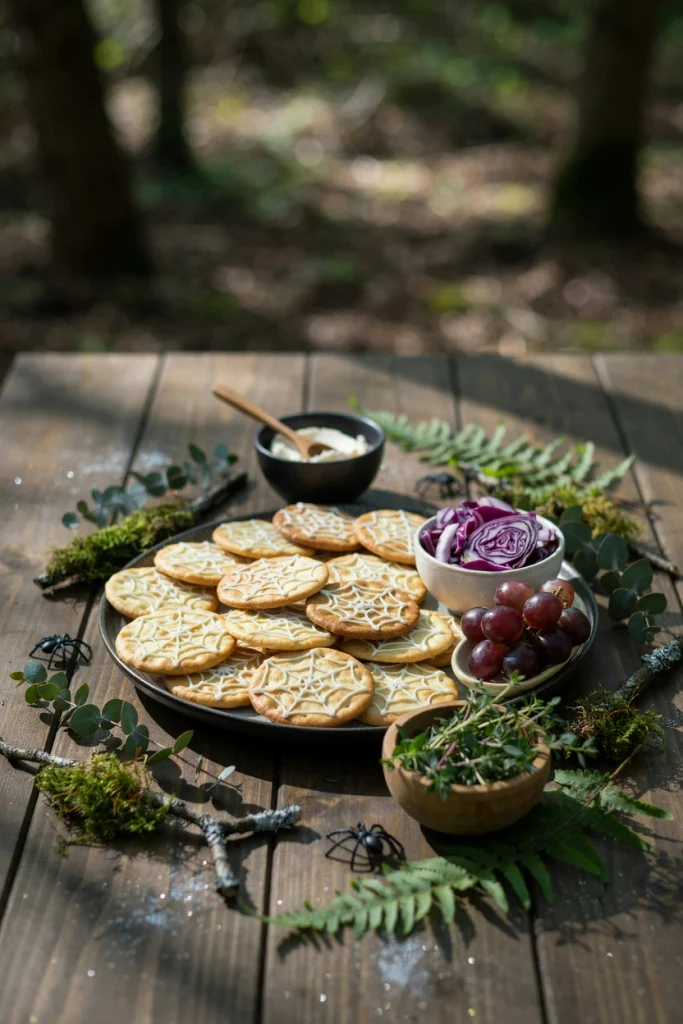
Pipe thin lines of softened cream cheese across mini flatbread crackers in a web pattern (a few straight lines crossed with connecting arcs), a nod to the more mischievous side of fairy folklore rather than the sugary-sweet side.
19. Acorn Cheese Balls
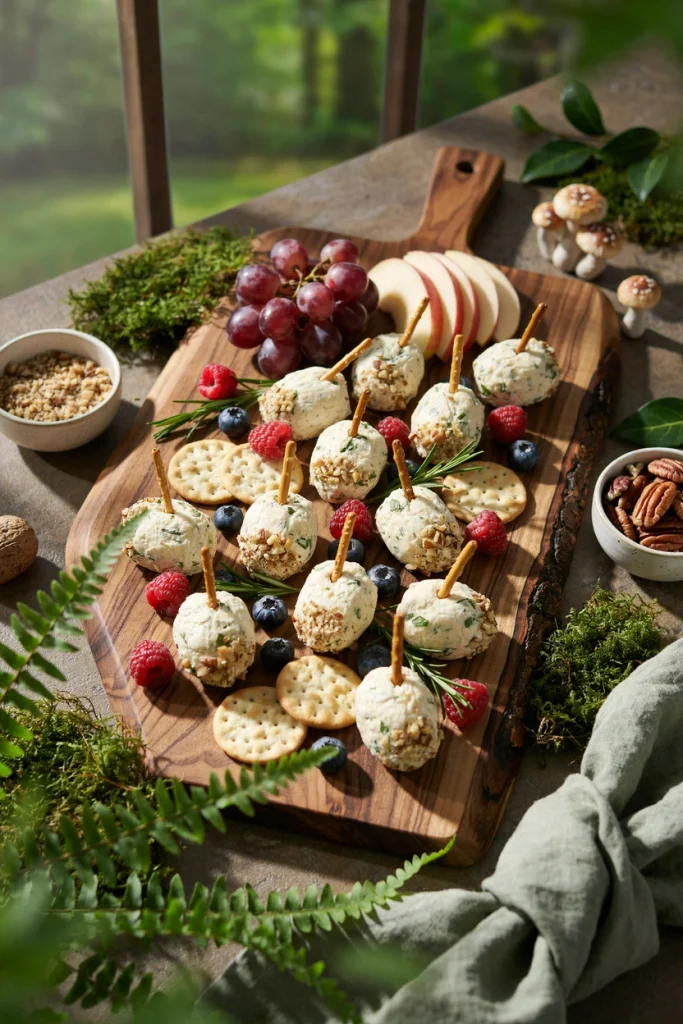
Roll small cream cheese and herb balls, dip the bottom third in crushed pecans or graham cracker crumbs to look like an acorn cap, and stick a tiny piece of pretzel in the top as a stem. Great alongside a fruit platter for anyone who wants savory over sweet.
20. Woodland Veggie Wands
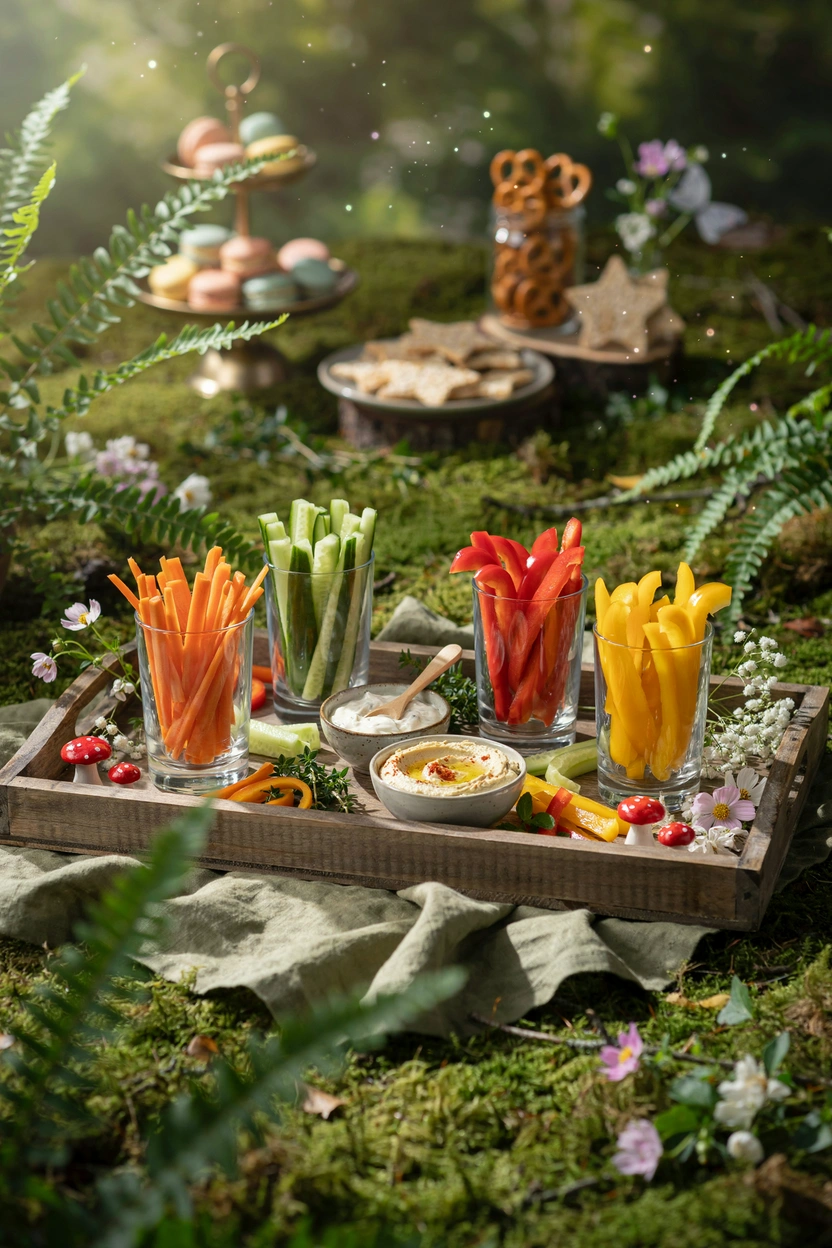
Cut carrots, cucumber, and bell pepper into thin, tall strips and stand them upright in a short glass like a bouquet, with a small bowl of ranch or hummus tucked beside it. Same “wand” presentation as the sweet version, just savory and fast.
21. Fairy Popcorn Trail Mix
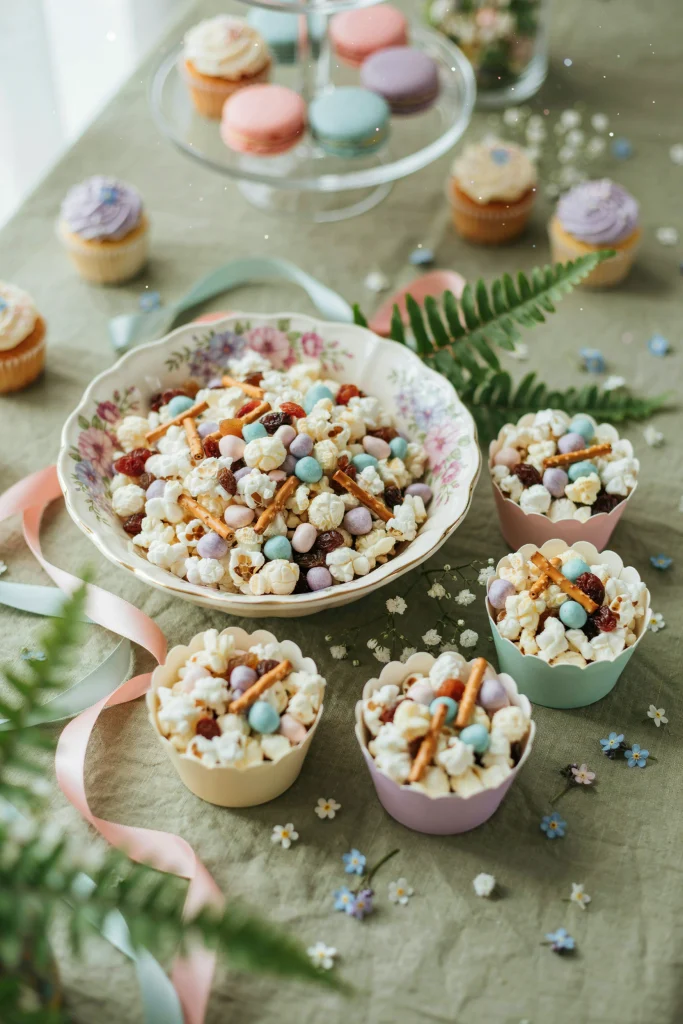
Mix plain popcorn with yogurt-covered raisins, tiny pretzel sticks, and a few pastel candy melts for a savory-sweet trail mix that’s less messy than pure “pixie dust” popcorn and holds up better if it sits out for a couple hours.
Fruity Magic
22. Butterfly Apple Bites
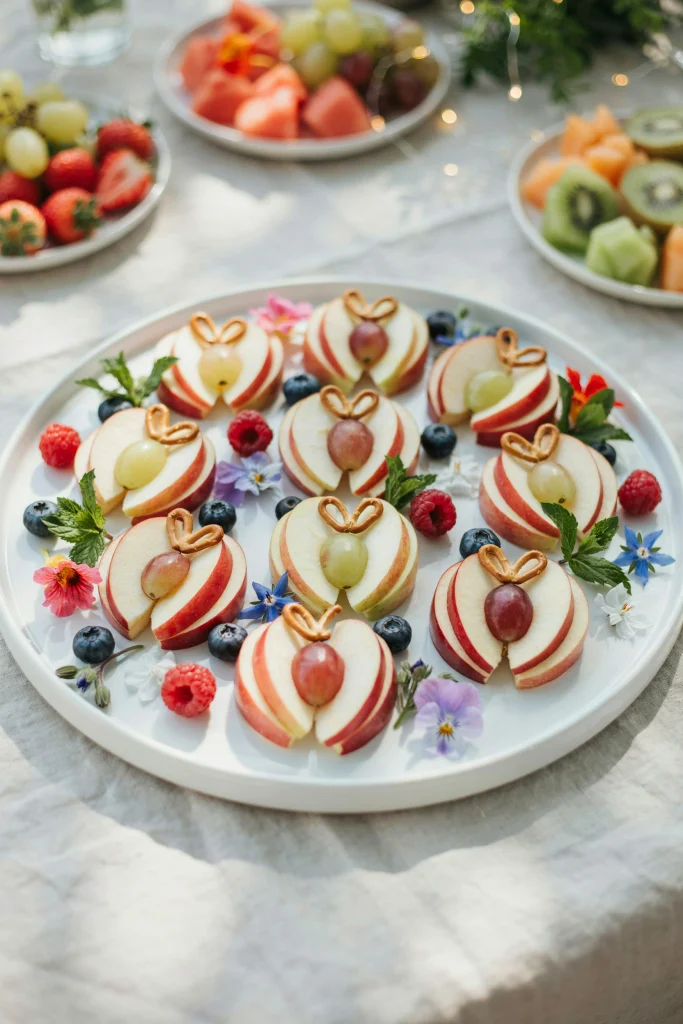
Arrange four thin apple slices in a butterfly wing pattern, add a grape down the center as the body, and two tiny pretzel sticks for antennae. Brush the apple lightly with lemon juice ahead of time so it doesn’t brown before guests arrive.
23. Enchanted Forest Fruit Cups
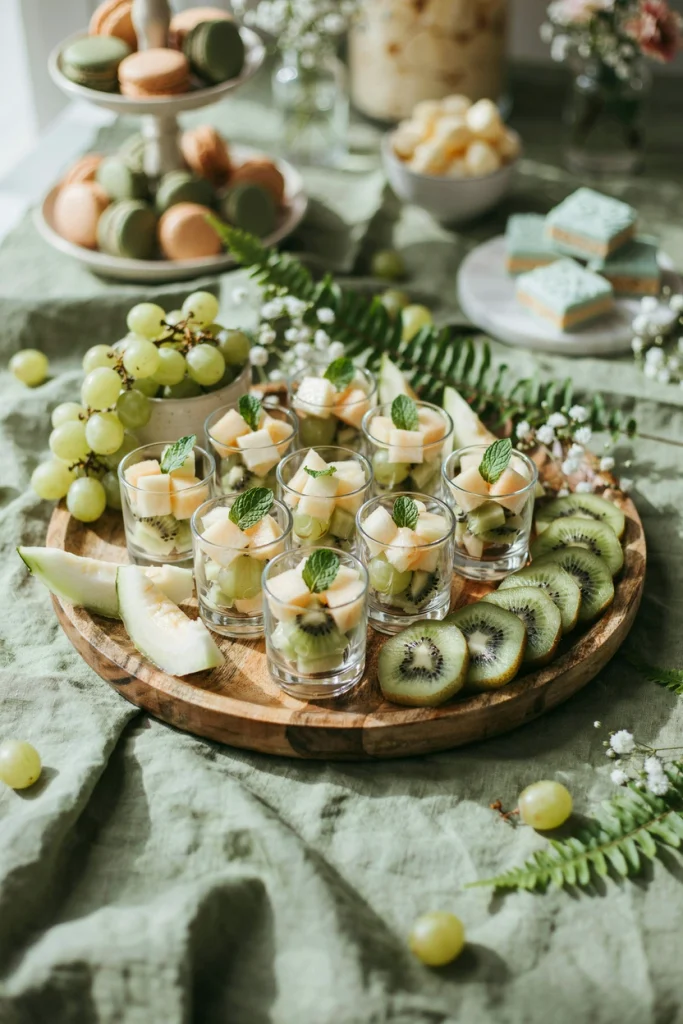
Layer only green and white fruit (kiwi, green grapes, honeydew, a mint leaf on top) in small clear cups for a “forest floor” look that reads more sophisticated and less rainbow-birthday-party than a standard fruit cup.
24. Fairy Toadstool Strawberries
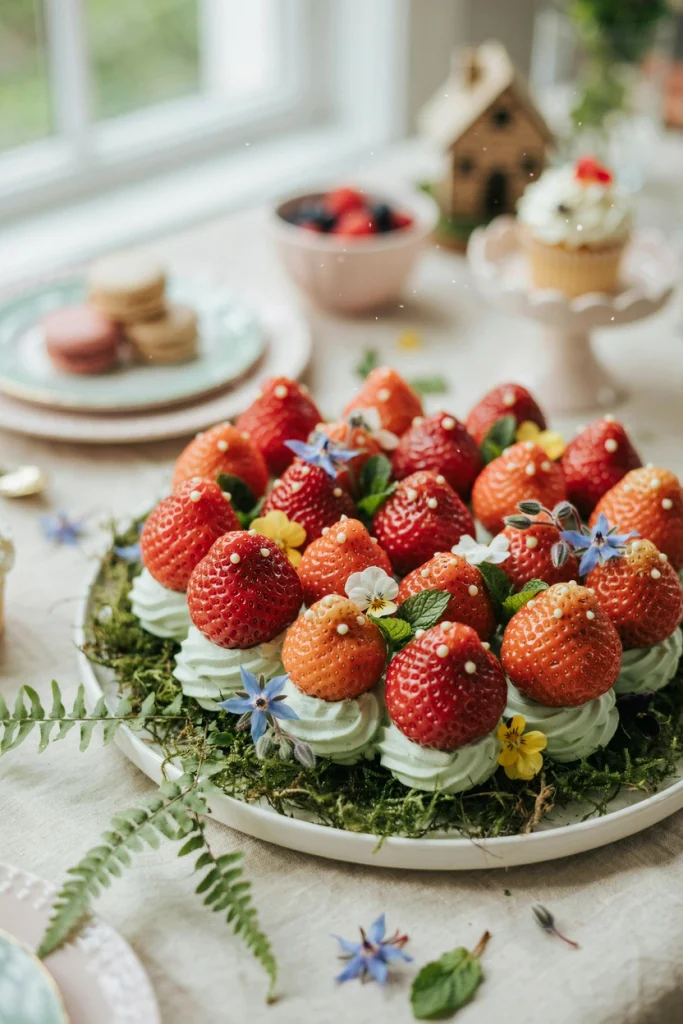
Slice the tops off strawberries, dot the red skin with tiny white chocolate dots (a toothpick dipped in melted white chocolate works well), and set them on a bed of whipped cream piped with a piping bag and grass tip. This is genuinely one of the fastest “wow” items on this whole list.
25. Rainbow Mist Fruit Skewers
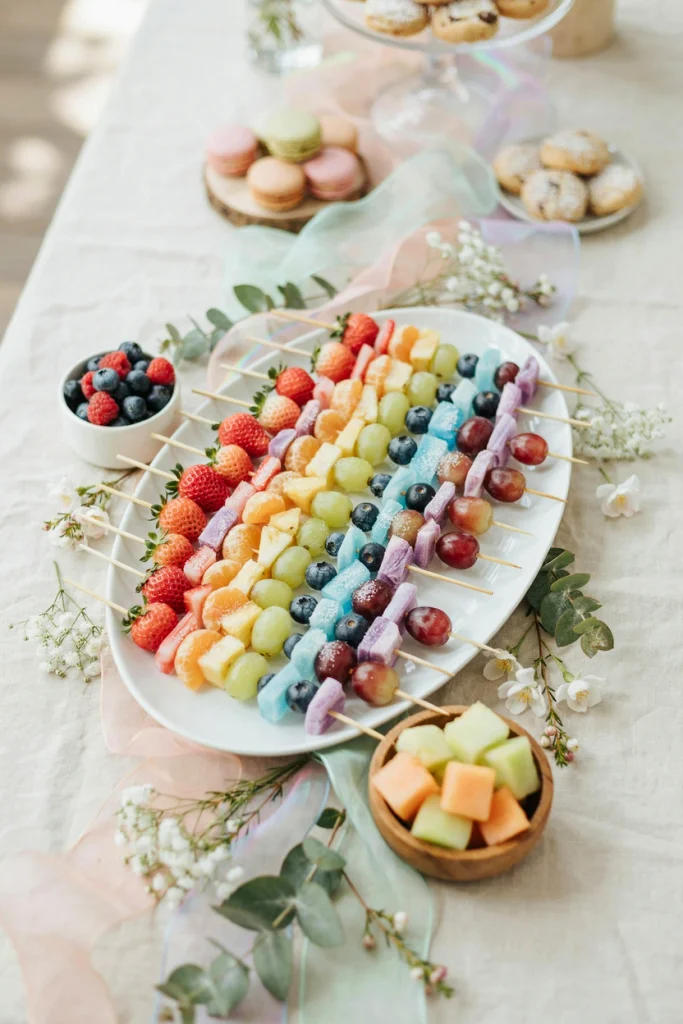
Instead of glitter, dust each fruit skewer with a different pastel sugar color (tinted with a drop of food coloring) as you thread it, so the color builds gradually down the stick like a soft rainbow gradient rather than one flat sparkle finish.
26. Blueberry Fairy Dust Yogurt Bark
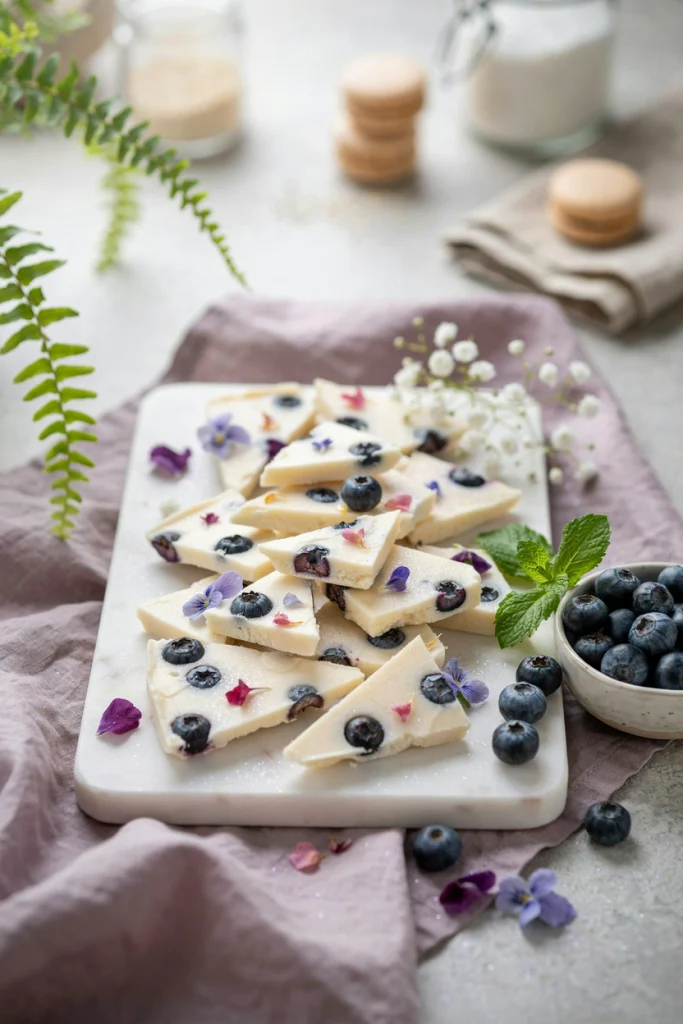
Spread vanilla yogurt on a parchment-lined tray, scatter blueberries and a few edible flower petals on top, freeze for two hours, then break into shards. It’s cold, refreshing, and holds together far better outdoors than most people expect.
27. Citrus Sunburst Platter
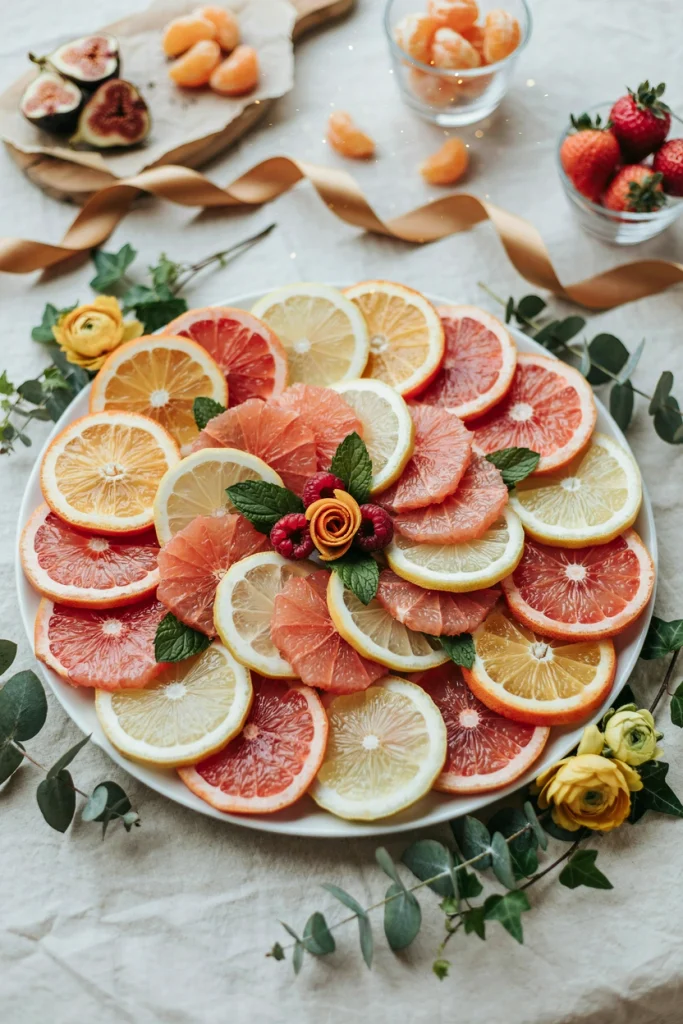
Slice oranges and grapefruit into thin rounds and fan them out from the center of a round white platter, then scatter a few mint leaves between the rays. It uses fruit most roundups skip and looks striking without any real skill.
28. Melon Ball Fairy Lanterns
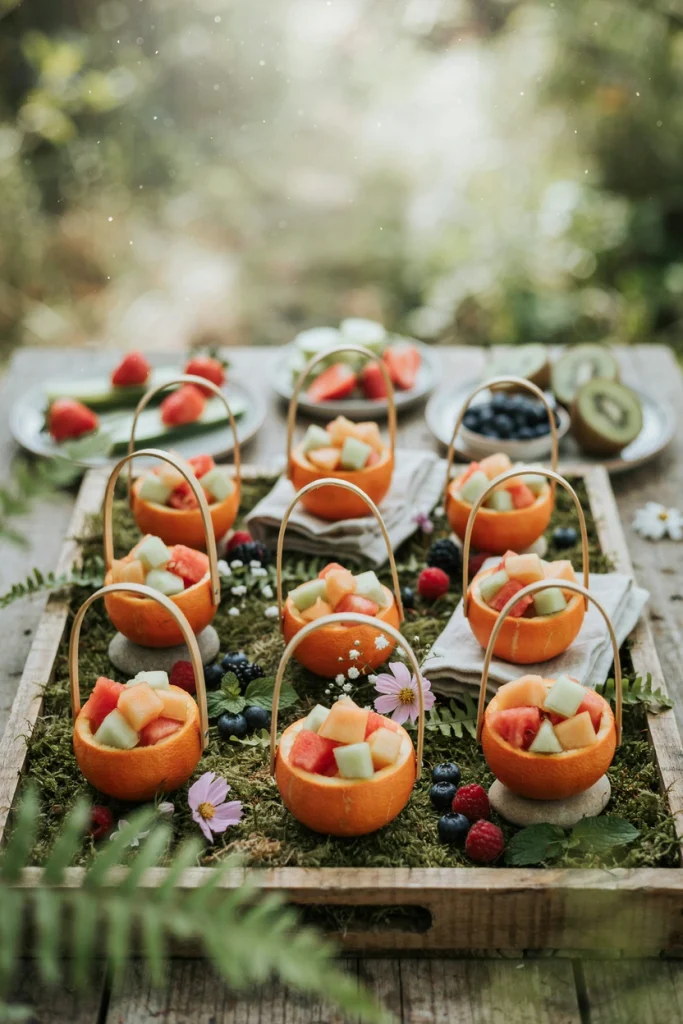
Hollow out small orange halves, poke a skewer of melon balls through the top like a handle, and set them around the table as edible “lanterns.” It’s a bit more assembly than most entries here, but it’s the kind of centerpiece detail people remember.
29. Frozen Grape “Fairy Stones”
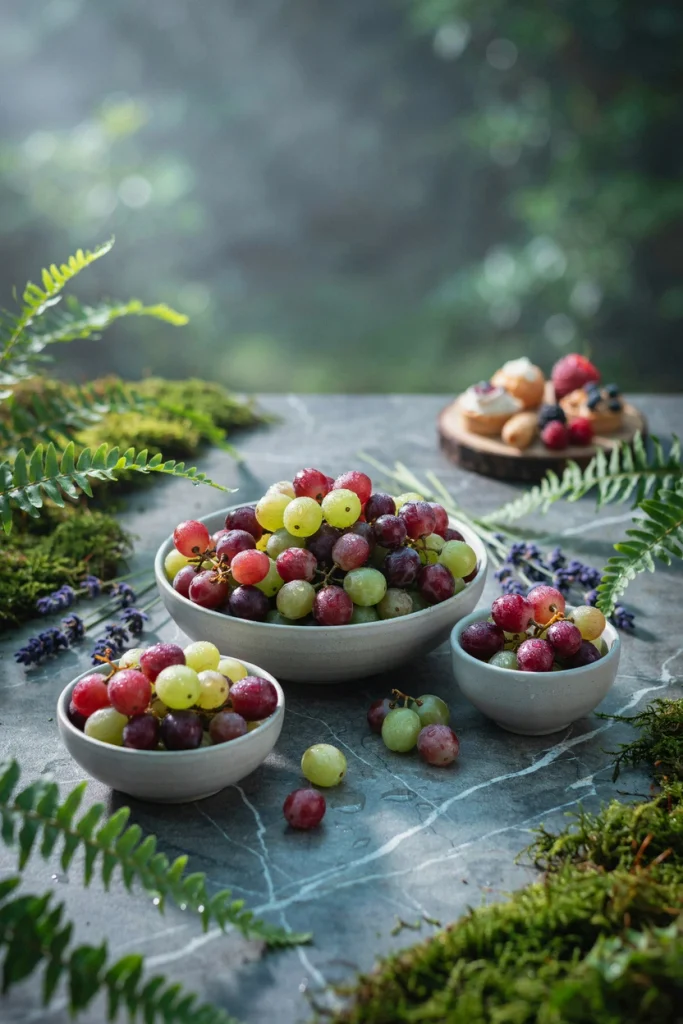
Freeze grapes overnight in a single layer, then pile them into a bowl right before serving. They look like little polished stones, stay cold in the heat, and need zero decorating, which makes them the easiest entry on this whole list.
Breads, Sandwiches & Handhelds
30. Toadstool Sandwich Rolls
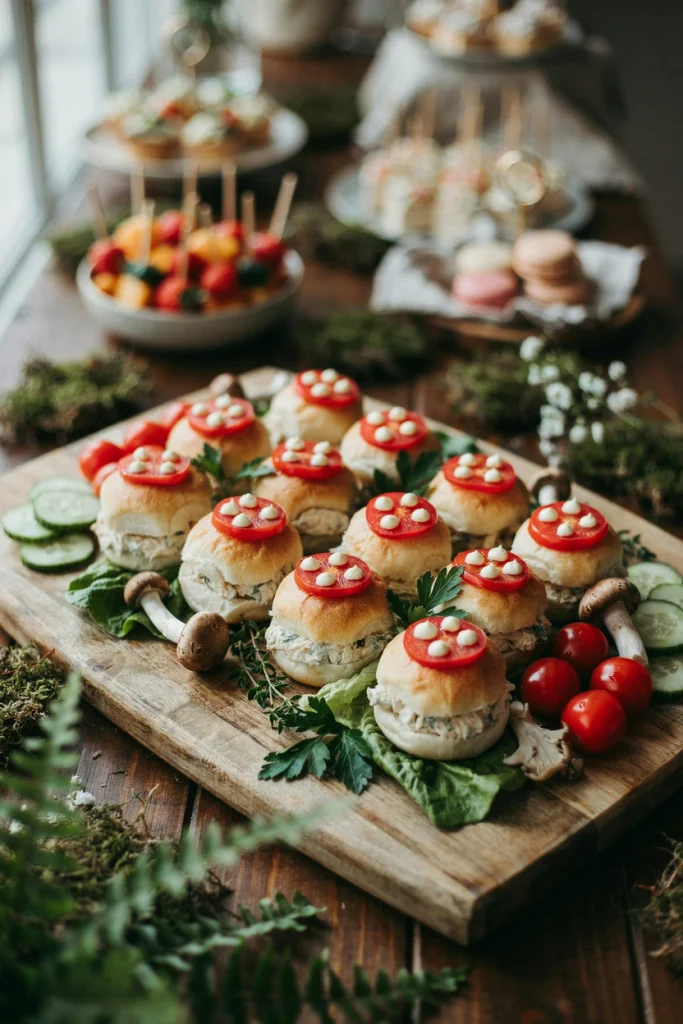
Use small round dinner rolls instead of cut sandwiches, slice horizontally, fill with chicken or egg salad, then top the outside with a thin round of red pepper and dots of cream cheese to mimic a mushroom cap.
31. Fairy Crown Puff Pastry Bites
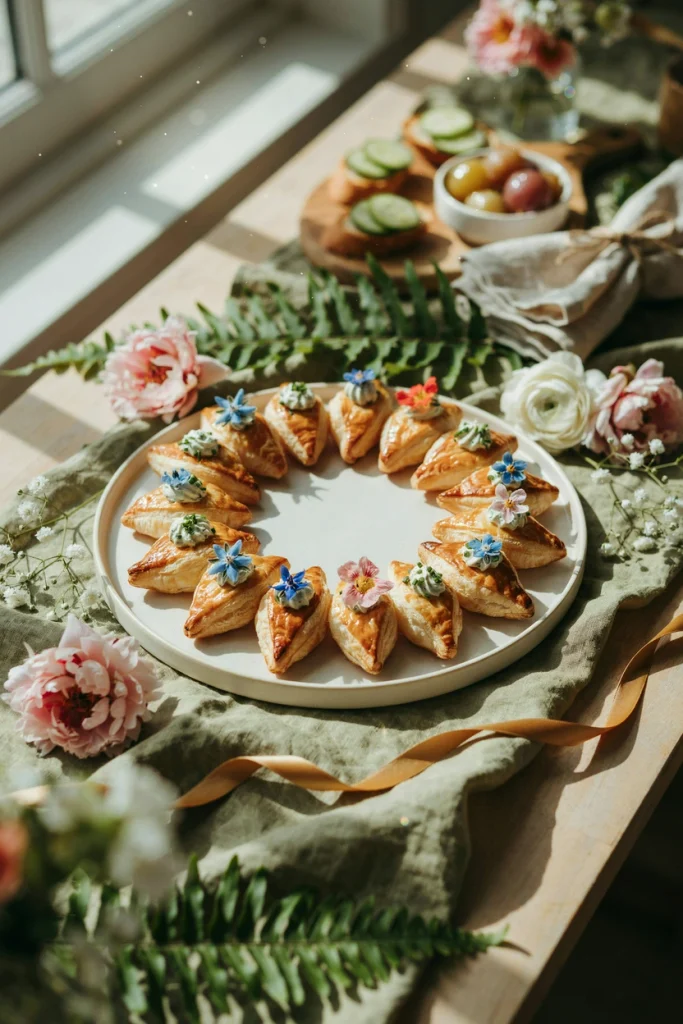
Cut puff pastry into small triangles, brush with egg wash, bake on a nonstick sheet pan until golden and puffed, and arrange them in a circle with points facing out like a crown. Fill or top with a savory spread once cooled so the pastry stays crisp.
32. Honeycomb Grilled Cheese Bites
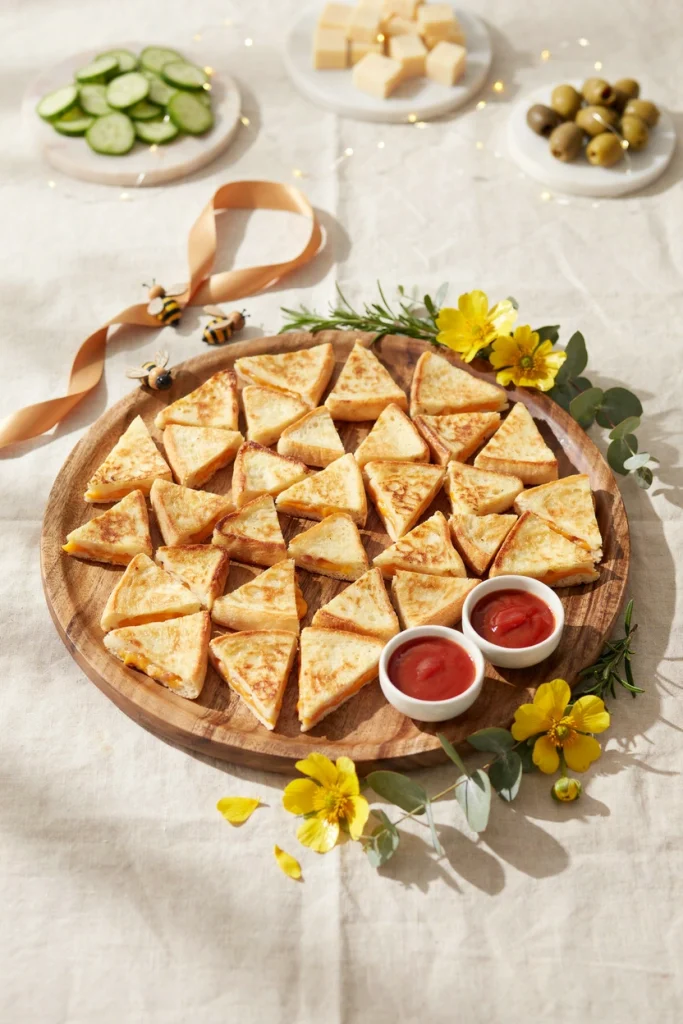
Make mini grilled cheese sandwiches in a cast-iron skillet, cut into small triangles, and arrange tightly on a platter so the triangles form a honeycomb pattern with no gaps. It’s just presentation doing the heavy lifting on an ordinary sandwich.
33. Leaf-Shaped Herb Biscuits
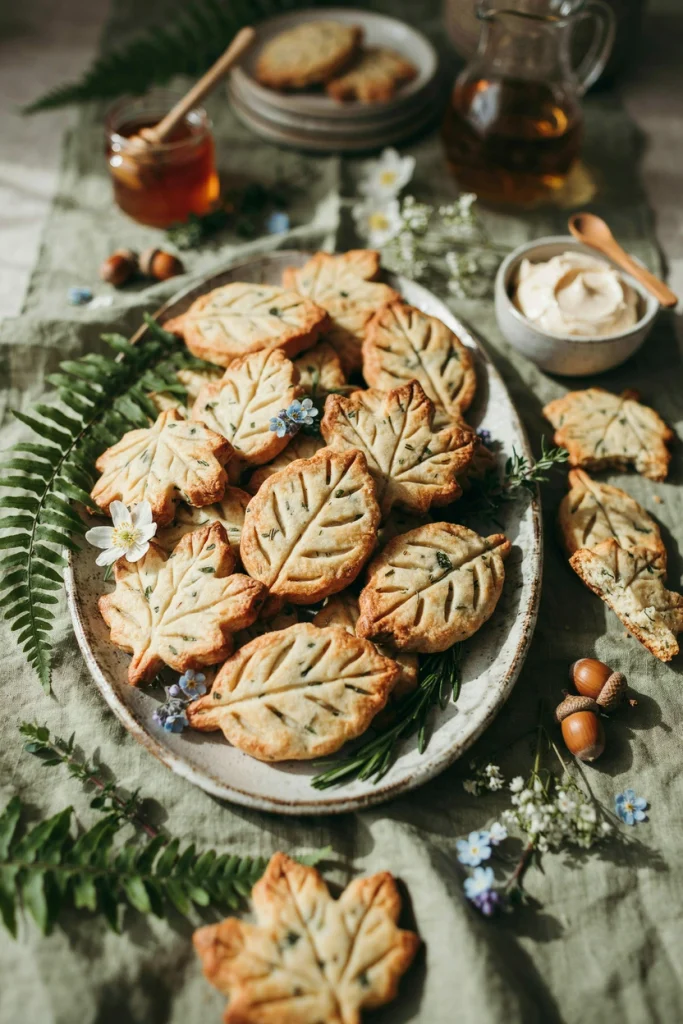
Cut biscuit or scone dough with a leaf-shaped cutter, using a rolling pin to get an even thickness, score vein lines with the back of a knife before baking, and serve with honey butter. These lean more “woodland” than “sparkly,” which is a nice contrast if the rest of your table is heavy on glitter.
34. Mini Naan Fairy Flatbreads
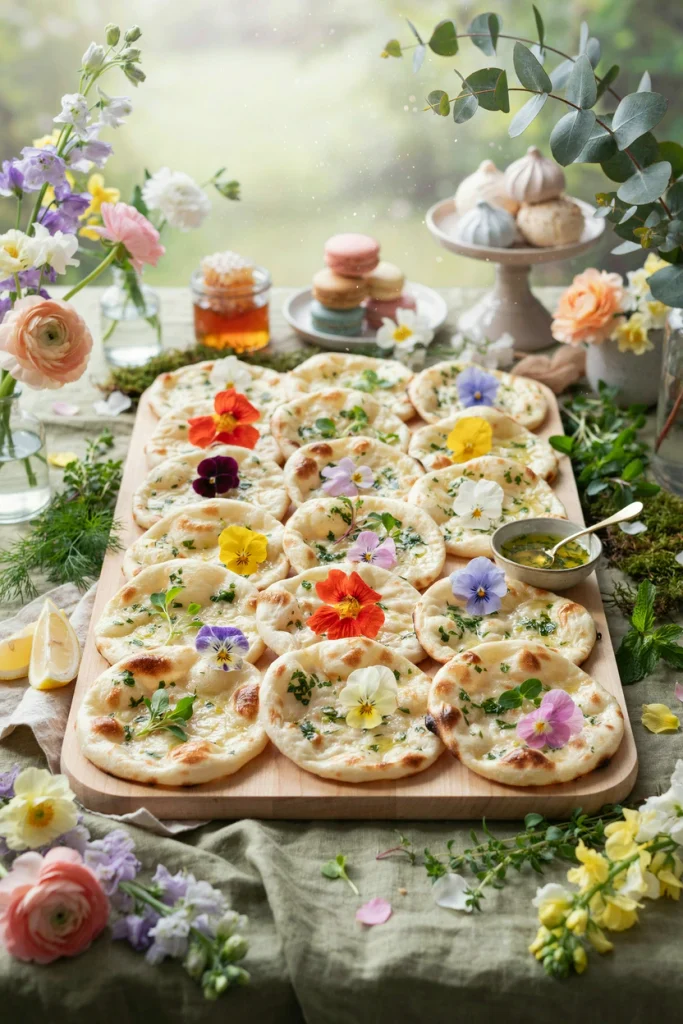
Warm mini naan or pita rounds, brush with garlic herb butter, and top with a single edible flower or a scattering of microgreens. It’s an easy way to add something warm to a table that’s otherwise all cold snacks.
35. Fairy House Crescent Rolls
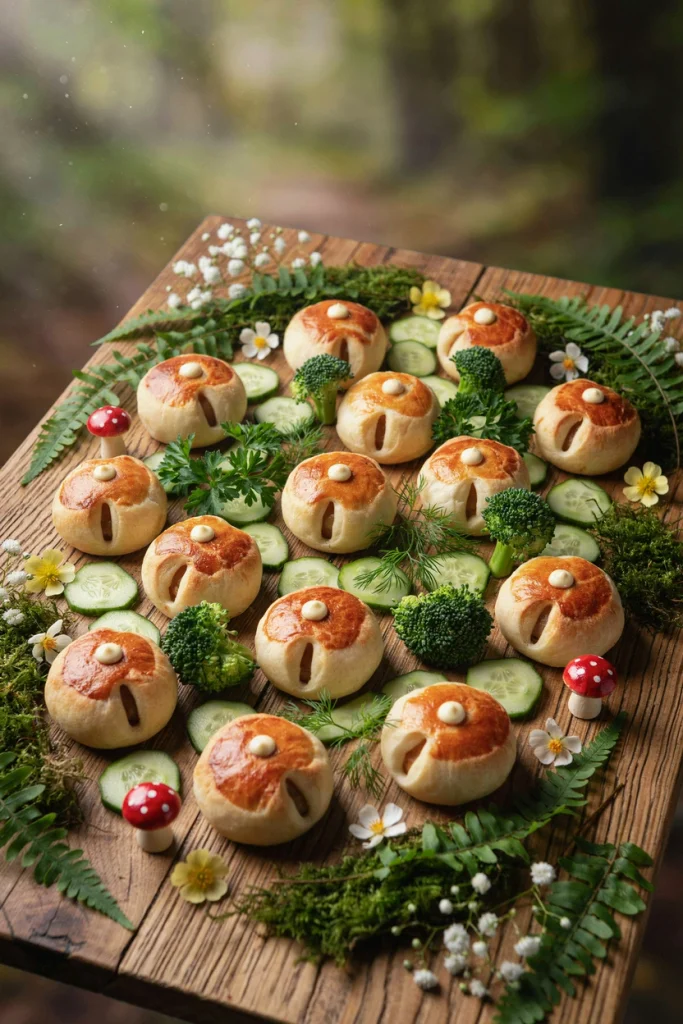
Shape crescent roll dough into small mounded rolls on a sheet pan, cut a thin slit for a “door” before baking, and once cooled, pipe a small dot of frosting or cream cheese above the door like a window. Fun for older kids to help assemble the afternoon before.
Drinks & Sips
36. Sparkling Fairy Dust Lemonade
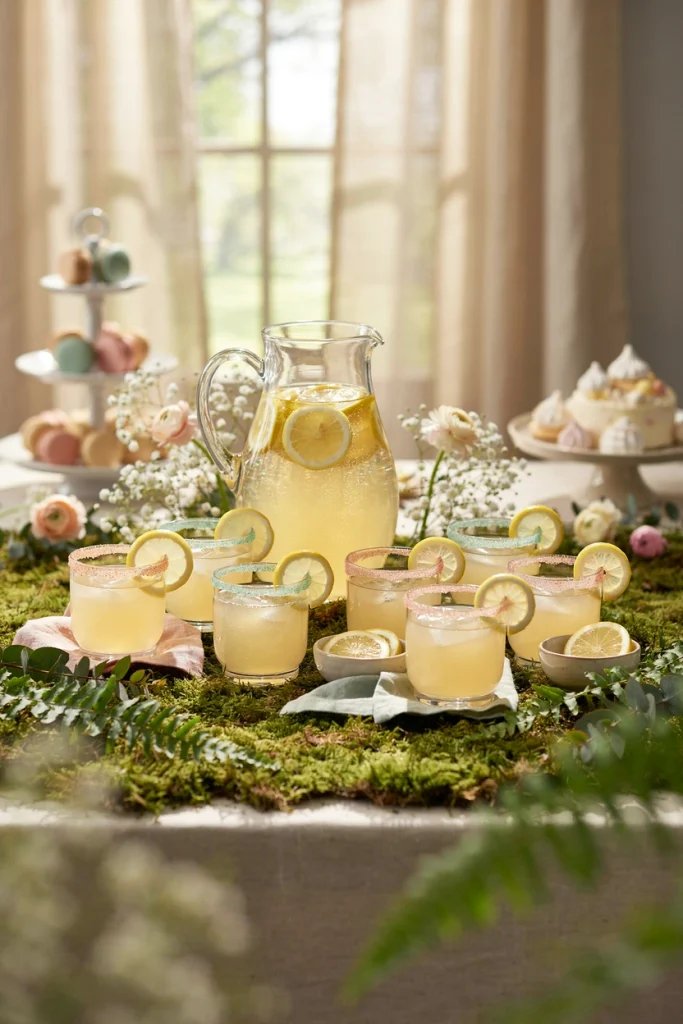
Stir a small amount of edible glitter into a glass beverage dispenser of lemonade right before serving (it settles if you do it too early, so keep it close to serving time), and rim the glasses with sanding sugar for extra sparkle at the edge.
37. Butterfly Pea Flower “Potion” Drink
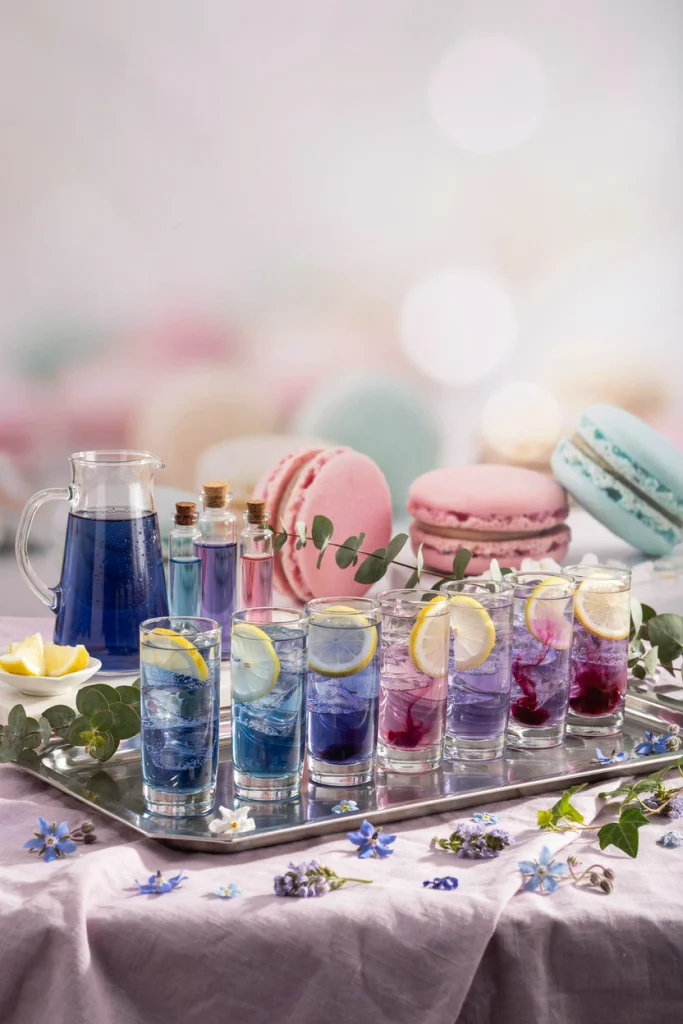
Brew butterfly pea flower tea (naturally bright blue, caffeine-free, and easy to find online), pour it over ice, and let kids squeeze in a bit of lemon juice to watch it shift from blue to purple right in front of them. This is the single most “actual magic” item on the whole list.
38. Glowing Jelly Cube Drinks
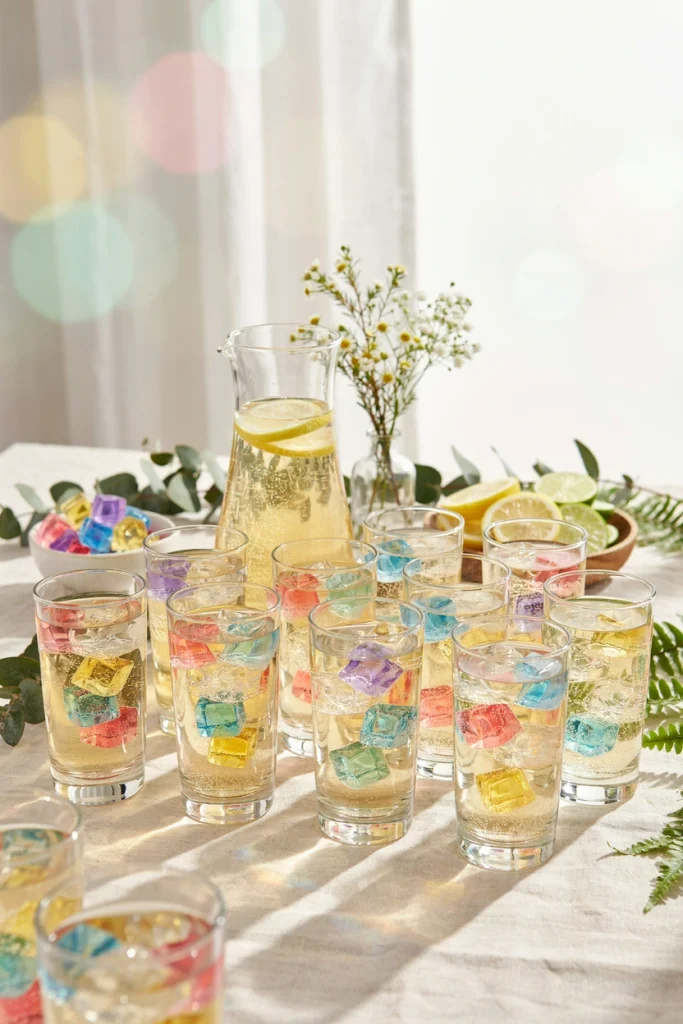
Make a batch of firm gelatin in a bright color, cut into small cubes, and drop a few into each clear plastic party cup of sparkling lemon-lime soda or juice right before serving so they float and glow through the fizz.
39. Rose Petal Ice Cubes
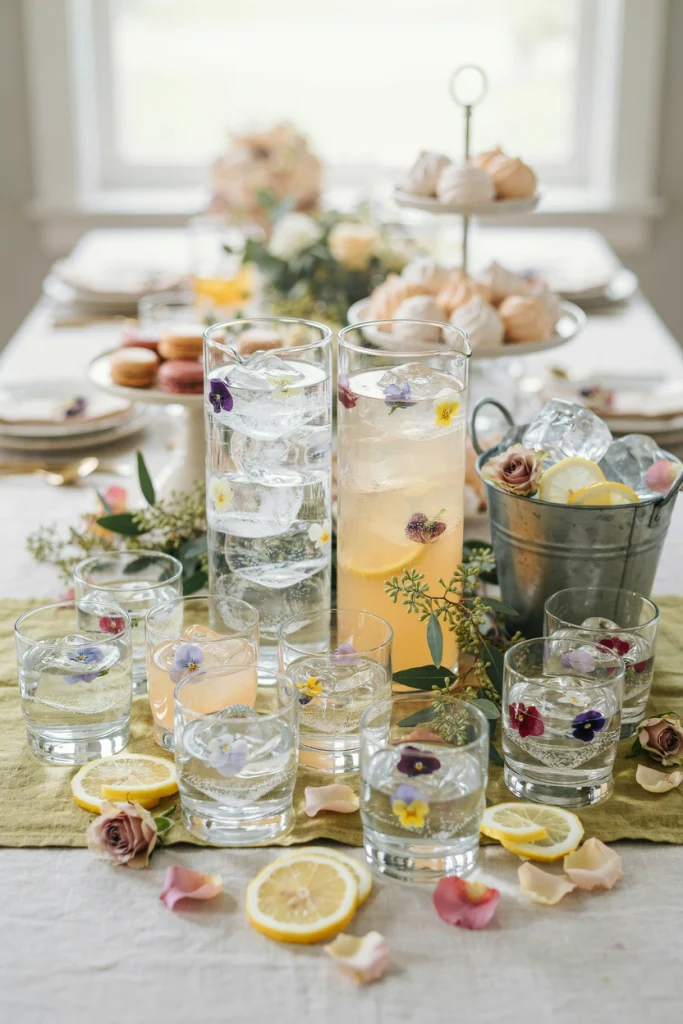
Freeze a single edible rose petal or small pansy into each cube of a large ice cube mold a day ahead, then drop them into pitchers of water or lemonade so every glass gets its own little floating flower as the ice melts.
40. Toadstool Milkshake Floats
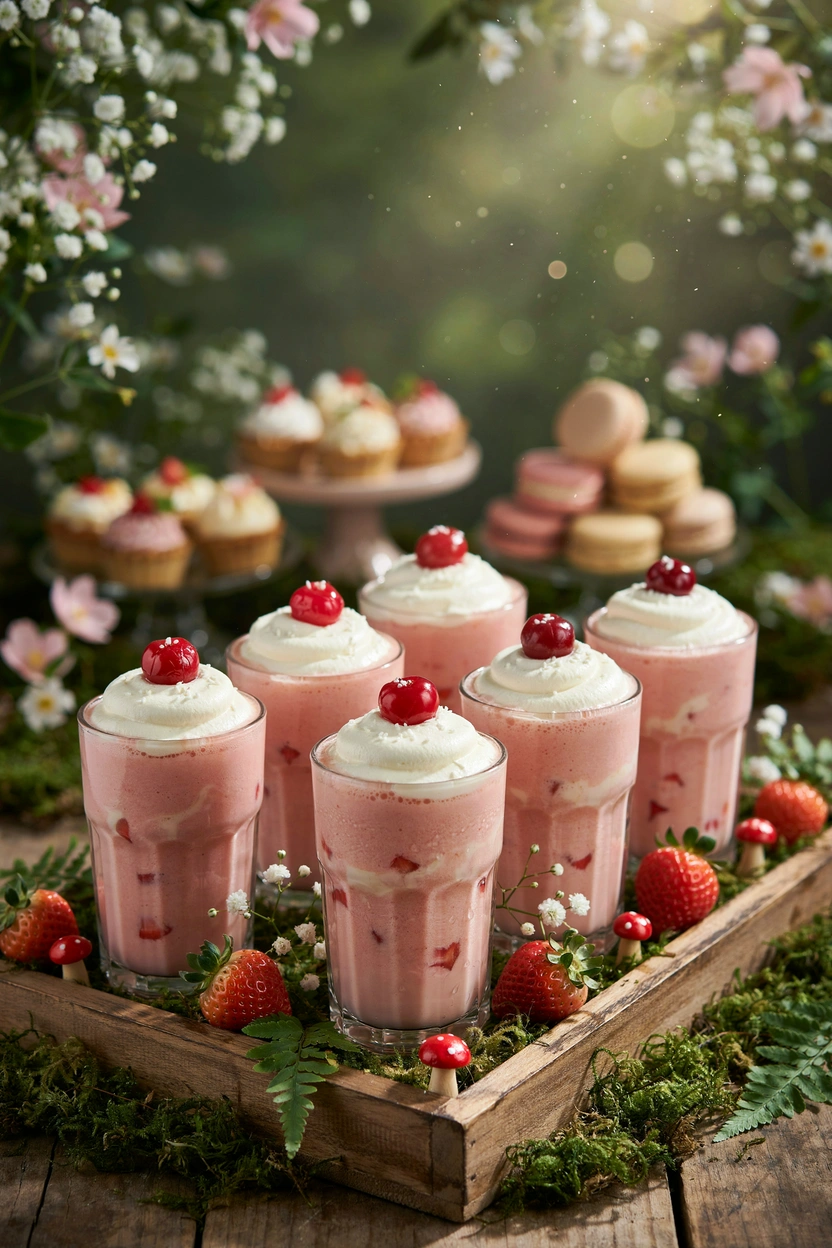
Top a plain vanilla or strawberry milkshake with a swirl of whipped cream and a single cherry perched on top, echoing the toadstool shape one more time in drink form for anyone who wants dessert and a drink in one cup.
No-Fuss Store-Bought Hacks
41. Doctored Store-Bought Cupcakes
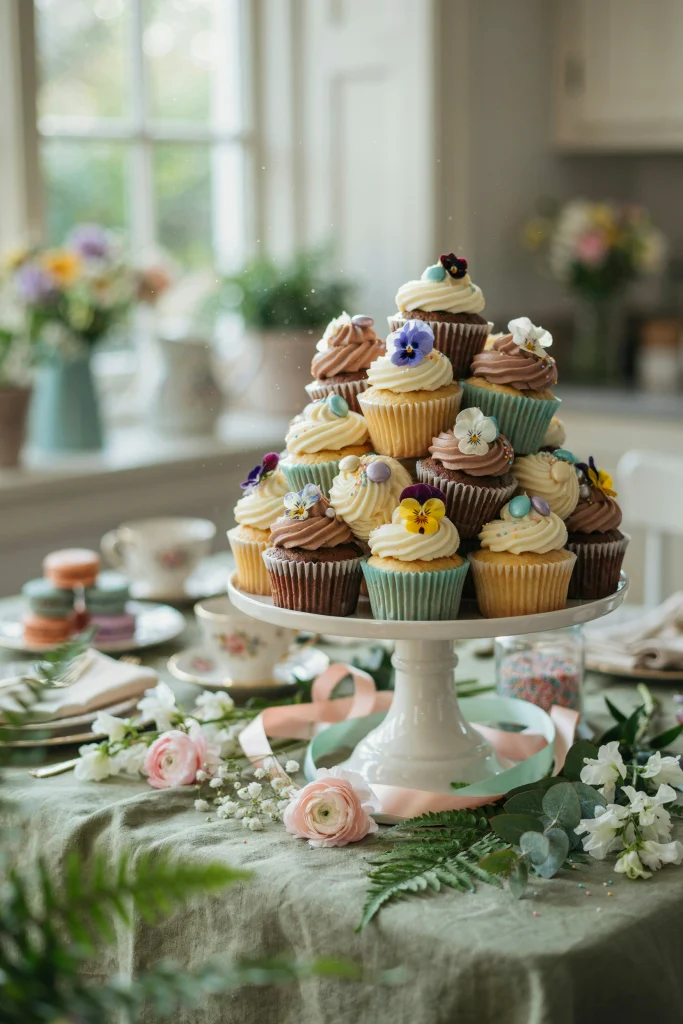
Buy plain bakery cupcakes, top each with a single edible flower or a candy “gem,” and dust lightly with edible luster dust. It takes under a minute per cupcake and nobody will guess you didn’t bake from scratch.
42. Jazzed-Up Animal Crackers
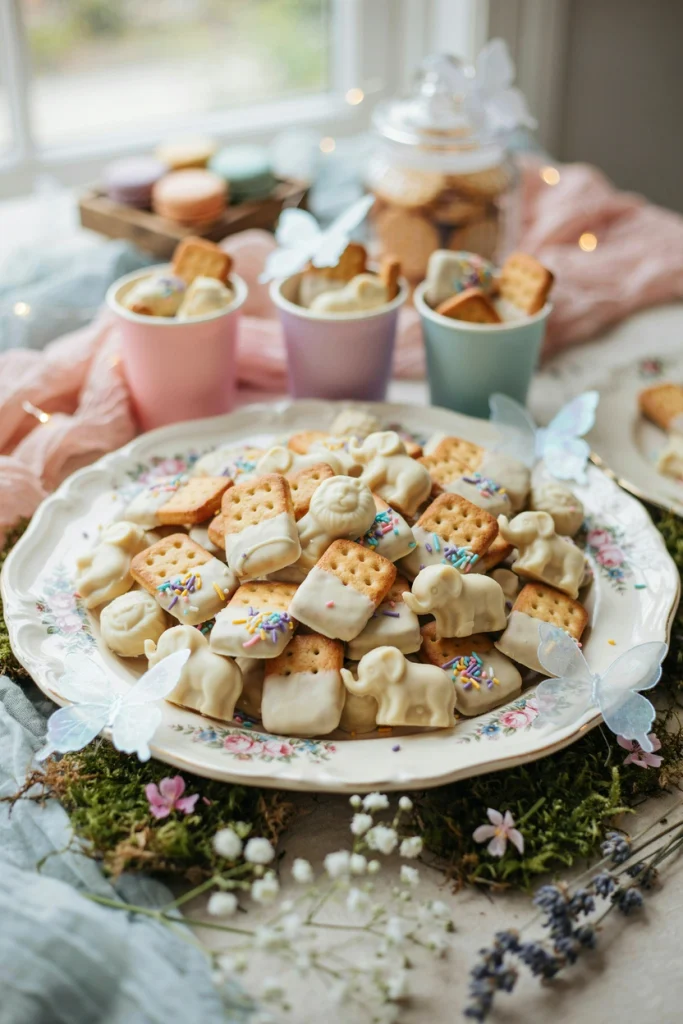
Dip half of each animal cracker in melted white chocolate, roll the wet edge in pastel sprinkles, and lay flat on parchment to set. It reframes a pantry staple as a party treat with almost zero actual cooking.
43. Upgraded Fruit Snacks Display
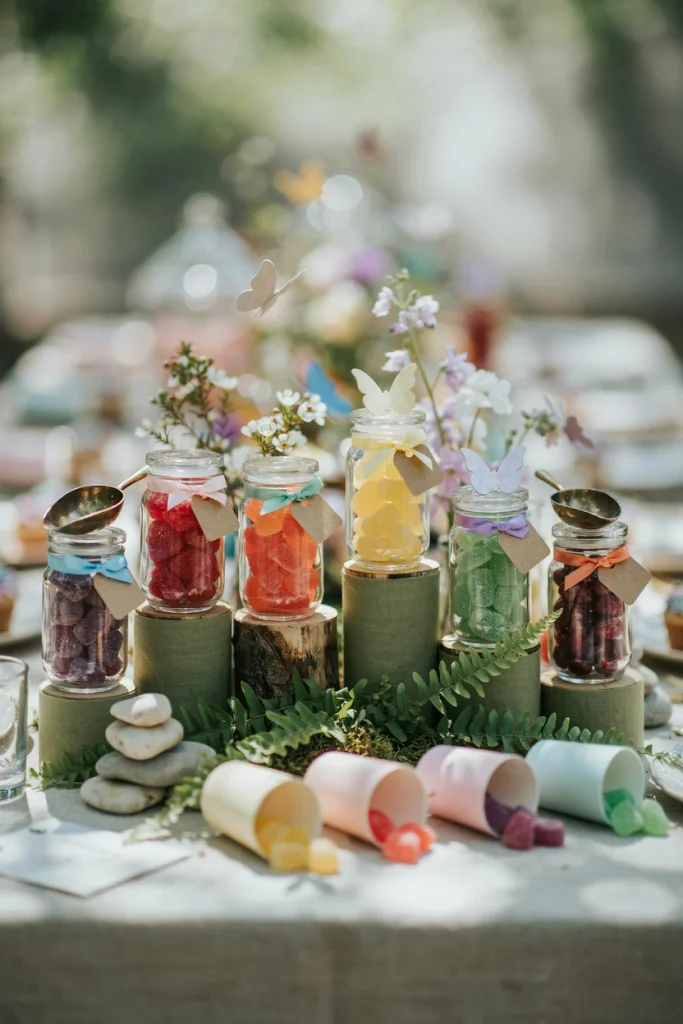
Pour a few different brands or flavors of store-bought fruit snacks into small labeled glass jars (“Pixie Gems,” “Fairy Jewels”) for a mini candy-bar moment that costs almost nothing and needs no prep at all.
44. Rice Krispie Toadstools
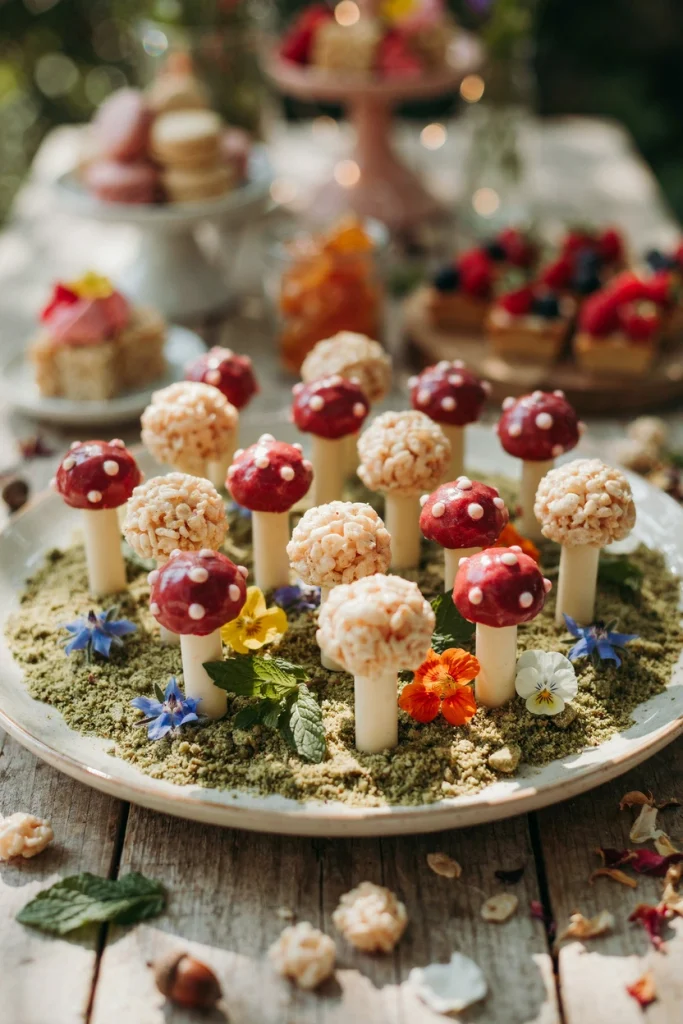
Shape store-bought or homemade Rice Krispie treat mixture into mushroom cap shapes while still warm, then stick a rolled piece of white chocolate underneath as the stem once cooled. Extremely forgiving if your shaping skills are rusty.
45. Themed Pretzel Bags
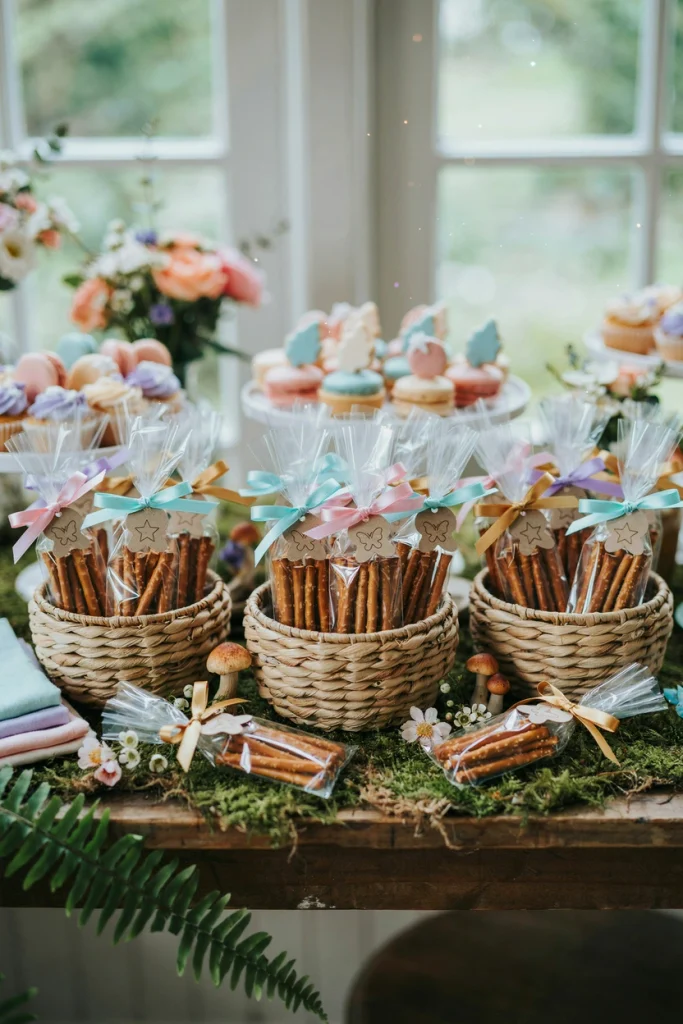
Bag up plain pretzels or pretzel sticks in cellophane treat bags, tie with ribbon, and add a small printed tag (“Pixie Dust Snacks”). It’s a grab-and-go option for kids who don’t sit still long enough for a full plate, which is most of them.
Showstopper Centerpieces
46. Fairy Garden Cheese Board
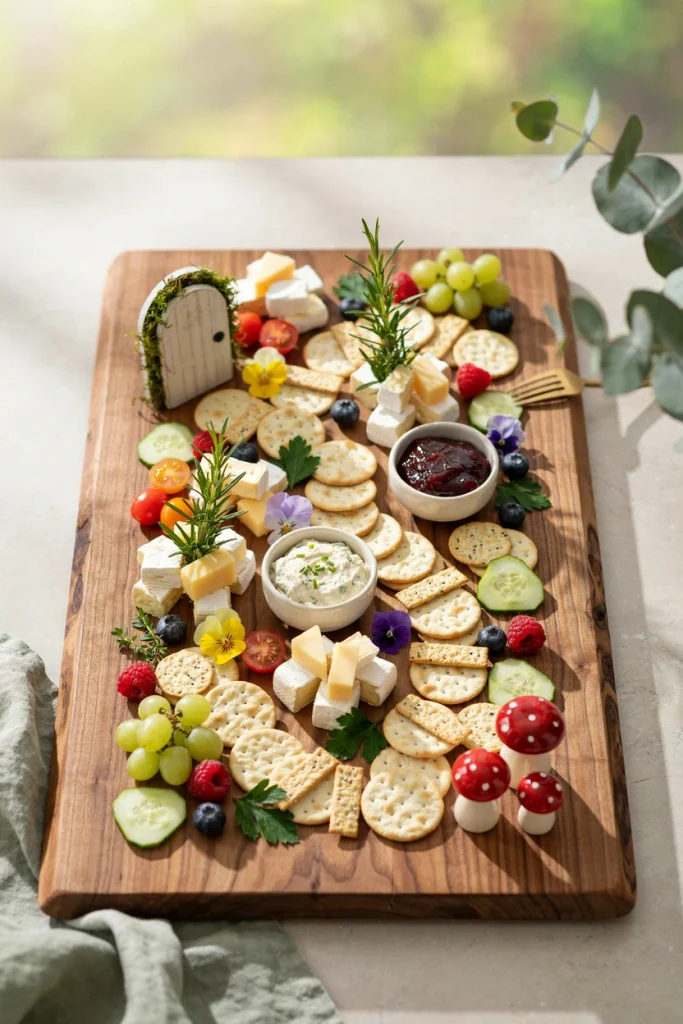
Build a savory grazing board on a large wooden charcuterie board styled like a tiny garden: cube cheese for “stones,” tuck sprigs of rosemary in as “bushes,” and lay crackers end to end as a winding “path.” It takes more time than any other entry here, but it works as your one true centerpiece if you skip a few smaller items to make room for it.
47. Mushroom Village Dessert Tower
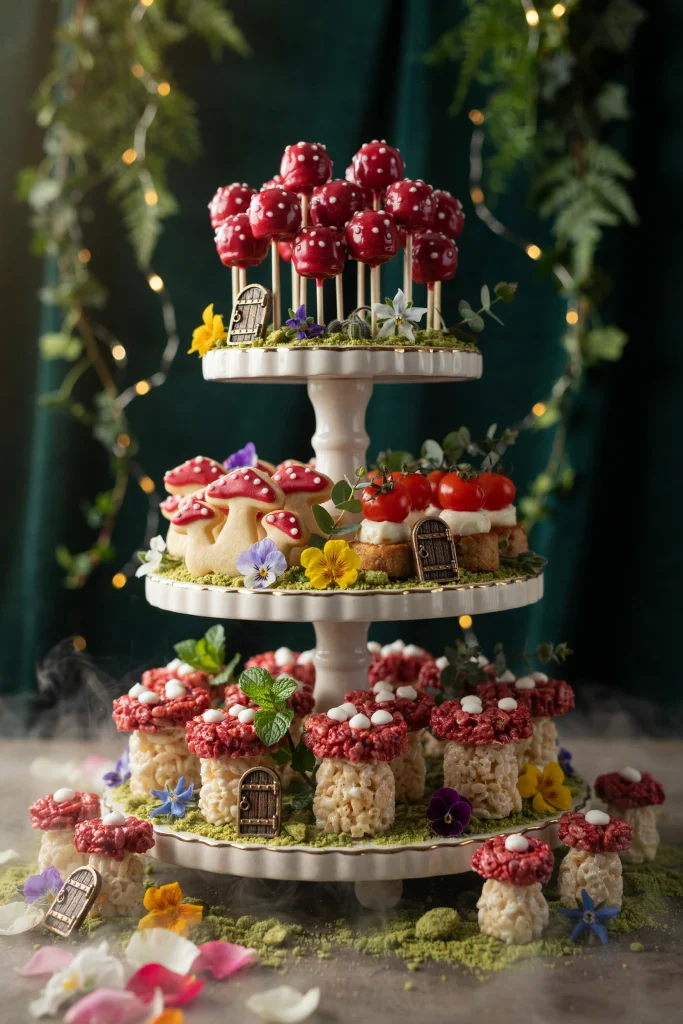
Use a tiered cupcake stand and cluster your toadstool marshmallow pops, mushroom cheese bites, and Rice Krispie toadstools together on different levels, filling gaps with crushed green sandwich cookies to look like moss. One stand, three recipes you already made, instantly a centerpiece.
48. Crystal Cave Candy Display
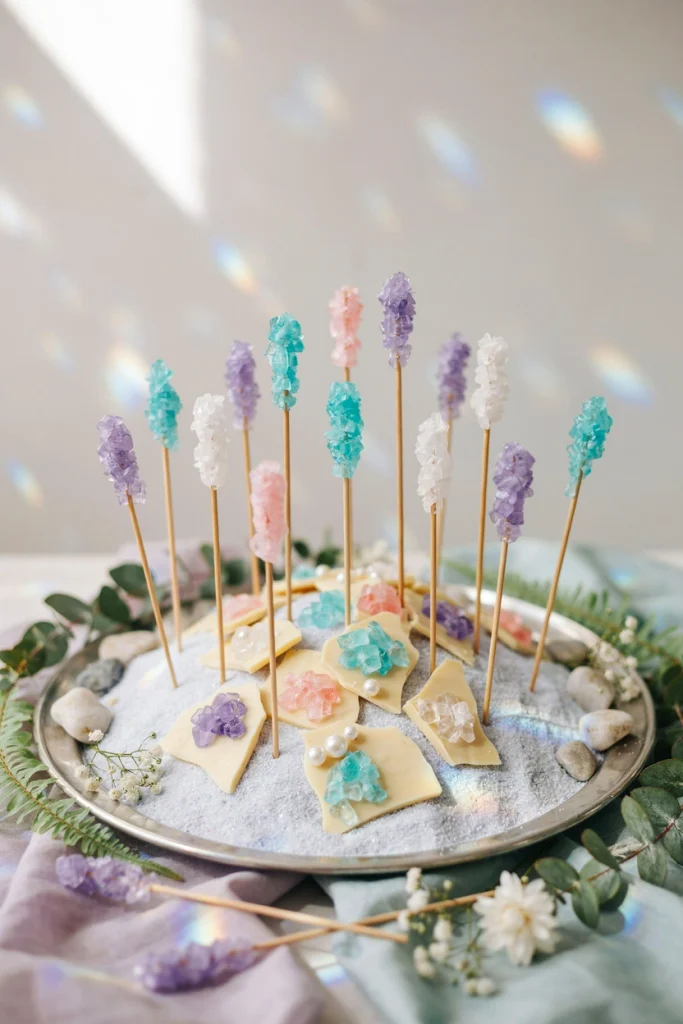
Pour a layer of coarse sanding sugar or rock salt onto a dark slate serving board, then arrange your geode bark and rock candy wands on top so they look like they’re emerging from a crystal cave. It’s styling, not cooking, so it’s a great job for a helper the morning of the party.
49. Floating Flower Punch Bowl
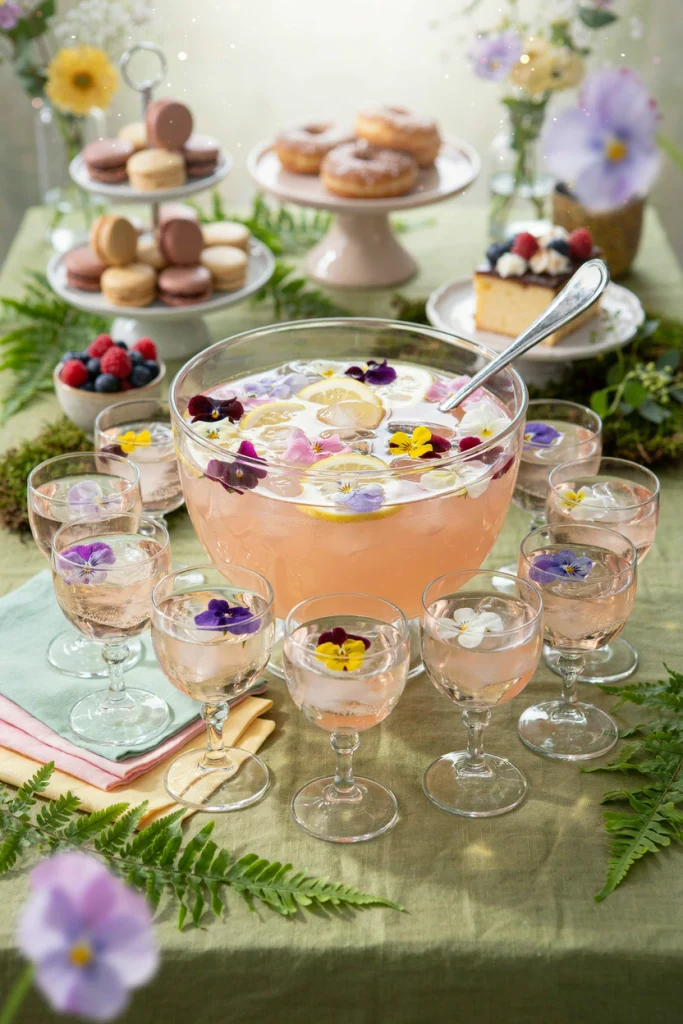
Float a handful of whole edible flowers (pansies or violas) directly in a glass beverage dispenser of pink lemonade or fruit punch right before serving. It’s the lowest-effort centerpiece upgrade on this entire list and it photographs like you hired a stylist.
50. Fairy Tale Charcuterie Wand Board
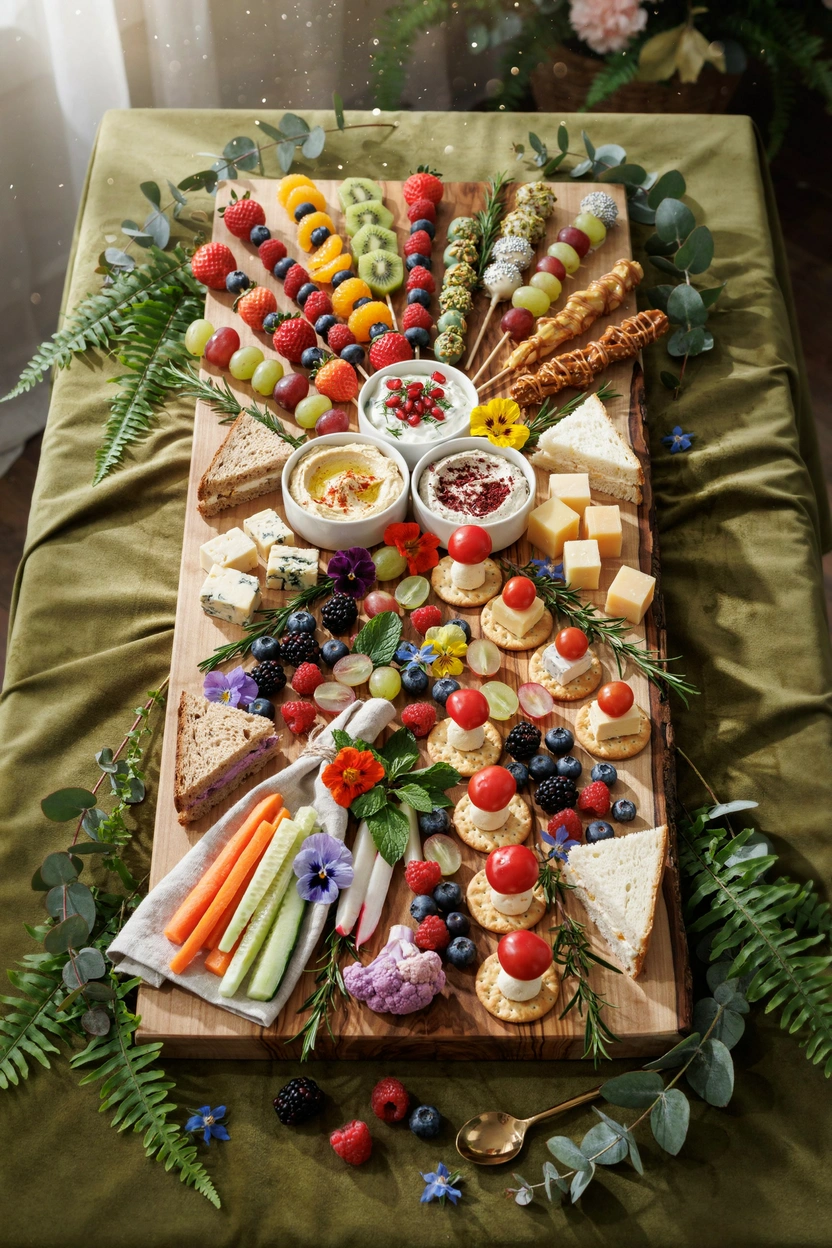
Lay your fairy wands, fruit skewers, and cheese bites in a fan pattern down a long wooden board instead of separate plates, tucking fresh flowers and herbs into the gaps. One long board reads as far more “designed” than six small plates, even though it’s the exact same food.
Realistic Prep Timeline
The day before, in the evening, handle anything shelf-stable: candy bark, geode bark, meringue kisses, rock candy, moonstone kisses, and toadstool marshmallow pops all keep in an airtight storage tin overnight.
The morning of, two to three hours before guests arrive, cut and skewer fruit, assemble sandwiches and cover with a damp paper towel, build the butterfly apple bites (brushed with lemon juice so they don’t brown), and make the jelly cups.
One hour before guests arrive, assemble the centerpieces: the mushroom village tower, the crystal cave display, and the fairy garden cheese board. These need the most visual fuss, so give them your freshest attention.
Fifteen minutes before, handle anything that wilts or melts fast: the cotton candy cloud toppers, the butterfly pea flower drink, the floating flower punch, and any last glitter dusting.
Frequently Asked Questions
Do I need special equipment for any of these?
Almost none. A few recipes use silicone molds (for the stained glass wings or dewdrop jellies) or a tiered stand for the dessert tower, but the majority use tools already in a typical kitchen.
What’s the single easiest idea on this list for a mom short on time?
Frozen grape “fairy stones” and the floating flower punch bowl both take under 10 minutes total and need no decorating skill at all.
Can I mix ideas from different categories?
Yes, and it’s actually recommended. Pull two or three sweet items, one savory, one drink, and one centerpiece rather than trying to make all 50, which would be far more food than any party needs.
How many of these should I actually make?
For a one to two hour party, six to eight items total (including one centerpiece) is plenty. More than that and most of it goes untouched.
More Party Food Ideas You’ll Love
- Party Food Appetizers for Kids — more kid-friendly snack ideas for any party
- Appetizers on a Stick — more skewer and stick-based snack ideas
- First Birthday Party Food Ideas — for a fuller spread beyond snacks alone
- Summer Appetizer Ideas for a Party — seasonal snacking inspiration
- 65 Baby Shower Food Ideas That Everyone Will Love — another big grazing-table roundup
- Christmas Appetizers — themed snacks for another occasion