The best freezer meals to make before baby arrives are hearty casseroles, soups, slow cooker dinners, muffins, and one-handed snacks that reheat easily. Prep 20–25 meals across your third trimester using a two-week schedule instead of one exhausting cooking day, and store them in labeled, stackable, freezer-safe containers.
Heads up: This post may include affiliate links. As an Amazon Associate, I earn from qualifying purchases—at no extra cost to you. Full privacy policy and disclosure here.
Hearty Dinners & Casseroles
1. Cheesy Chicken and Rice Casserole
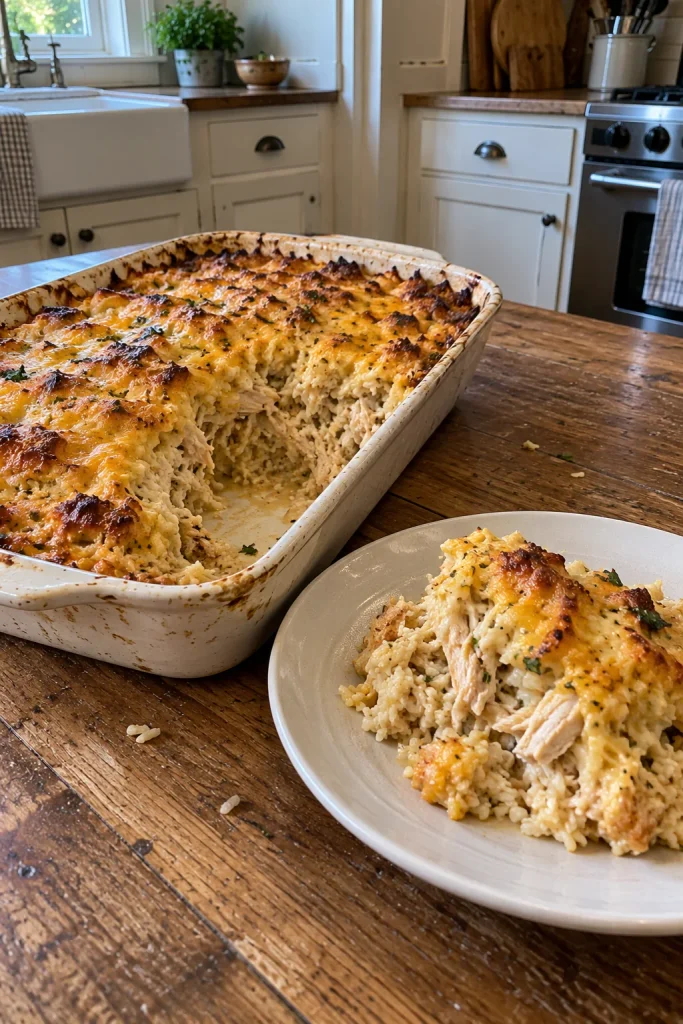
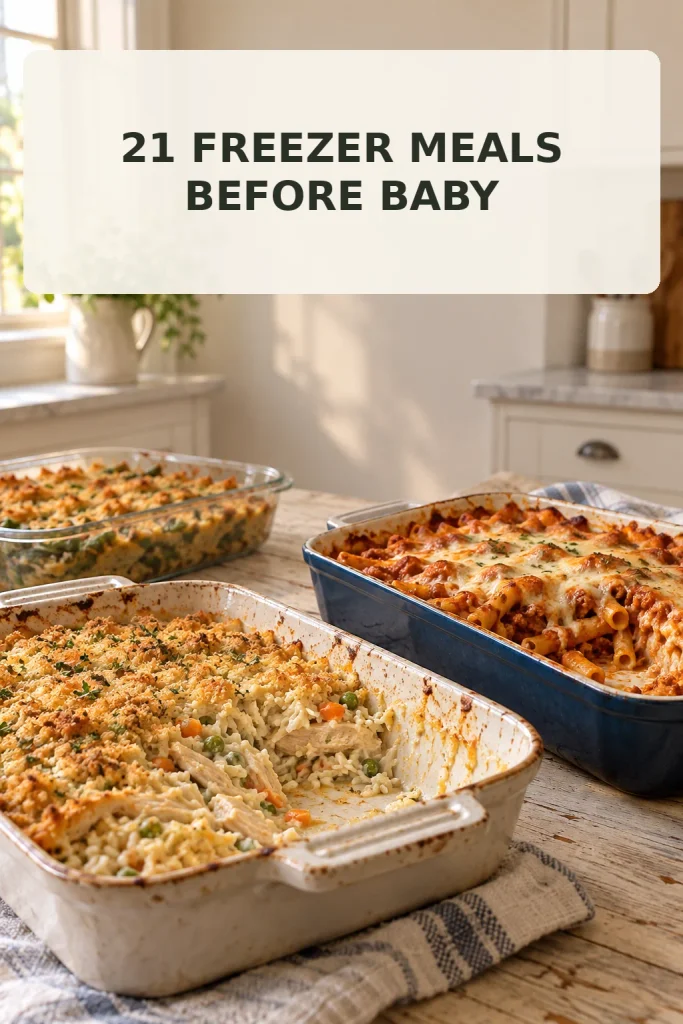
This is the casserole you make when you want dinner to feel like a warm hug. Tender shredded chicken and rice bake together in a creamy sauce, and the cheddar topping turns deeply golden and slightly crisp at the edges — the kind of bubbling, melty top that makes people go back for seconds straight from the pan.
Prep Time: 20 min | Cook Time: 40 min | Total Time: 1 hr | Servings: 6 | Difficulty: Easy
Ingredients
- 2 cups cooked white rice
- 3 cups shredded cooked chicken
- 1 can (10.5 oz) cream of chicken soup
- 1 cup sour cream
- 1 cup chicken broth
- 2 cups shredded cheddar cheese, divided
- 1 tsp garlic powder
- 1 tsp onion powder
- 1/2 tsp salt
- 1/4 tsp black pepper
- 1 cup crushed buttery crackers (optional topping)
Instructions
- In a large bowl, combine the cooked rice, shredded chicken, cream of chicken soup, sour cream, chicken broth, garlic powder, onion powder, salt, and pepper. Stir until fully combined.
- Fold in 1 1/2 cups of the shredded cheddar, reserving the rest for topping.
- Spread the mixture into a 9×13-inch foil freezer pan. Top with the remaining 1/2 cup cheddar and crushed crackers if using.
- Cover tightly with foil and freeze flat for up to 3 months.
- To bake: thaw overnight in the fridge. Bake covered at 350°F for 30 minutes, then uncover and bake 10 more minutes until bubbling and golden on top.
Cook’s Tip
Undercook the rice slightly before mixing it in — it finishes cooking in the oven and won’t turn mushy after freezing and reheating.
Why You’ll Love It
It’s a full dinner in one pan, kid-friendly, and reheats without drying out, which makes it a reliable go-to for chaotic newborn evenings.
2. Beef and Vegetable Shepherd’s Pie
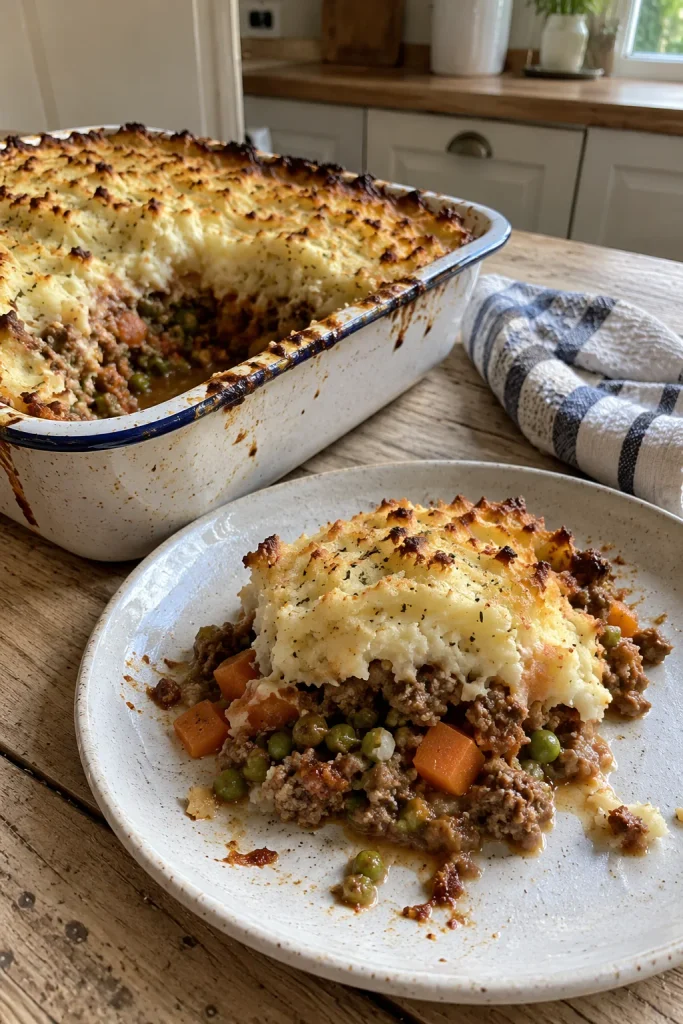
Underneath that swirled, golden potato crust is a rich, savory filling of ground beef and vegetables in a thick gravy that clings to every bite. It’s the kind of dinner that tastes like it took all afternoon, even though it comes together from mostly pantry staples.
Prep Time: 25 min | Cook Time: 45 min | Total Time: 1 hr 10 min | Servings: 8 | Difficulty: Medium
Ingredients
- 2 lbs ground beef
- 1 small onion, diced
- 2 carrots, diced
- 1 cup frozen peas
- 1 cup frozen corn
- 2 tbsp tomato paste
- 2 tbsp all-purpose flour
- 1 1/2 cups beef broth
- 1 tsp Worcestershire sauce
- 1 tsp dried thyme
- Salt and pepper to taste
- 4 cups mashed potatoes (about 3 lbs potatoes, cooked and mashed)
- 1/2 cup shredded cheddar (optional, for topping)
Instructions
- In a large skillet over medium-high heat, brown the ground beef with the onion and carrots, about 8 minutes, breaking up the meat as it cooks. Drain excess fat.
- Stir in the tomato paste and flour, cooking 1 minute. Add the beef broth, Worcestershire sauce, thyme, salt, and pepper. Simmer 5 minutes until thickened.
- Stir in the frozen peas and corn, then remove from heat.
- Spread the meat mixture into a 9×13-inch foil freezer pan. Top evenly with mashed potatoes, spreading to the edges to seal in the filling. Sprinkle with cheddar if using.
- Cover tightly and freeze flat for up to 3 months.
- To bake: thaw overnight in the fridge. Bake uncovered at 375°F for 35–40 minutes, until the potato topping is golden and the filling is bubbling at the edges.
Storage & Freezing
Freeze in a disposable foil pan so you can go straight from freezer to oven without transferring dishes — one less thing to wash postpartum.
Best For
Family dinners where you need something filling enough that nobody asks for seconds of anything else.
3. Baked Ziti with Italian Sausage
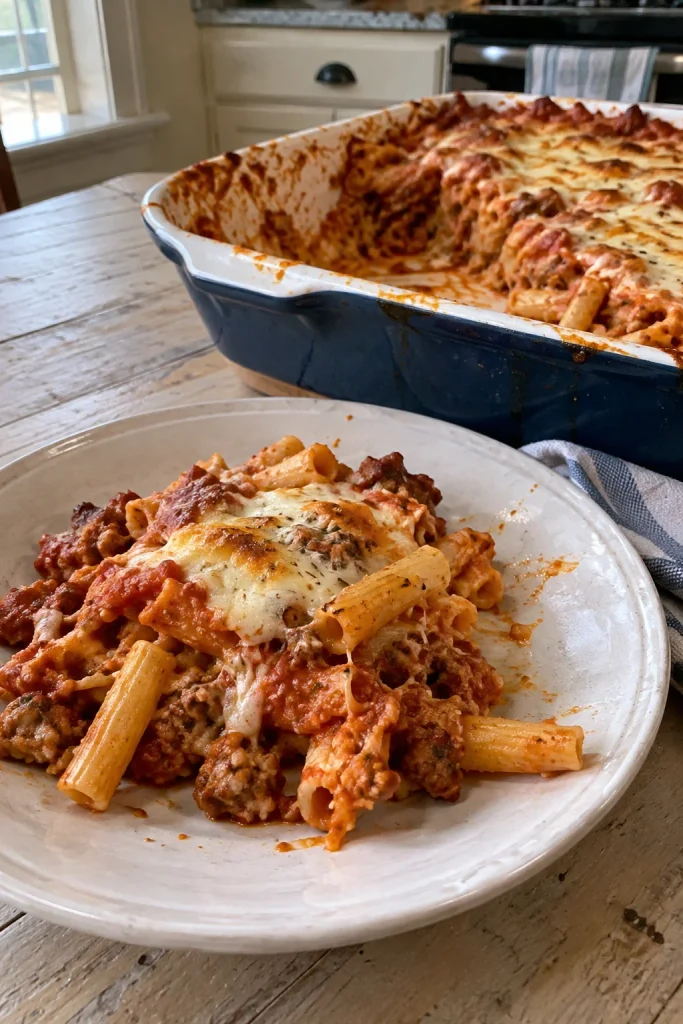
Layers of tender ziti tangled in a rich, slightly spicy sausage marinara, blanketed in mozzarella that stretches the second you pull a serving free. It’s the freezer meal that makes the whole house smell like garlic and basil the moment it goes in the oven.
Prep Time: 20 min | Cook Time: 35 min | Total Time: 55 min | Servings: 8 | Difficulty: Easy
Ingredients
- 1 lb ziti pasta
- 1 lb Italian sausage, casings removed
- 1 jar (24 oz) marinara sauce
- 1 cup ricotta cheese
- 2 cups shredded mozzarella, divided
- 1/2 cup grated Parmesan
- 1 tsp Italian seasoning
- 1/2 tsp red pepper flakes (optional)
Instructions
- Cook the ziti in salted boiling water until very al dente, about 2 minutes less than package directions. Drain.
- In a skillet over medium heat, brown the sausage, breaking it into crumbles, about 7 minutes. Stir in the marinara sauce and Italian seasoning; simmer 5 minutes.
- In a large bowl, combine the drained ziti, sausage sauce, ricotta, 1 cup mozzarella, and half the Parmesan. Stir until evenly coated.
- Spread into a 9×13-inch foil freezer pan. Top with remaining mozzarella, Parmesan, and red pepper flakes if using.
- Cover tightly and freeze flat for up to 3 months.
- To bake: thaw overnight in the fridge. Bake covered at 375°F for 25 minutes, uncover, and bake 10 more minutes until the cheese is melted and golden.
Make-Ahead Tip
Slightly undercooking the pasta before freezing keeps it from turning mushy once it’s reheated a second time in the oven.
4. Slow-Braised Chicken Enchilada Casserole
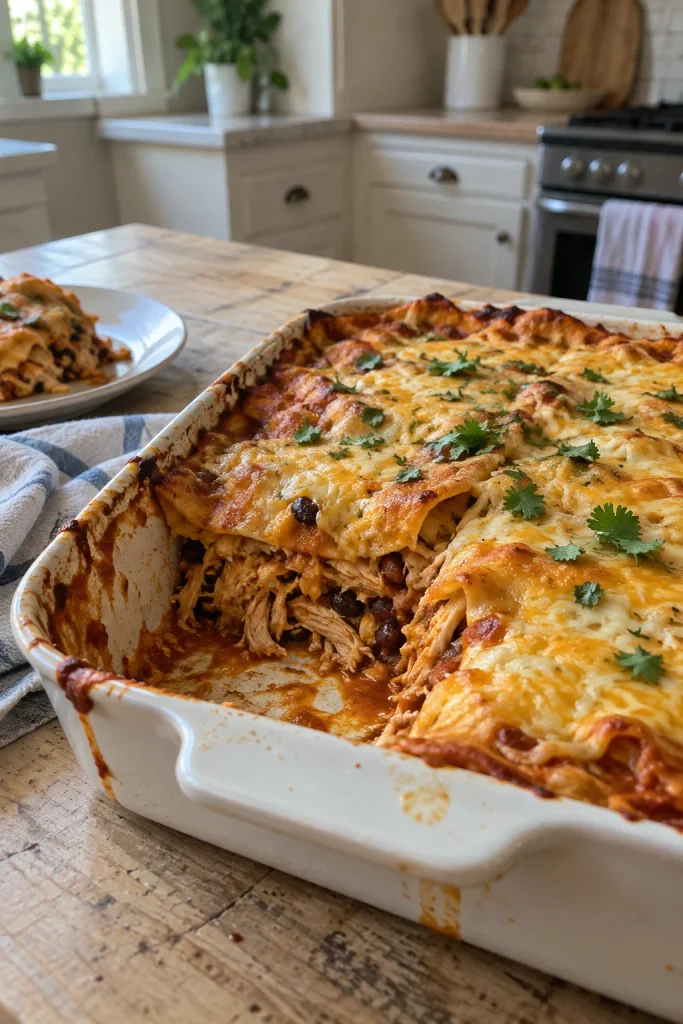
Instead of rolling individual enchiladas, this layers shredded chicken, tortillas, and a deeply spiced red sauce lasagna-style — smoky, a little tangy, and finished with a blanket of melted Monterey Jack that turns lightly crisp at the edges.
Prep Time: 20 min | Cook Time: 35 min | Total Time: 55 min | Servings: 6 | Difficulty: Easy
Ingredients
- 3 cups shredded cooked chicken
- 2 cans (10 oz each) red enchilada sauce
- 1 cup sour cream
- 1 can (4 oz) diced green chiles
- 10 corn tortillas, torn in half
- 2 1/2 cups shredded Monterey Jack cheese
- 1/2 tsp ground cumin
- Fresh cilantro, for garnish
Instructions
- In a bowl, mix the shredded chicken with 1 can of enchilada sauce, sour cream, green chiles, and cumin.
- Spread a thin layer of the remaining can of enchilada sauce on the bottom of a 9×13-inch foil freezer pan. Layer torn tortillas to cover the base, then half the chicken mixture, then 1 cup cheese. Repeat with another tortilla layer, remaining chicken mixture, and finish with remaining cheese on top.
- Cover tightly and freeze flat for up to 3 months.
- To bake: thaw overnight in the fridge. Bake covered at 375°F for 25 minutes, then uncovered for 10 minutes until bubbling. Top with fresh cilantro before serving.
Substitutions
Swap the corn tortillas for flour if that’s what’s on hand — the texture will be softer, but the layering method still works perfectly.
Why You’ll Love It
It has bold, comforting flavor without any exotic ingredients, and reheats in individual squares so you’re not committed to a full pan every time.
5. Turkey Meatloaf with Brown Sugar Glaze
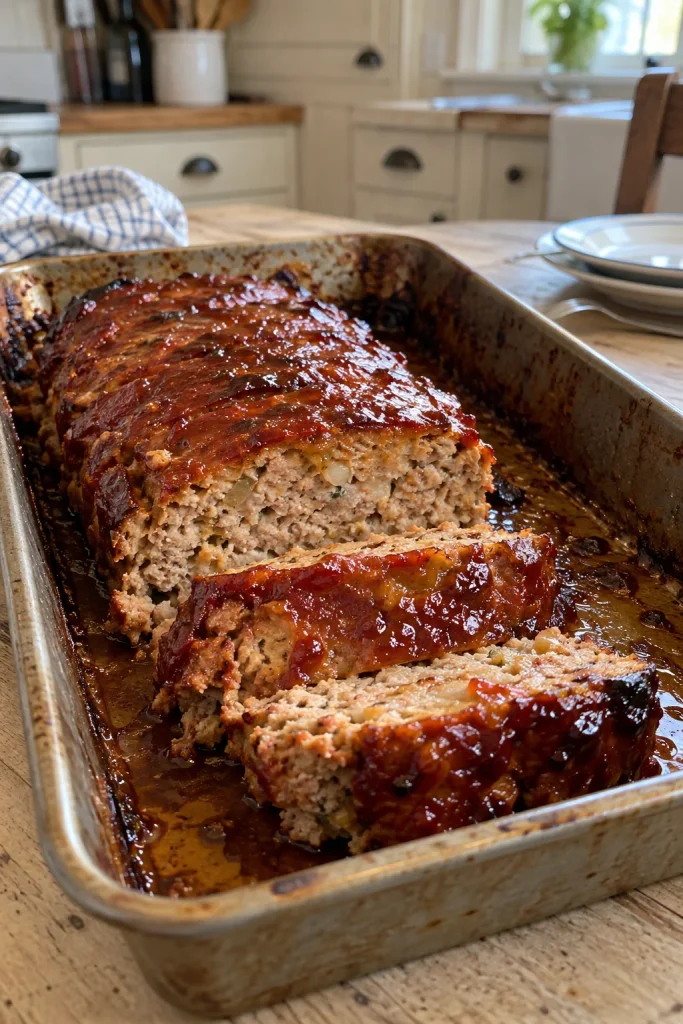
Lighter than a classic beef meatloaf but every bit as satisfying, this turkey version stays moist thanks to grated zucchini folded right into the mix, finished with a sticky brown sugar and ketchup glaze that caramelizes at the edges in the oven.
Prep Time: 15 min | Cook Time: 55 min | Total Time: 1 hr 10 min | Servings: 6 | Difficulty: Easy
Ingredients
- 2 lbs ground turkey
- 1 cup grated zucchini, squeezed dry
- 1 cup breadcrumbs
- 2 large eggs
- 1/4 cup milk
- 1/2 cup finely diced onion
- 2 cloves garlic, minced
- 1 tsp salt
- 1/2 tsp black pepper
- 1/2 cup ketchup
- 3 tbsp brown sugar
- 1 tbsp apple cider vinegar
Instructions
- In a large bowl, combine the ground turkey, zucchini, breadcrumbs, eggs, milk, onion, garlic, salt, and pepper. Mix gently until just combined — don’t overwork it.
- Shape into a loaf and place in a foil-lined loaf pan.
- Whisk together the ketchup, brown sugar, and vinegar; spread half over the top of the loaf.
- Wrap the pan tightly and freeze uncooked for up to 3 months, with remaining glaze frozen separately in a small bag.
- To bake: thaw both overnight in the fridge. Bake the loaf at 350°F for 50–55 minutes, brushing with the reserved glaze at the 30-minute mark, until it reaches an internal temperature of 165°F.
Good to Know
This freezes best raw and unbaked rather than fully cooked — it comes out juicier, and you get that fresh-baked glaze at reheat time instead of a reheated crust.
6. Chicken Pot Pie Filling with Biscuit Topping
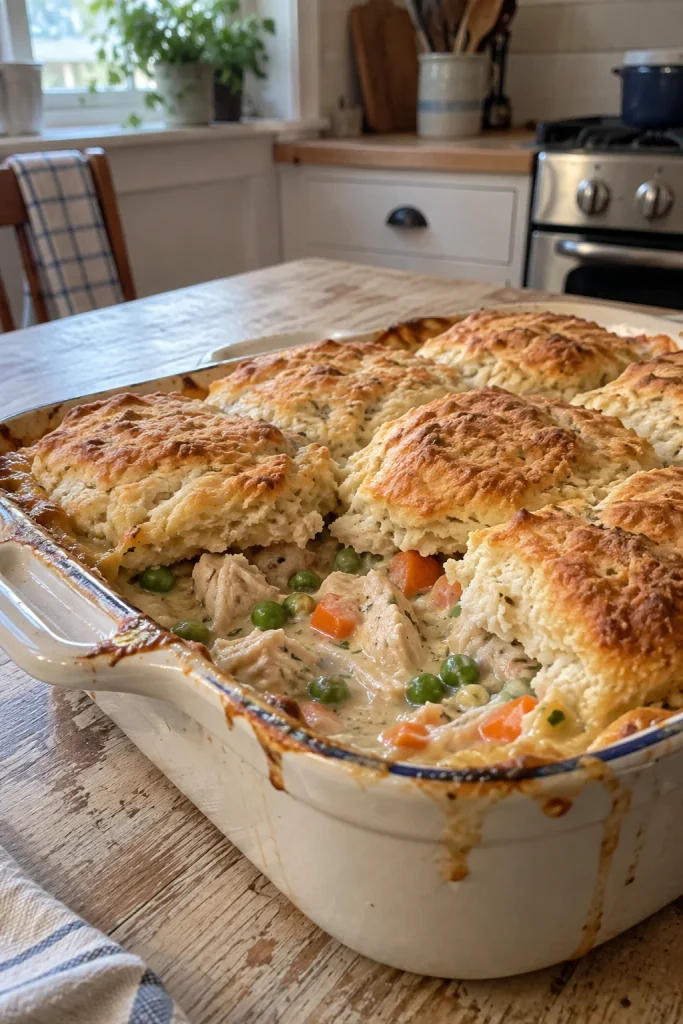
This isn’t a pastry-crust pie — it’s a thick, creamy chicken and vegetable filling baked under a layer of drop biscuits that puff up golden and slightly crisp on top, soft and buttery underneath where they soak up the gravy.
Prep Time: 25 min | Cook Time: 30 min | Total Time: 55 min | Servings: 6 | Difficulty: Medium
Ingredients
- 3 tbsp butter
- 1/3 cup all-purpose flour
- 2 cups chicken broth
- 1 cup milk
- 3 cups shredded cooked chicken
- 2 cups frozen mixed vegetables (peas, carrots, corn)
- 1/2 tsp poultry seasoning
- Salt and pepper to taste
- 2 cups biscuit baking mix
- 2/3 cup milk (for biscuit topping)
Instructions
- Melt the butter in a saucepan over medium heat. Whisk in the flour and cook 1 minute. Slowly whisk in the chicken broth and 1 cup milk, stirring until thickened, about 5 minutes.
- Stir in the shredded chicken, frozen vegetables, poultry seasoning, salt, and pepper. Pour into a 9×13-inch foil freezer pan and let cool completely.
- Cover tightly and freeze the filling flat for up to 3 months. Freeze the dry biscuit mix in a separate labeled bag to combine with milk fresh on baking day.
- To bake: thaw the filling overnight in the fridge. Stir the biscuit mix with 2/3 cup milk and drop spoonfuls over the filling. Bake at 400°F for 25–30 minutes, until the biscuits are golden and the filling is bubbling.
Cook’s Tip
Freeze the filling and biscuit topping separately — mixing them before freezing leaves you with soggy, deflated biscuits instead of a golden top.
Flavor Variation
Swap in leftover turkey after the holidays, or stir a spoonful of Dijon into the filling for a sharper, more grown-up flavor.
Soups & Stews
7. Creamy Tomato Basil Soup
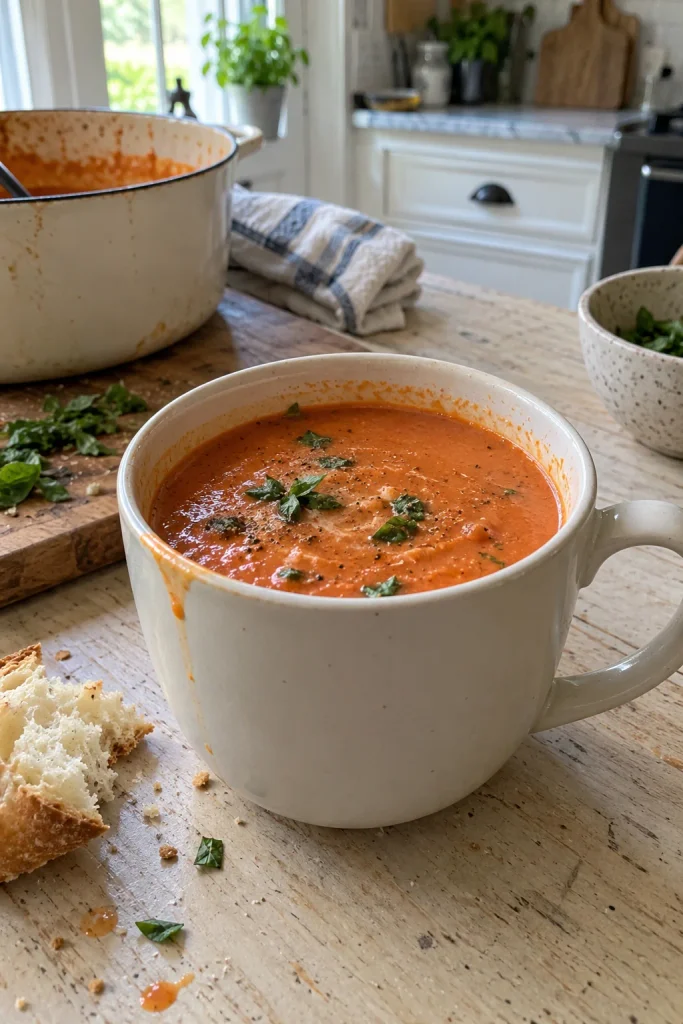
Deeply roasted tomato flavor, mellowed with a swirl of cream and fresh basil, this soup is smooth enough to sip straight from a mug with one hand — no bowl, no spoon, no problem while you’re feeding a baby with the other arm.
Prep Time: 15 min | Cook Time: 35 min | Total Time: 50 min | Servings: 6 | Difficulty: Easy
Ingredients
- 2 tbsp olive oil
- 1 small onion, diced
- 3 cloves garlic, minced
- 2 cans (28 oz each) whole peeled tomatoes
- 2 cups vegetable broth
- 1/2 cup heavy cream
- 1/4 cup fresh basil leaves, plus more for garnish
- 1 tsp sugar
- Salt and pepper to taste
Instructions
- Heat the olive oil in a large pot over medium heat. Add the onion and cook until soft, about 5 minutes. Add the garlic and cook 1 minute more.
- Add the tomatoes (with juices) and vegetable broth. Bring to a simmer and cook uncovered for 20 minutes.
- Remove from heat and blend with an immersion blender (or in batches in a countertop blender) until smooth.
- Stir in the cream, basil, sugar, salt, and pepper. Let cool completely.
- Portion into quart-size freezer bags, laid flat, and freeze for up to 3 months.
- To reheat: thaw overnight in the fridge or run the bag under warm water to loosen, then warm gently on the stovetop or in the microwave, stirring occasionally.
One-Handed Friendly
This is a sip-from-a-mug meal — no utensils required, which makes it one of the easiest dinners to eat one-handed during round-the-clock feeds.
Why You’ll Love It
It comes together almost entirely from pantry cans, freezes and reheats without separating, and pairs well with a grilled cheese if you have five extra minutes.
8. Hearty White Bean and Kale Soup
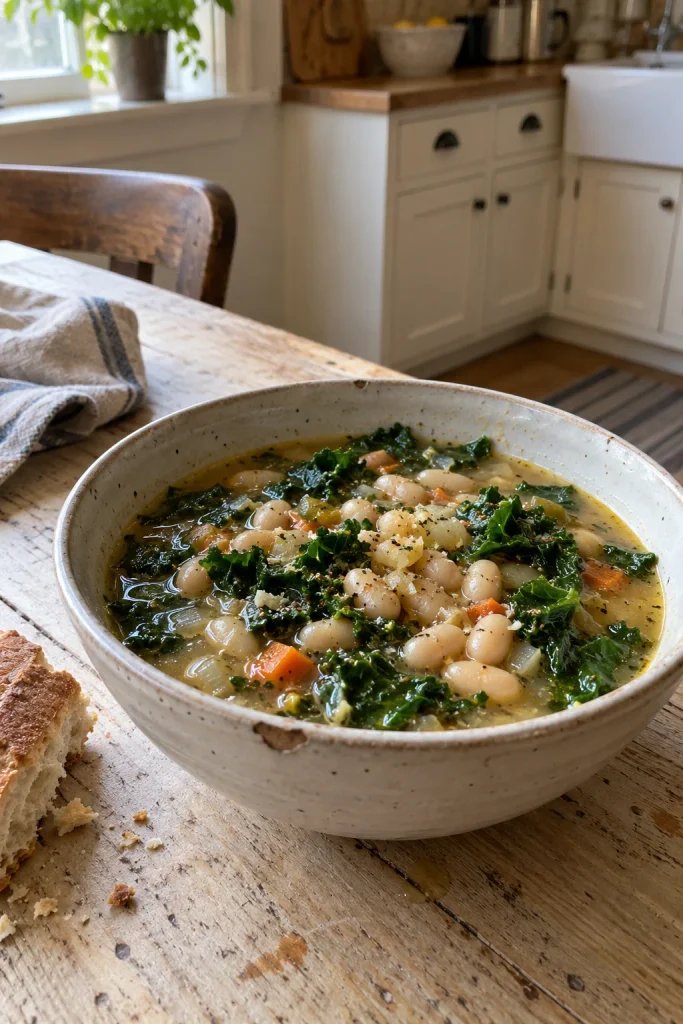
This is the soup for when your body needs real nourishment — creamy white beans, tender kale, and a savory herbed broth thickened just enough to feel substantial without needing anything else alongside it.
Prep Time: 15 min | Cook Time: 30 min | Total Time: 45 min | Servings: 6 | Difficulty: Easy
Ingredients
- 2 tbsp olive oil
- 1 onion, diced
- 2 carrots, diced
- 2 celery stalks, diced
- 3 cloves garlic, minced
- 3 cans (15 oz each) white beans, drained and rinsed
- 6 cups chicken or vegetable broth
- 1 parmesan rind (optional)
- 4 cups chopped kale, stems removed
- 1 tsp dried thyme
- Salt and pepper to taste
Instructions
- Heat the olive oil in a large pot over medium heat. Add the onion, carrots, and celery; cook 7 minutes until softened. Add the garlic and cook 1 minute more.
- Add the white beans, broth, parmesan rind if using, and thyme. Bring to a simmer and cook 15 minutes.
- Remove the parmesan rind. Using a potato masher, lightly mash about a third of the beans directly in the pot to thicken the broth.
- Stir in the kale and cook 3–4 minutes until wilted. Season with salt and pepper. Let cool completely.
- Portion into freezer bags or containers and freeze flat for up to 3 months.
- To reheat: thaw overnight in the fridge, then warm on the stovetop over medium-low heat, stirring occasionally, until heated through.
Substitutions
Spinach works in place of kale if that’s what’s on hand — add it in the last minute of cooking since it wilts much faster.
9. Slow Cooker Beef and Barley Stew
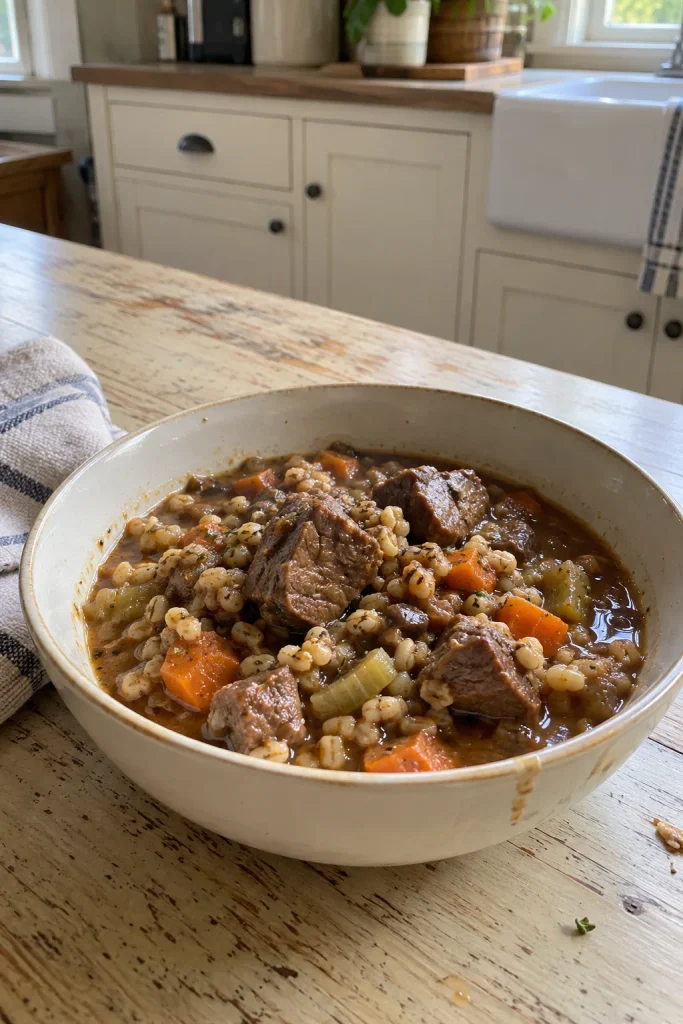
Chunks of beef braise low and slow with barley, carrots, and a deeply savory broth until the meat falls apart at the touch of a fork — the kind of stew that tastes like it simmered all day, because it did, mostly unattended.
Prep Time: 20 min | Cook Time: 8 hrs (slow cooker) | Total Time: 8 hrs 20 min | Servings: 8 | Difficulty: Easy
Ingredients
- 2 lbs beef stew meat, cubed
- 1/2 cup pearl barley
- 3 carrots, sliced
- 2 celery stalks, sliced
- 1 onion, diced
- 3 cloves garlic, minced
- 6 cups beef broth
- 2 tbsp tomato paste
- 1 tsp dried rosemary
- 1 tsp dried thyme
- Salt and pepper to taste
Instructions
- Combine the beef, barley, carrots, celery, onion, garlic, beef broth, tomato paste, rosemary, thyme, salt, and pepper directly in a gallon freezer bag. Seal, removing excess air, and freeze flat for up to 3 months.
- On cooking day, thaw the bag overnight in the fridge (or add a couple extra hours if cooking from frozen).
- Dump the contents into a slow cooker and cook on low for 8 hours, or high for 5 hours, until the beef is fork-tender and the barley is cooked through.
- Taste and adjust seasoning before serving.
Make-Ahead Tip
This is a true dump-and-freeze meal — everything goes in raw, so there’s no stovetop step before freezing at all.
Storage & Freezing
Lay the bag completely flat to freeze so it thaws faster and stacks easily with your other freezer bags.
10. Coconut Curry Lentil Soup
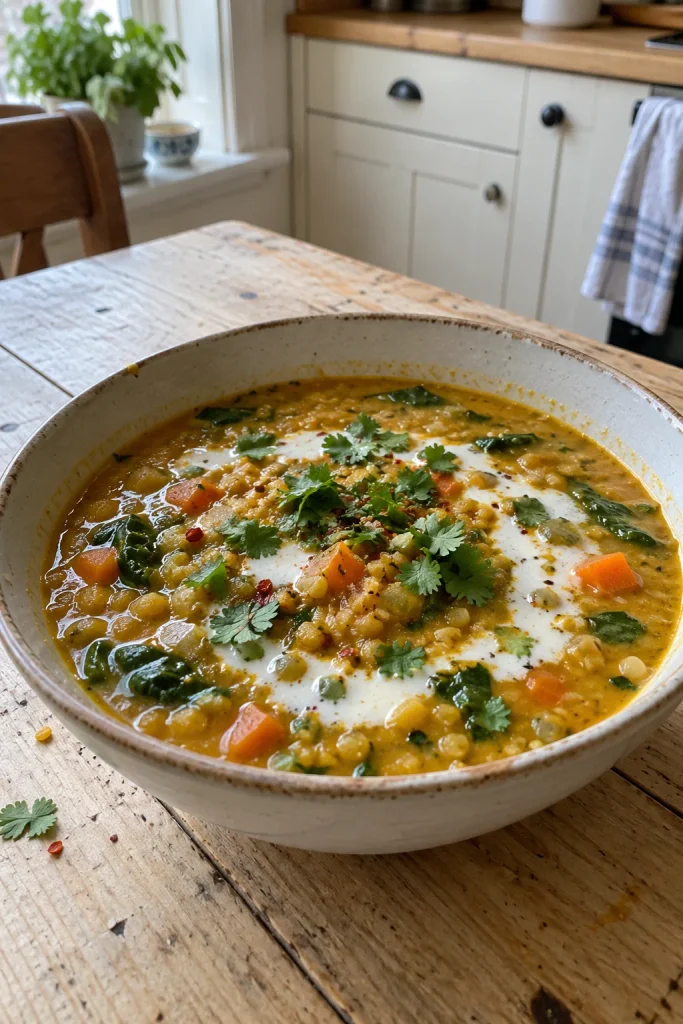
Red lentils break down into a velvety, golden broth infused with warm curry spice and coconut milk — naturally plant-based, deeply comforting, and one of the few soups that actually tastes even better the day after it’s reheated.
Prep Time: 15 min | Cook Time: 30 min | Total Time: 45 min | Servings: 6 | Difficulty: Easy
Ingredients
- 1 tbsp coconut oil
- 1 onion, diced
- 3 cloves garlic, minced
- 1 tbsp grated fresh ginger
- 2 tbsp curry powder
- 1 1/2 cups red lentils, rinsed
- 1 can (14 oz) diced tomatoes
- 1 can (14 oz) coconut milk
- 4 cups vegetable broth
- Salt to taste
- Fresh cilantro and lime wedges, for serving
Instructions
- Heat the coconut oil in a large pot over medium heat. Add the onion and cook 5 minutes until softened. Add the garlic, ginger, and curry powder; cook 1 minute until fragrant.
- Stir in the lentils, diced tomatoes, coconut milk, and vegetable broth. Bring to a simmer and cook 20–25 minutes, until the lentils are fully softened and the soup has thickened.
- Season with salt to taste and let cool completely.
- Portion into freezer bags or containers and freeze flat for up to 3 months.
- To reheat: thaw overnight in the fridge, then warm on the stovetop over medium-low heat, stirring often. Top with fresh cilantro and a squeeze of lime.
Substitutions
This is naturally dairy-free, gluten-free, and vegan as written, making it one of the easiest meals on this list to share with visiting family who have dietary restrictions.
Slow Cooker & Dump Meals
11. Slow Cooker Honey Garlic Chicken Thighs
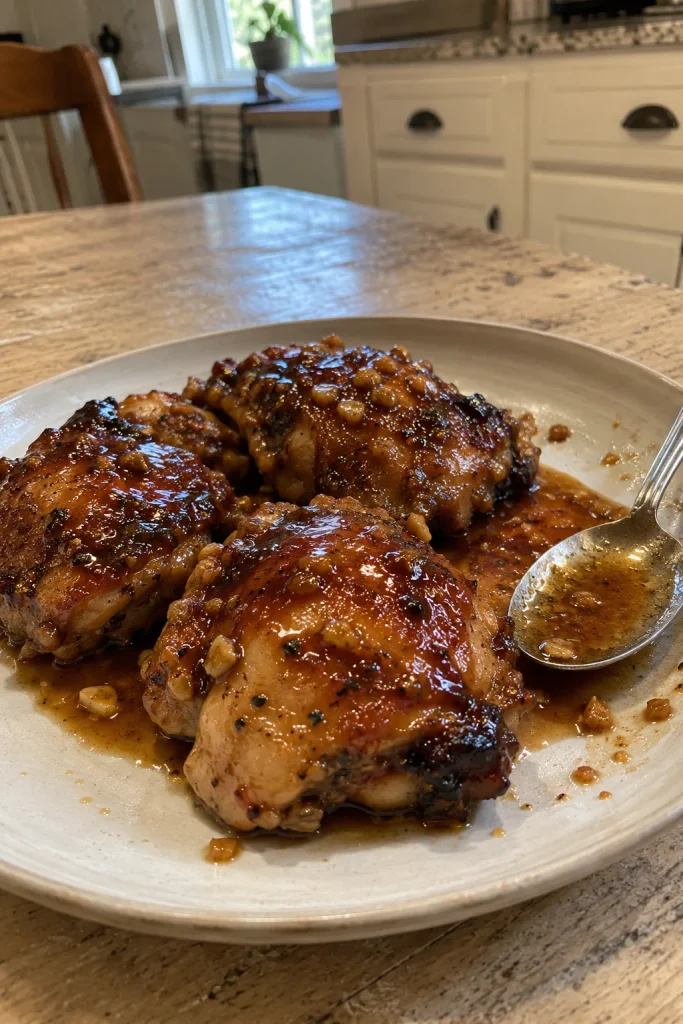
Chicken thighs braise in a sticky-sweet honey garlic sauce until they practically fall off the bone, glazed and glossy, with just enough sauce left over to spoon generously over rice.
Prep Time: 10 min | Cook Time: 6 hrs (slow cooker) | Total Time: 6 hrs 10 min | Servings: 6 | Difficulty: Easy
Ingredients
- 2 1/2 lbs boneless, skinless chicken thighs
- 1/2 cup honey
- 1/3 cup soy sauce
- 3 cloves garlic, minced
- 1 tbsp rice vinegar
- 1 tsp grated fresh ginger
- 1 tbsp cornstarch (added on cooking day)
- Sesame seeds and sliced green onion, for garnish
Instructions
- Place the chicken thighs in a gallon freezer bag. In a small bowl, whisk together the honey, soy sauce, garlic, rice vinegar, and ginger; pour over the chicken. Seal, removing excess air, and freeze flat for up to 3 months.
- On cooking day, thaw the bag overnight in the fridge.
- Empty the contents into a slow cooker and cook on low for 6 hours, or high for 3–4 hours, until the chicken is fully cooked and tender.
- Remove the chicken. Whisk the cornstarch with 2 tbsp cold water and stir into the sauce in the slow cooker; cook on high 10 minutes until thickened. Return the chicken to coat.
- Garnish with sesame seeds and green onion before serving.
Cook’s Tip
Thighs stay juicy through freezing and slow cooking far better than chicken breast, which tends to dry out with this method.
12. Vegetarian Slow Cooker Chili
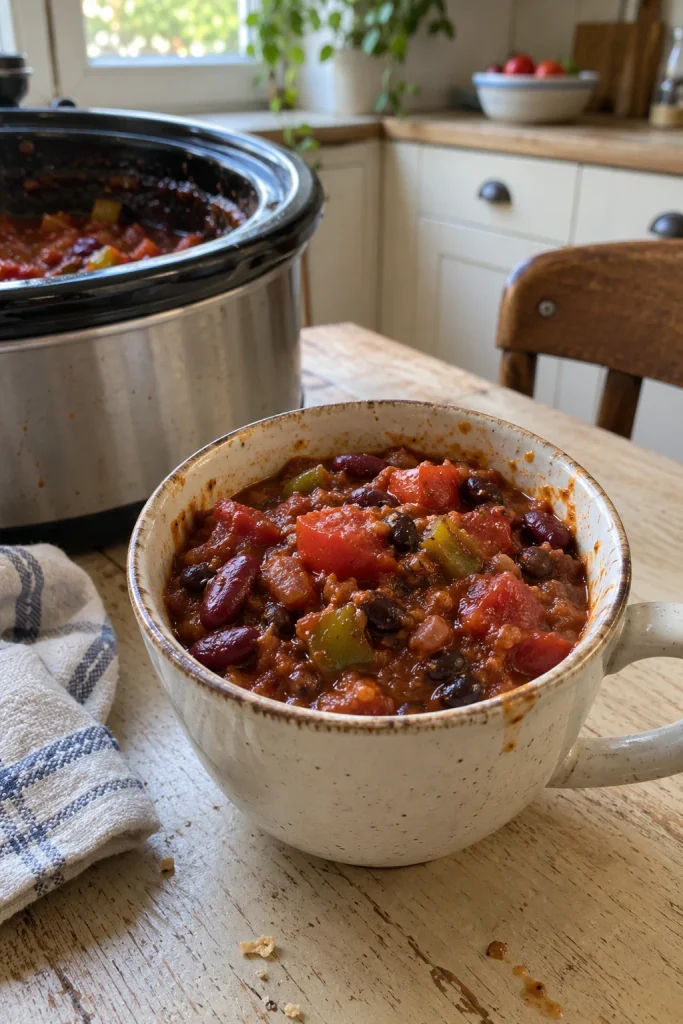
Three kinds of beans simmer with smoky chipotle and fire-roasted tomatoes into a chili thick enough to eat with a spoon standing up — no meat required, and nobody at the table will miss it.
Prep Time: 15 min | Cook Time: 6 hrs (slow cooker) | Total Time: 6 hrs 15 min | Servings: 8 | Difficulty: Easy
Ingredients
- 1 can (15 oz) black beans, drained
- 1 can (15 oz) kidney beans, drained
- 1 can (15 oz) pinto beans, drained
- 1 can (28 oz) fire-roasted diced tomatoes
- 1 can (15 oz) tomato sauce
- 1 bell pepper, diced
- 1 onion, diced
- 2 cloves garlic, minced
- 1 chipotle pepper in adobo, minced
- 2 tbsp chili powder
- 1 tsp ground cumin
- Salt to taste
- Shredded cheese, sour cream, avocado, for serving
Instructions
- Combine the black beans, kidney beans, pinto beans, diced tomatoes, tomato sauce, bell pepper, onion, garlic, chipotle pepper, chili powder, and cumin directly in a gallon freezer bag. Seal, removing excess air, and freeze flat for up to 3 months.
- On cooking day, thaw the bag overnight in the fridge.
- Empty into a slow cooker and cook on low for 6 hours, or high for 4 hours, stirring once partway through.
- Season with salt to taste and serve topped with cheese, sour cream, and avocado.
Best For
Feeding a crowd of visiting family and friends without anyone needing to cook anything from scratch that day.
Substitutions
Leave off the dairy toppings and this stays fully vegan, making it easy to serve alongside other dinners without a separate dish.
13. Slow Cooker Pulled Pork
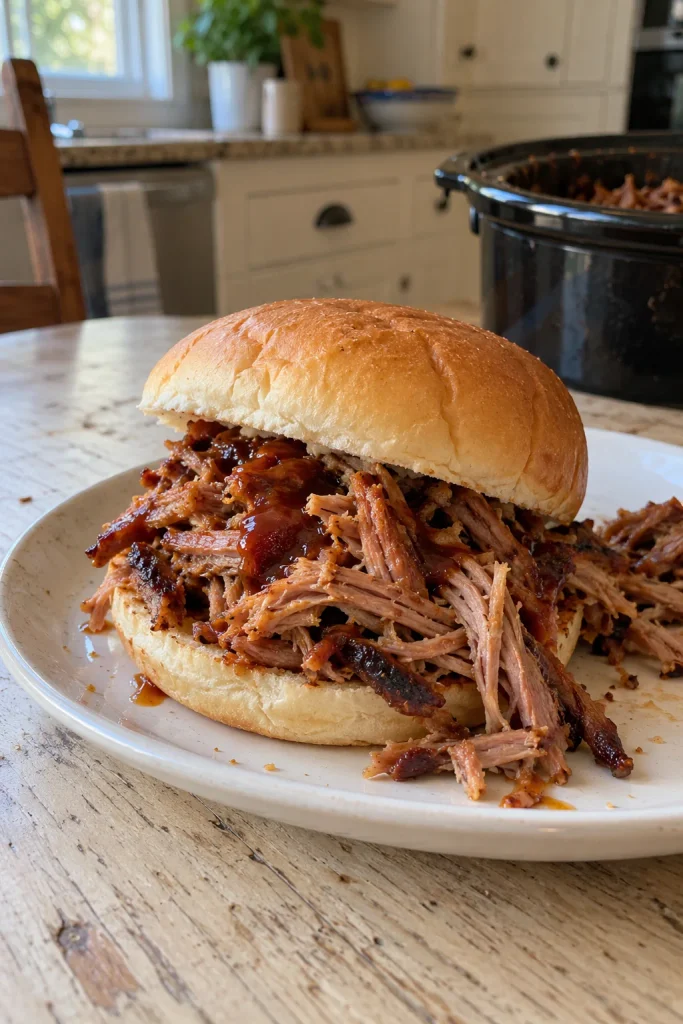
A pork shoulder rubbed with brown sugar and smoked paprika breaks down over hours into impossibly tender, shreddable meat that soaks up a tangy barbecue sauce right in the slow cooker — one of the easiest meals on this list to stretch across multiple dinners.
Prep Time: 15 min | Cook Time: 8 hrs (slow cooker) | Total Time: 8 hrs 15 min | Servings: 10 | Difficulty: Easy
Ingredients
- 4 lb boneless pork shoulder
- 2 tbsp brown sugar
- 1 tbsp smoked paprika
- 1 tsp garlic powder
- 1 tsp onion powder
- 1 tsp salt
- 1/2 tsp black pepper
- 1 cup barbecue sauce, plus more for serving
- 1/2 cup chicken broth
Instructions
- Combine the brown sugar, smoked paprika, garlic powder, onion powder, salt, and pepper; rub all over the pork shoulder.
- Place the seasoned pork in a gallon freezer bag with the barbecue sauce and chicken broth. Seal, removing excess air, and freeze flat for up to 3 months.
- On cooking day, thaw the bag in the fridge for 24–36 hours (it’s a large cut, so give it extra time).
- Empty the contents into a slow cooker and cook on low for 8 hours, until the pork shreds easily with two forks.
- Shred the pork directly in the slow cooker juices and stir to coat. Serve with extra barbecue sauce.
Storage & Freezing
This large cut needs the longest thaw time on the list — plan for a full day and a half in the fridge before your cooking day.
Flavor Variation
Skip the barbecue sauce and add cumin and lime instead for pulled pork tacos rather than sandwiches.
14. Slow Cooker Butternut Squash and Apple Soup
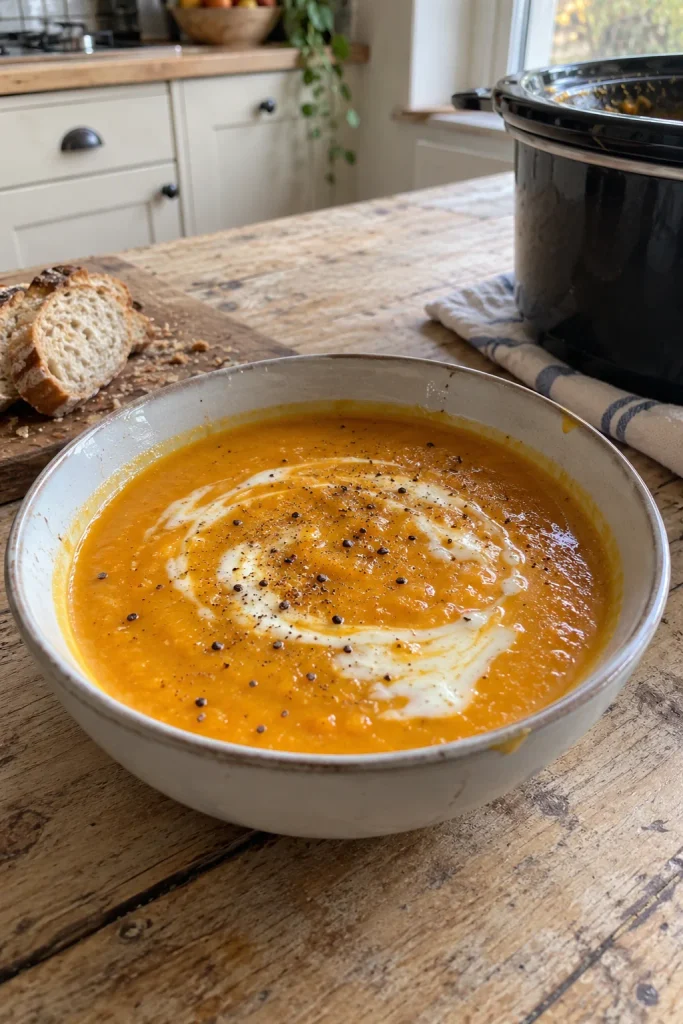
Butternut squash and apples cook down together into a naturally sweet, velvety soup with just a whisper of cinnamon — cozy without being heavy, and one of the few freezer soups that feels like dessert-adjacent comfort food.
Prep Time: 20 min | Cook Time: 6 hrs (slow cooker) | Total Time: 6 hrs 20 min | Servings: 6 | Difficulty: Easy
Ingredients
- 1 large butternut squash, peeled and cubed (about 6 cups)
- 2 apples, peeled and chopped
- 1 onion, diced
- 3 cups vegetable broth
- 1/2 tsp ground cinnamon
- 1/4 tsp ground nutmeg
- Salt to taste
- 1/4 cup heavy cream, for serving
Instructions
- Combine the butternut squash, apples, onion, vegetable broth, cinnamon, and nutmeg directly in a gallon freezer bag. Seal, removing excess air, and freeze flat for up to 3 months.
- On cooking day, thaw the bag overnight in the fridge.
- Empty into a slow cooker and cook on low for 6 hours, or high for 3–4 hours, until the squash is completely soft.
- Blend directly in the slow cooker with an immersion blender (or in batches in a countertop blender) until smooth. Season with salt to taste.
- Serve with a drizzle of heavy cream.
Good to Know
Pre-cubed squash from the grocery store works perfectly here if you want to skip the peeling and chopping step entirely.
Breakfasts & Muffins
15. Freezer Breakfast Burritos
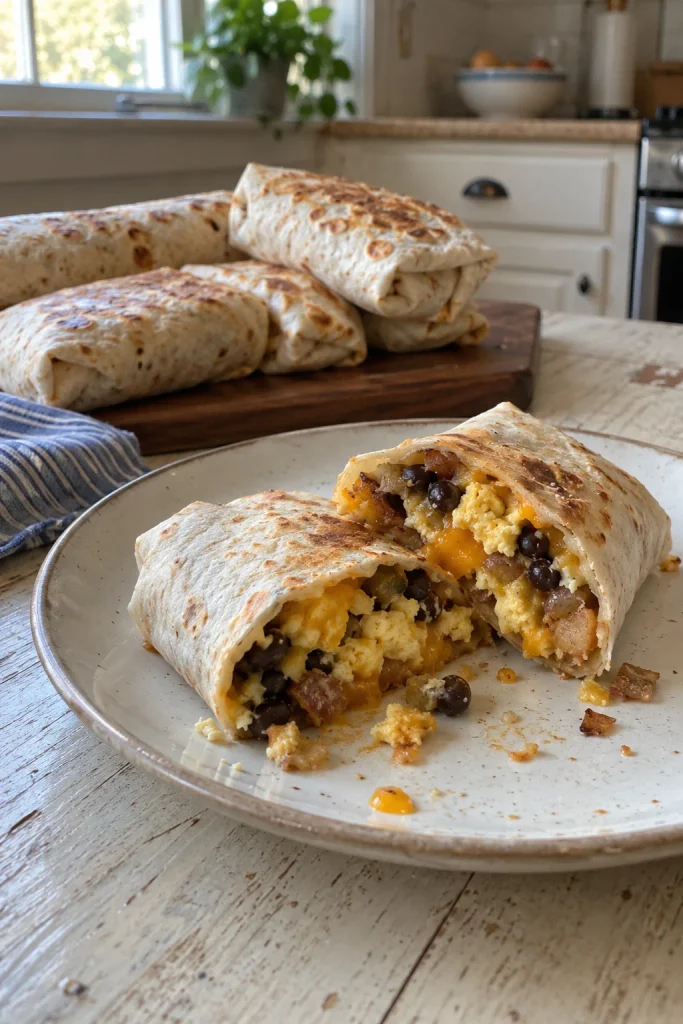
Scrambled eggs, savory sausage, melty cheese, and crispy potatoes wrapped tightly in a warm tortilla — this is the breakfast that turns a two-minute microwave reheat into something that actually feels like a real meal.
Prep Time: 25 min | Cook Time: 20 min | Total Time: 45 min | Servings: 8 burritos | Difficulty: Easy
Ingredients
- 10 large eggs
- 1/4 cup milk
- 1 lb breakfast sausage, cooked and crumbled
- 2 cups frozen hash browns, thawed
- 2 cups shredded cheddar cheese
- 8 large flour tortillas
- Salt and pepper to taste
Instructions
- Whisk the eggs with milk, salt, and pepper. Scramble in a skillet over medium heat until just set but still soft, about 5 minutes. Remove from heat.
- In the same skillet, crisp the hash browns over medium-high heat, about 8 minutes.
- Warm the tortillas slightly to make them pliable. Divide the scrambled eggs, sausage, hash browns, and cheese evenly among the tortillas.
- Fold in the sides and roll tightly into burritos. Wrap each individually in foil.
- Freeze the wrapped burritos in a single layer, then transfer to a freezer bag once solid, for up to 3 months.
- To reheat: unwrap the foil, wrap the burrito in a paper towel, and microwave on high for 2–3 minutes, flipping halfway, until heated through.
One-Handed Friendly
This is the ultimate hold-and-eat breakfast — no plate, no fork, and it’s just as good tucked in a stroller cup holder for a walk.
Why You’ll Love It
Individually wrapped portions mean you grab exactly one, which cuts down on food waste compared to reheating a whole casserole for a single serving.
16. Baked Oatmeal Cups
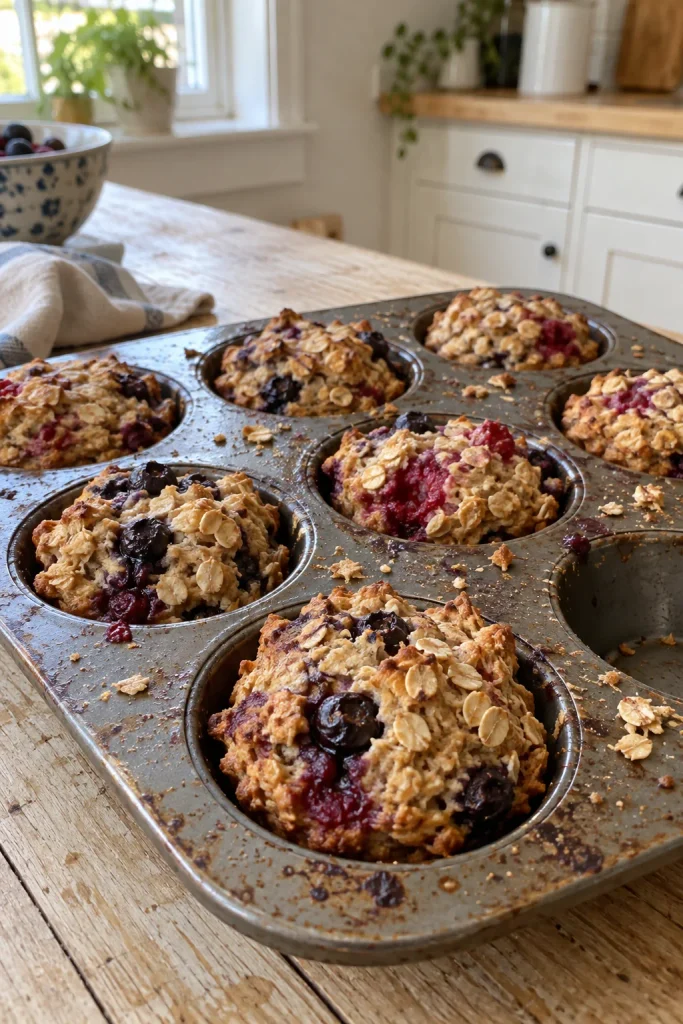
These aren’t muffins, but they hold together just like one — hearty rolled oats baked into individual cups with juicy blueberries and a hint of cinnamon, sturdy enough to eat straight from your hand while nursing.
Prep Time: 15 min | Cook Time: 22 min | Total Time: 37 min | Servings: 12 cups | Difficulty: Easy
Ingredients
- 2 1/2 cups old-fashioned rolled oats
- 1 tsp baking powder
- 1 tsp ground cinnamon
- 1/2 tsp salt
- 2 large eggs
- 1 3/4 cups milk
- 1/3 cup maple syrup
- 2 tbsp melted butter
- 1 tsp vanilla extract
- 1 cup fresh or frozen blueberries
Instructions
- Preheat the oven to 350°F and grease a 12-cup muffin tin well.
- In a bowl, mix the oats, baking powder, cinnamon, and salt.
- In a separate bowl, whisk the eggs, milk, maple syrup, melted butter, and vanilla.
- Combine the wet and dry ingredients, then fold in the blueberries.
- Divide the mixture evenly among the muffin cups. Bake 20–22 minutes, until set and lightly golden on top.
- Cool completely, then freeze individually on a tray before transferring to a freezer bag, for up to 3 months.
- To reheat: microwave a frozen cup for 45–60 seconds, or thaw overnight in the fridge and eat cold or warmed.
Substitutions
Swap blueberries for diced apple and extra cinnamon, or chopped banana and a spoonful of peanut butter, without changing the base recipe at all. A good mini muffin tin also works here if you’d rather make smaller, more grab-friendly portions.
17. Freezer-Friendly Banana Muffins
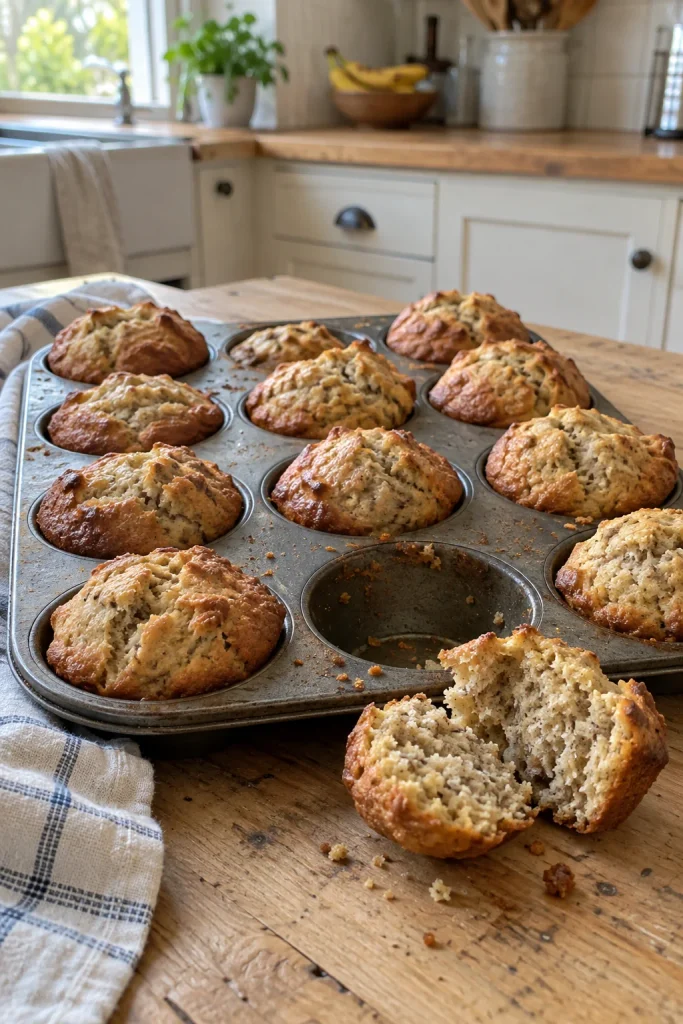
Overripe bananas mash into a naturally sweet, moist muffin batter that needs no frosting or fuss — just a soft, tender crumb and a deep banana flavor that only gets better after a day in the freezer and a quick thaw.
Prep Time: 15 min | Cook Time: 20 min | Total Time: 35 min | Servings: 12 muffins | Difficulty: Easy
Ingredients
- 3 very ripe bananas, mashed
- 1/3 cup melted butter
- 3/4 cup brown sugar
- 1 large egg
- 1 tsp vanilla extract
- 1 tsp baking soda
- 1/2 tsp salt
- 1 1/2 cups all-purpose flour
- 1/2 cup chopped walnuts (optional)
Instructions
- Preheat the oven to 350°F and line a 12-cup muffin tin with liners.
- In a large bowl, mix the mashed bananas with melted butter. Stir in the brown sugar, egg, and vanilla.
- Sprinkle the baking soda and salt over the mixture and stir in. Add the flour and mix just until combined. Fold in walnuts if using.
- Divide the batter among the muffin cups. Bake 18–20 minutes, until a toothpick inserted in the center comes out clean.
- Cool completely, then freeze individually on a tray before transferring to a freezer bag, for up to 3 months.
- To reheat: microwave a frozen muffin for 30–40 seconds, or thaw at room temperature for about an hour.
One-Handed Friendly
No wrapping, no reheating required if you’re in a hurry — this is grab-and-eat straight from the freezer bag once thawed.
One-Handed Snacks & Lactation-Friendly Bites
18. Lactation Energy Bites
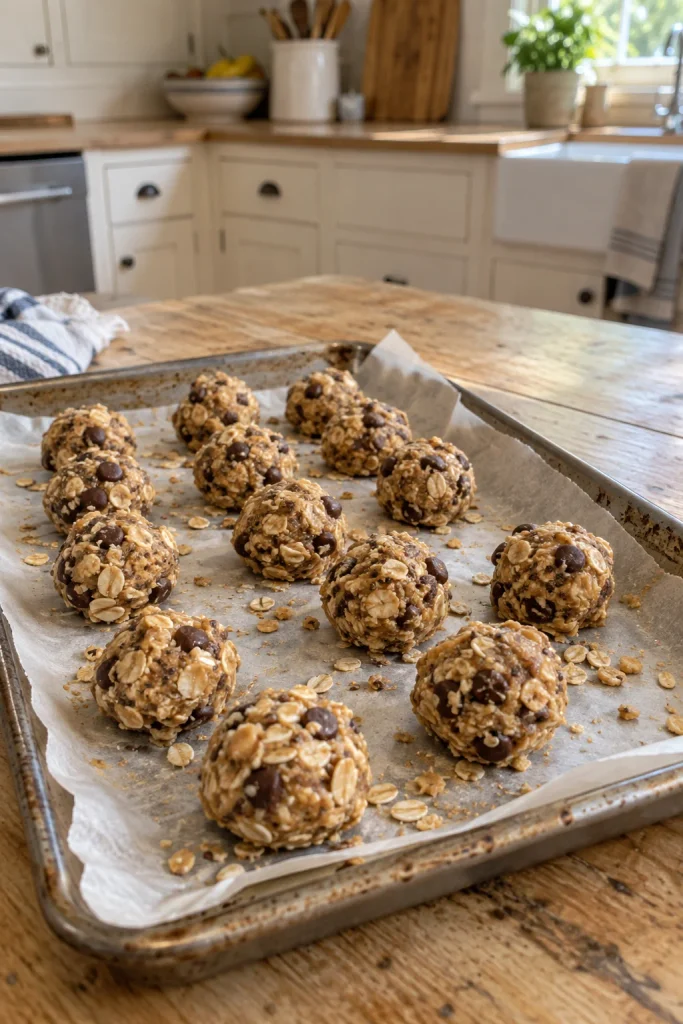
Rolled oats, flaxseed, and brewer’s yeast blend into a no-bake bite that’s genuinely craveable — chewy, lightly sweet, and studded with chocolate chips, so it tastes like a treat even though it’s built around ingredients that support milk supply.
Prep Time: 15 min | Cook Time: None | Total Time: 15 min plus chilling | Servings: 20 bites | Difficulty: Easy
Ingredients
- 2 cups old-fashioned rolled oats
- 1/3 cup ground flaxseed
- 2 tbsp brewer’s yeast
- 1/2 cup natural peanut butter
- 1/3 cup honey
- 1/2 cup mini chocolate chips
- 1 tsp vanilla extract
- Pinch of salt
Instructions
- In a large bowl, combine the oats, flaxseed, brewer’s yeast, and salt.
- Add the peanut butter, honey, and vanilla; stir until fully combined and the mixture holds together when pressed.
- Fold in the chocolate chips.
- Roll into 1-inch balls and place on a parchment-lined tray. Chill in the fridge for 30 minutes to firm up.
- Freeze the balls in a single layer on the tray, then transfer to a freezer bag, for up to 3 months.
- To eat: thaw a few at room temperature for 10–15 minutes, or eat straight from the freezer for a firmer, chewier bite.
Good to Know
Brewer’s yeast has a distinctly bitter, malty flavor — start with the amount listed and adjust to taste in your next batch if you’d like it milder. If you’re planning to nurse long-term, it’s worth reading up on the benefits of extended breastfeeding so you know what you’re working toward on the harder days.
One-Handed Friendly
These are designed to be eaten one-handed, no plate or napkin required, straight from a jar on the nightstand during a 3am feed.
19. Savory Ham and Cheese Hand Pies
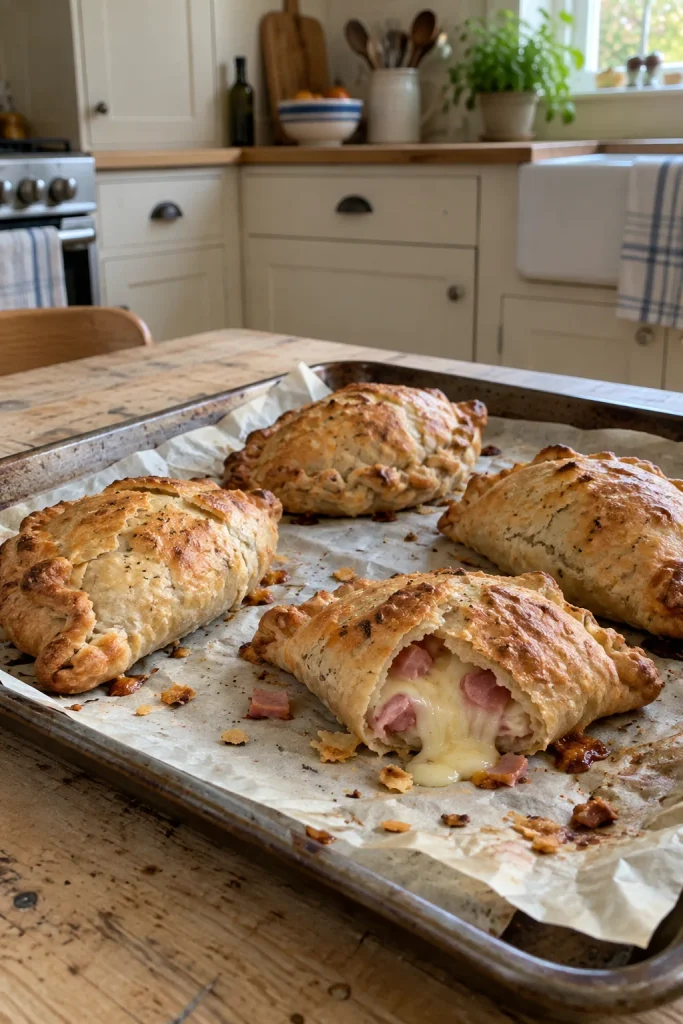
Flaky puff pastry folds around a filling of diced ham and melty cheese, crimped tight and baked until deeply golden — small enough to eat in a few bites with one hand, no fork required, no filling spilling out.
Prep Time: 25 min | Cook Time: 20 min | Total Time: 45 min | Servings: 12 hand pies | Difficulty: Medium
Ingredients
- 2 sheets puff pastry, thawed
- 1 1/2 cups diced ham
- 1 1/2 cups shredded Swiss or cheddar cheese
- 2 tbsp Dijon mustard
- 1 large egg, beaten (for egg wash)
Instructions
- Roll out the puff pastry sheets and cut each into 6 squares (12 total).
- In a bowl, mix the diced ham, cheese, and Dijon mustard.
- Spoon about 2 tablespoons of filling onto one half of each pastry square. Fold over into a triangle or rectangle and crimp the edges firmly with a fork to seal.
- Arrange on a parchment-lined tray and freeze unbaked in a single layer until solid, then transfer to a freezer bag, for up to 3 months.
- To bake: brush frozen hand pies with beaten egg and bake at 400°F for 20–22 minutes, until deeply golden, no thawing needed.
Best For
Visiting family members or older siblings who want something they can grab and eat without needing a full sit-down meal.
One-Handed Friendly
Small enough to eat in three or four bites, with no filling to drip — one of the tidiest options on this whole list.
20. Cheddar and Herb Freezer Biscuits
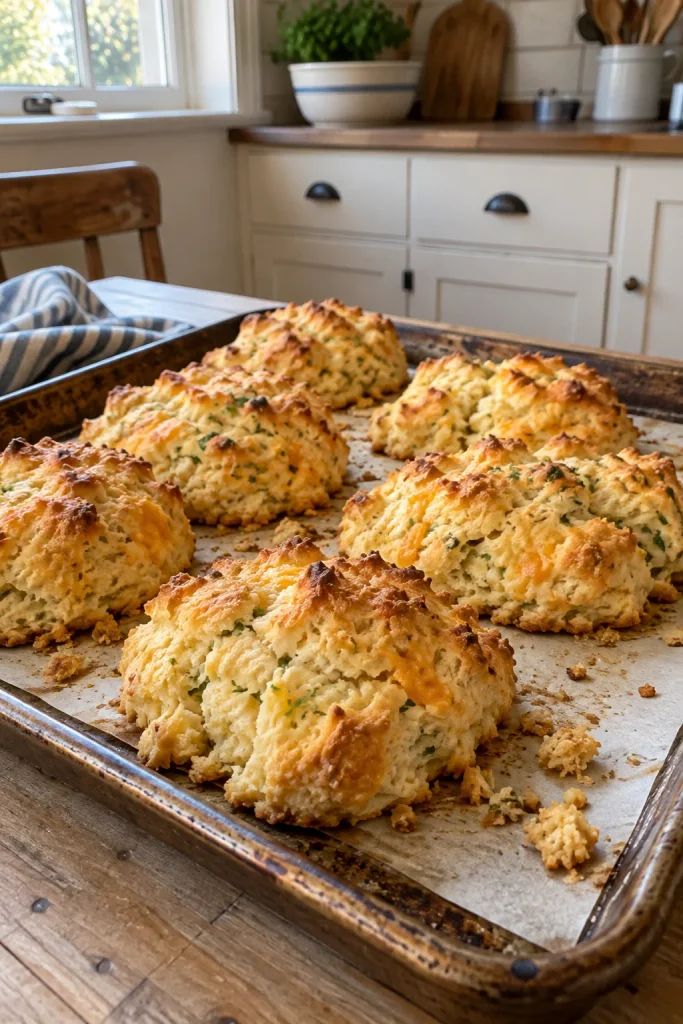
Buttery, flaky, and loaded with sharp cheddar and fresh herbs, these drop biscuits bake straight from frozen into a golden, craggy top with a soft, savory interior — sturdy enough to eat plain, straight from a napkin, no plate needed.
Prep Time: 15 min | Cook Time: 18 min | Total Time: 33 min | Servings: 12 biscuits | Difficulty: Easy
Ingredients
- 2 1/2 cups all-purpose flour
- 1 tbsp baking powder
- 1/2 tsp salt
- 3/4 cup cold butter, cubed
- 1 1/2 cups shredded sharp cheddar
- 2 tbsp chopped fresh chives or parsley
- 1 cup buttermilk
Instructions
- In a large bowl, whisk together the flour, baking powder, and salt. Cut in the cold butter with a pastry cutter or your fingers until the mixture resembles coarse crumbs.
- Stir in the cheddar and chives. Add the buttermilk and stir just until a shaggy dough forms — don’t overmix.
- Drop 1/4-cup portions of dough onto a parchment-lined tray, spacing them apart.
- Freeze the unbaked biscuits in a single layer until solid, then transfer to a freezer bag, for up to 3 months.
- To bake: place frozen biscuits on a lined baking sheet and bake at 400°F for 20–22 minutes, a few minutes longer than fresh dough, until golden on top.
Flavor Variation
Swap the cheddar for pepper jack and add a pinch of cayenne for a spicier version that pairs well with the White Bean and Kale Soup.
21. No-Bake Peanut Butter Protein Bars
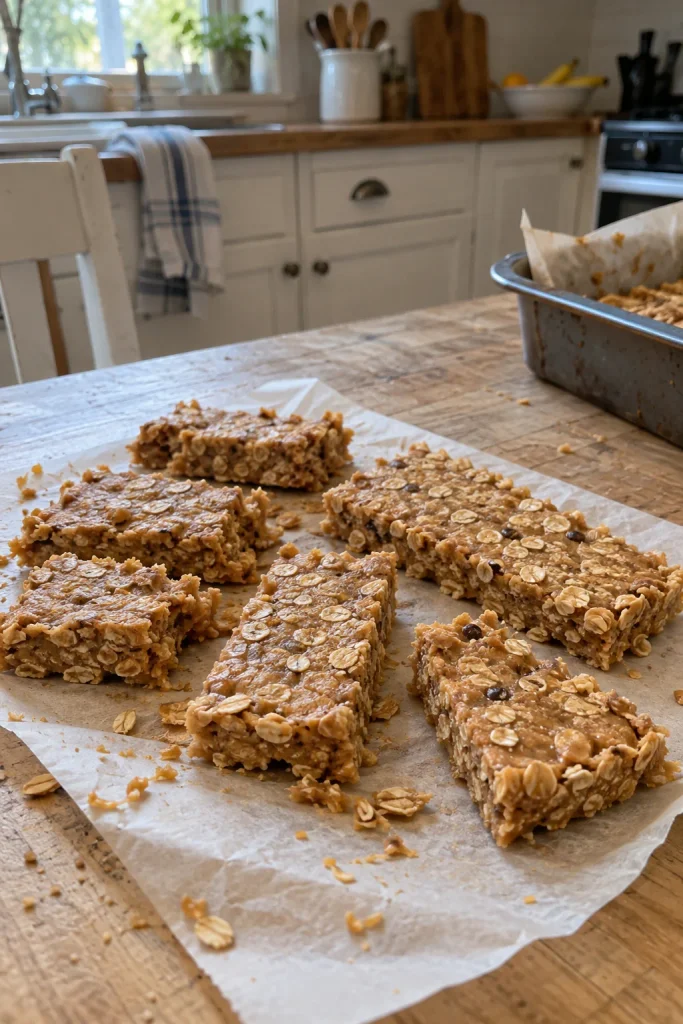
Dense, chewy, and rich with peanut butter, these no-bake bars come together in one bowl and firm up in the freezer into a sturdy, portable bar that holds up perfectly in a diaper bag or on a nightstand for a middle-of-the-night snack.
Prep Time: 15 min | Cook Time: None | Total Time: 15 min plus freezing | Servings: 12 bars | Difficulty: Easy
Ingredients
- 1 cup natural peanut butter
- 1/3 cup honey
- 2 cups old-fashioned rolled oats
- 1/2 cup vanilla protein powder
- 1/4 cup milk
- 1/2 cup mini chocolate chips
- 1/4 cup melted chocolate, for drizzling
Instructions
- Line an 8×8-inch pan with parchment paper.
- In a large bowl, stir together the peanut butter and honey until smooth. Mix in the oats, protein powder, and milk until fully combined and slightly sticky.
- Fold in the chocolate chips, then press the mixture firmly and evenly into the prepared pan.
- Drizzle the melted chocolate over the top. Freeze for at least 1 hour, until firm.
- Cut into 12 bars, wrap individually in parchment or plastic wrap, and freeze in a bag for up to 3 months.
- To eat: thaw a bar at room temperature for 10 minutes, or eat straight from frozen for an extra chewy, dense texture.
One-Handed Friendly
No utensils, no mess, and it survives being tossed in a bag — an easy grab on your way out the door for a pediatrician appointment.
Which Freezer Meal Should You Make First?
With 21 options, it helps to know where to start. This breaks the list down by what each recipe is actually best for.
| Recipe | Best For | Difficulty | Total Time |
|---|---|---|---|
| Cheesy Chicken and Rice Casserole | Feeding the whole family fast | Easy | 1 hr |
| Slow-Braised Chicken Enchilada Casserole | Bold flavor without extra effort | Easy | 55 min |
| Creamy Tomato Basil Soup | Eating one-handed | Easy | 50 min |
| Slow Cooker Beef and Barley Stew | Zero prep-day cooking | Easy | 8 hrs 20 min |
| Freezer Breakfast Burritos | Grab-and-go mornings | Easy | 45 min |
| Lactation Energy Bites | Middle-of-the-night snacking | Easy | 15 min plus chilling |
| Vegetarian Slow Cooker Chili | Feeding visiting guests | Easy | 6 hrs 15 min |
How to Store and Freeze These Meals
A little bit of system makes the difference between a freezer full of food you’ll actually eat and one full of mystery bags nobody wants to open.
Freeze soups, stews, and casseroles flat in labeled gallon freezer bags or a set of sturdy freezer-safe baking pans — flat bags stack like books and go straight from freezer to oven without a dish transfer. Glass containers work well for anything you plan to reheat directly in the microwave. Label every single item with the meal name, the date it was made, and simple reheating instructions, since your partner or a tired visiting relative should be able to find and heat something without asking you a single question.
Most of these meals hold their best texture and flavor for about 3 months in a freezer kept at 0°F, though they remain safe to eat beyond that window as long as the freezer has stayed consistently cold.
Frequently Asked Questions
How many freezer meals should I make before my due date?
Around 20 to 25 meals typically covers three to four weeks of dinners, which is usually enough to get through the hardest early adjustment period before you’re ready to cook again.
When should I start making freezer meals during pregnancy?
Start around 30 to 32 weeks and spread the prep across several sessions instead of one big weekend, so you’re not overexerting yourself late in pregnancy.
What foods don’t freeze well?
High-water-content foods like lettuce, raw potatoes, and cream-based sauces tend to turn watery, grainy, or separated once thawed and reheated.
How long do freezer meals last?
Most cooked freezer meals stay at peak quality for about 3 months, though they remain safe to eat beyond that as long as your freezer stays consistently at 0°F.
Can I freeze meals directly in a slow cooker liner?
Yes — many slow cooker liners are freezer-safe, letting you freeze the meal flat and drop it straight into the slow cooker later with no extra dishes.
Do I need a chest freezer to make this many meals?
Not necessarily — a standard freezer with organized bins can typically hold 20 or more meals if you use flat, stackable freezer bags instead of bulky containers.
What are the best one-handed freezer meals for newborn days?
Muffins, energy bites, hand pies, and hearty soups sipped from a mug are the easiest to eat one-handed while holding or nursing a baby.
Should I ask for freezer meals instead of baby shower gifts?
Many new moms find this far more useful postpartum than another outfit — it’s worth mentioning to close family or adding as a registry note.
What’s the best way to reheat a frozen casserole?
Thaw it in the fridge for 24 hours first, then reheat covered in the oven so the center warms evenly instead of drying out at the edges.
Can freezer meals help with postpartum nutrition?
Yes — prepping iron-rich, protein-forward meals ahead of time means you’re not relying on whatever convenience food is fastest during recovery. Pair them with a warm cup from our favorite teas for new moms, keep a reusable water bottle within reach for hydration, and check out our full guide to postpartum recovery tips for more on what your body needs in those first few weeks. A ready-made postpartum recovery kit is also worth having on hand alongside the freezer stash.
Related Reads
- Tips on Preparing for When Your Baby Comes Home
- Crucial Postpartum Recovery Tips for a Smooth Transition After Birth
- Best Tea for New Moms That Provide Nourishment
- 7 Powerful Benefits of Extended Breastfeeding Every Mom Should Know
- 25 Must-Read Parenting Blogs: Your Go-To Guide
- 200 Inspirational Quotes for Mom