30 Pink Winter Wonderland Baby Shower Ideas That Look Like Frosted Dreams
A pink winter wonderland baby shower combines blush florals, frosted white accents, twinkling lights, and icy textures to create an elegant, celebratory atmosphere. These ideas range from shoestring DIY ($250–450) to luxury full setups ($1,400+), all designed to feel warm, welcoming, and absolutely magical for expectant moms.
Heads up: This post may include affiliate links. As an Amazon Associate, I earn from qualifying purchases—at no extra cost to you. Full privacy policy and disclosure here.
The Blush Pink Base: Soft, Sophisticated Color Palettes
1. Blush, Ivory, and Sage—The Timeless Trio
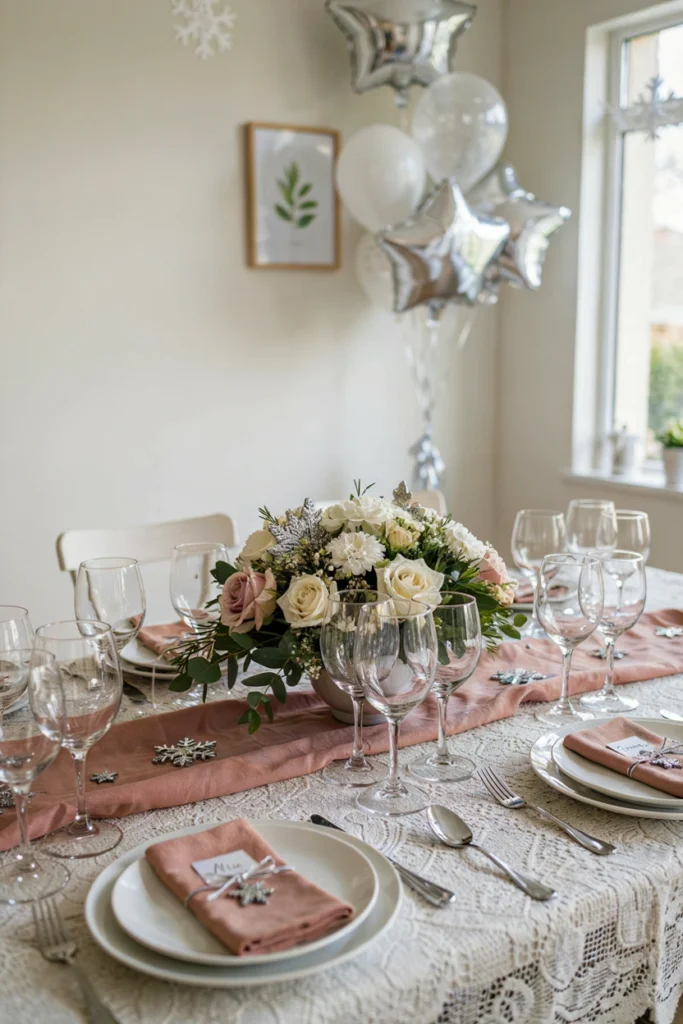
This might be the safest play in the winter wonderland playbook, and for good reason. Blush pink is romantic without being juvenile. Ivory keeps it crisp and fresh. Sage green adds depth and prevents the whole thing from reading as “too matchy.” The result feels like a grown-up celebration, not a baby shower designed by a toddler.
Styling Tips
- Use blush as your dominant color (linens, main florals), but keep it to maybe 40% of the palette. Let ivory and sage claim equal real estate.
- Mix matte and satin finishes in the blush tones—this prevents everything from looking flat.
2. Blush, White, and Champagne Gold—The Luxury Play
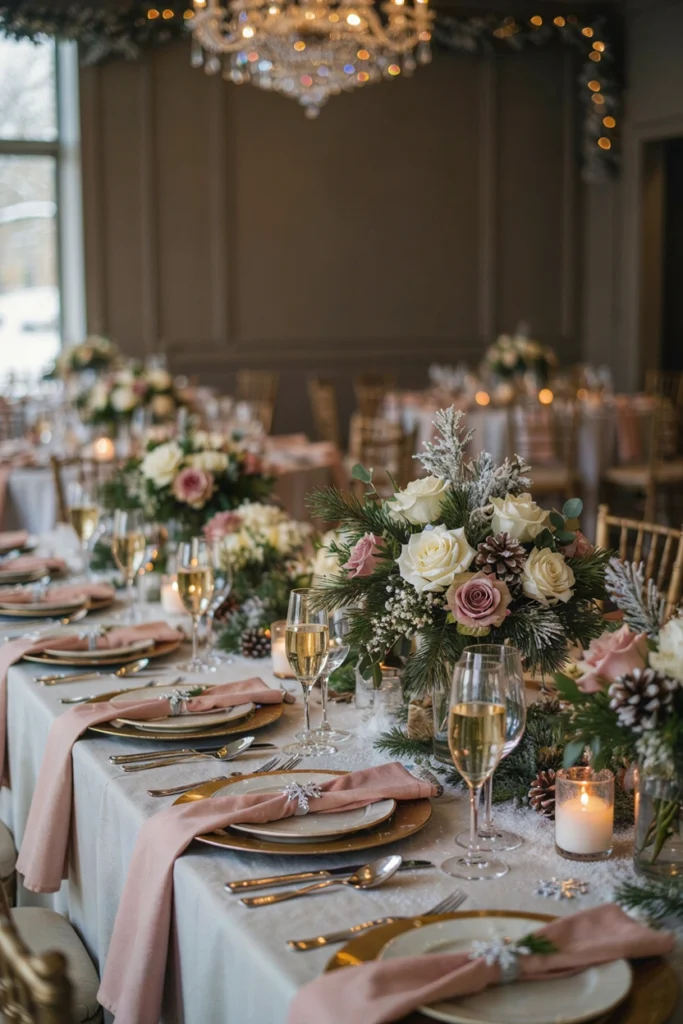
If you want to skew upscale without trying too hard, add champagne gold to your blush-and-white base. Gold doesn’t scream “formal wedding”—it whispers “we thought about this.” Pair it with clean white flowers, delicate gold flatware, and those blush napkins, and suddenly your dining room feels like a five-star hotel.
Color Pairing Strategy
- Gold works best in small doses: charger plates, utensils, or a single statement centerpiece with metallic touches.
- Avoid mixing gold and silver in the same space—pick one and commit.
3. Blush, Snow White, and Silver Sparkle—The Frosty Dreamscape
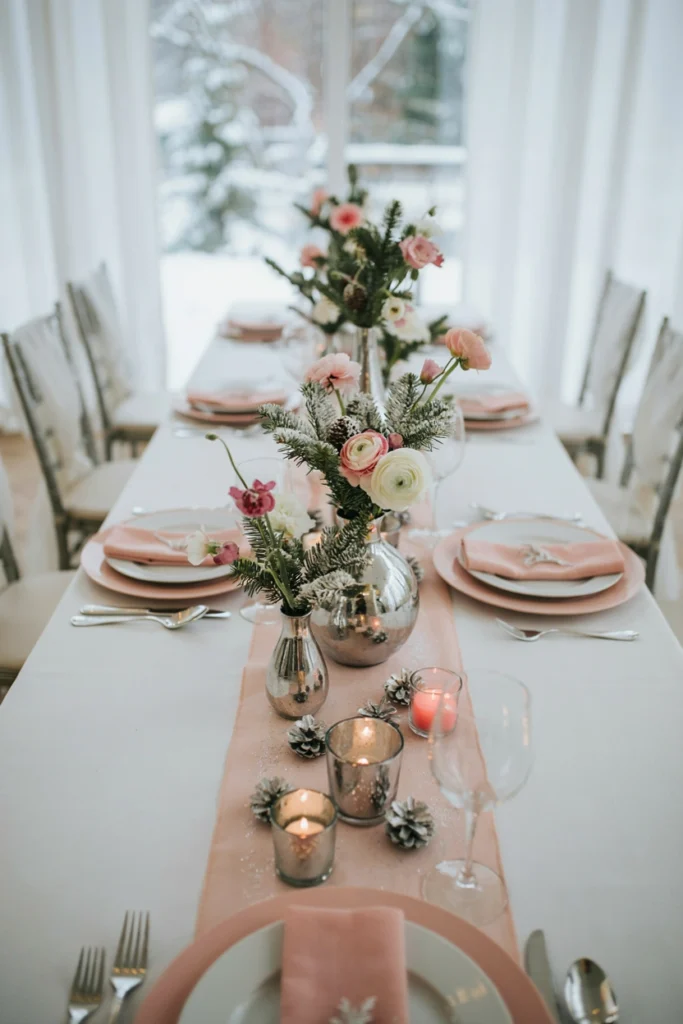
This is the version that says “winter wonderland” loudest. Snow white + silver + blush creates an icy, crystalline feel that actually makes sense for the season. It feels fresh, cool, and slightly ethereal—perfect if you want guests to feel like they’ve stepped into an enchanted forest.
Styling Tips
- Silver mercury glass (reflective, vintage-looking) beats shiny chrome every time—it feels more organic and less “metallic party.”
- Use the blush as a warm counterpoint to all that cool silver; it prevents the space from feeling cold or sterile.
The Florals: Bouquets, Arrangements, and Greenery Moments
4. Overflowing White Roses with Blush Accents
![A lush, abundant arrangement of white roses with touches of pale blush roses, baby's breath, and eucalyptus spilling from a tall clear glass vase. Garden-style, romantic, very full and generous.]](https://tiredmomsupermom.com/wp-content/uploads/2026/06/pink-winter-wonderland-baby-shower-14-683x1024.webp)
If you’re going to go big on florals (and honestly, this is where the magic happens), white roses are your power move. They’re classic, they’re winter-appropriate, and they feel expensive even at grocery store prices. Tuck in blush roses so they’re visible but not dominant, and greenery so the arrangement reads as organic, not stiff.
Styling Tips
- Overflowing arrangements (where some stems hang over the edge of the vase) feel more editorial and less “stiff floral shop.” Lean into that.
- Mix stem heights—some flowers tall, some short, some to the side. This creates movement and prevents the “pom-pom” effect.
5. Minimalist White Flowers in Gold-Rimmed Vases
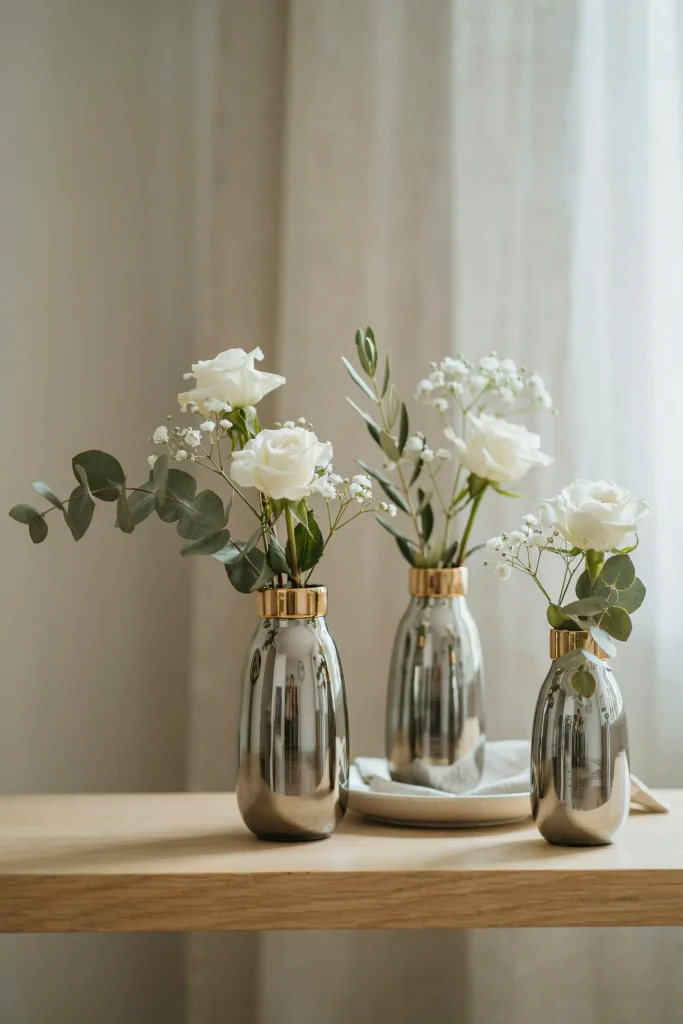
Not every table arrangement needs to be a full explosion. Sometimes elegant means selective. Three smaller arrangements with just 3–4 stems each, scattered across the table in gold-rimmed vessels, can read as more intentional (and more expensive-looking) than one giant centerpiece.
Styling Tips
- Odd numbers (3, 5) always feel more curated than even numbers (2, 4). Arrange your vases accordingly.
- Let negative space breathe. A few stems in a tall vase with lots of empty space above them reads as modern and intentional.
6. Garland-Wrapped Centerpiece with Blush Florals
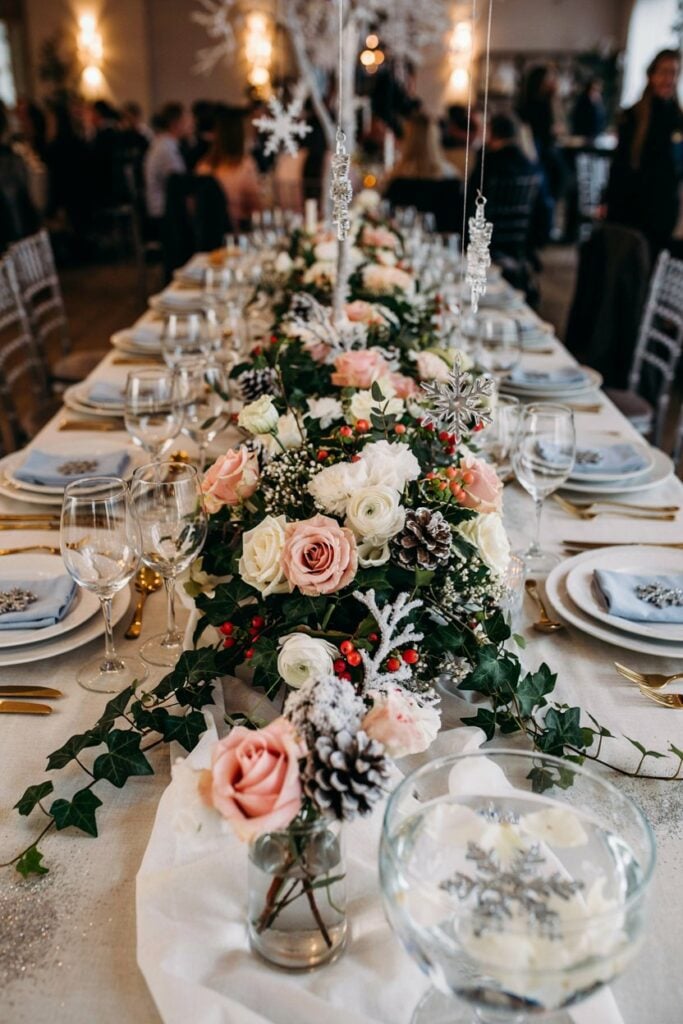
Low arrangements on long tables (instead of tall vases that block sightlines) are a catering-world secret that home entertaining needs to adopt. A garland of white and blush flowers running down the table’s center, dotted with taper candles, instantly transforms a plain table into something that feels curated and special.
Styling Tips
- Keep the arrangement low (under 12 inches tall so guests can see each other across the table).
- Use taper candles or tea lights nestled into the arrangement to add texture and warmth—especially important for a winter-themed event.
7. Potted Winter Plants as Living Centerpieces
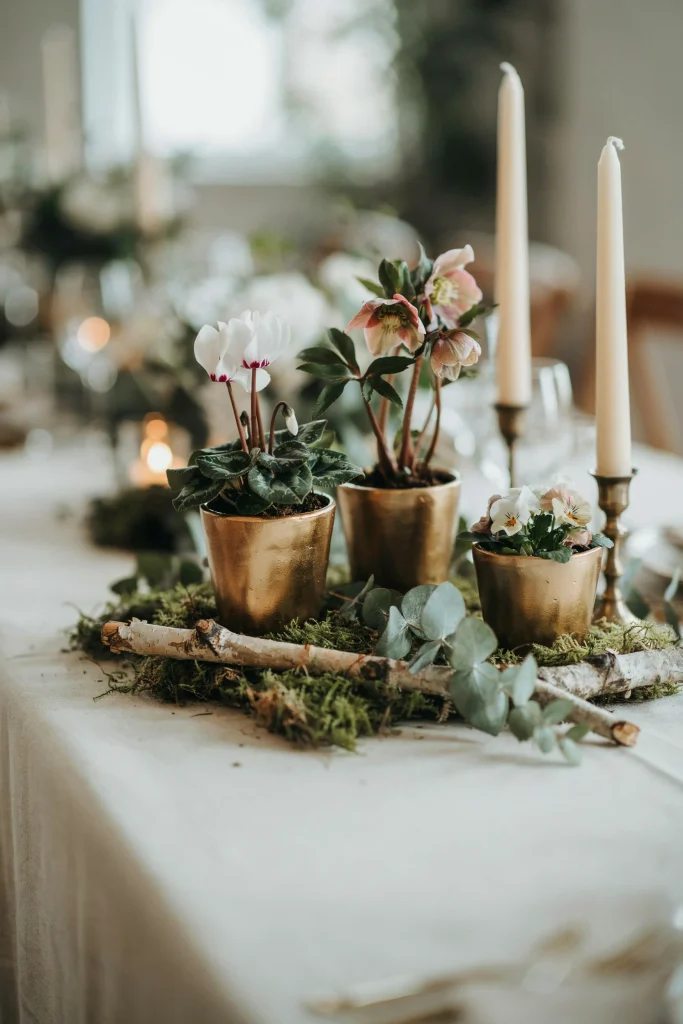
Fresh flowers are beautiful, but potted plants say “this is a gift for the home.” Guests can take them home and remember the shower every time they water them. White hellebores or winter-blooming cyclamen in blush pots or wrapped in cream linens feel special, seasonal, and very on-theme.
Styling Tips
- Wrap small terra cotta pots in cream or white linen and tie with a blush ribbon—instant upgrade.
- Add a hand-written tag with the plant’s name and care instructions; it adds a personal touch guests will remember.
8. Frosted Branches and Floating Flowers
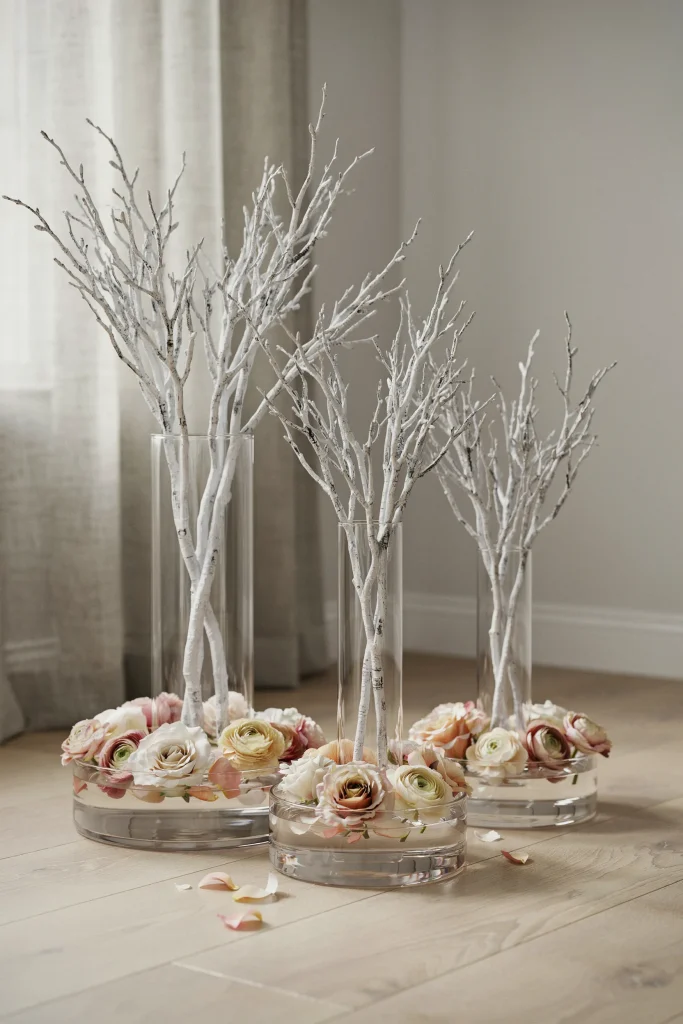
This is the kind of idea that looks expensive and complicated but is mostly spray paint and branches from your yard (or a neighbor’s). Frost-white branches create height and drama. Floating flowers underneath add softness and a “moment” of surprise when guests discover them.
Styling Tips
- Frosted branch spray (matte white, not shiny) is your friend. A light misting (not heavy coating) looks more natural and wintery.
- Floating flowers need stems removed and a shallow water source; reusable shallow bowls or vases work perfectly.
The Lighting: Twinkling, Glowing, Magical
9. Overhead Fairy Lights with Blush Fabric Drape
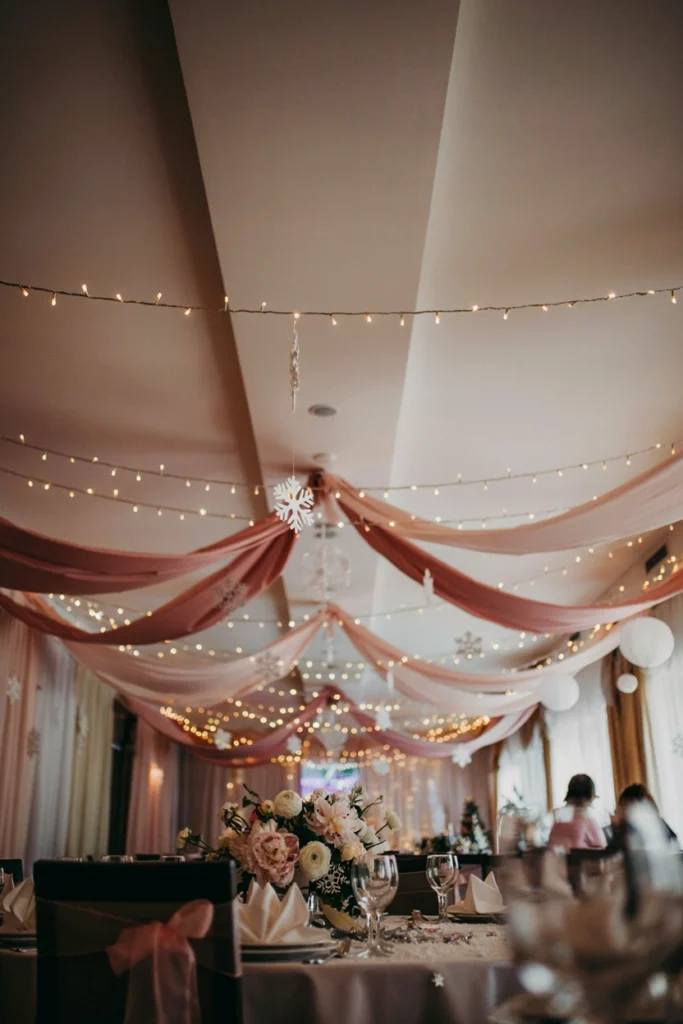
Lighting is the secret ingredient that turns a nice shower into a magical one. String warm-white fairy lights overhead (avoid blue “icy” lights—they’ll make the space feel cold, not cozy), then drape blush fabric loosely between them. It creates a soft, intimate canopy that says “fairy tale” without screaming it.
Styling Tips
- Warm white (2700K color temperature) always beats cool white or blue for this theme. Check the product description before buying.
- Drape fabric loosely and asymmetrically; geometric perfection kills the whimsical vibe.
10. Cascading String Lights with Hanging Greenery
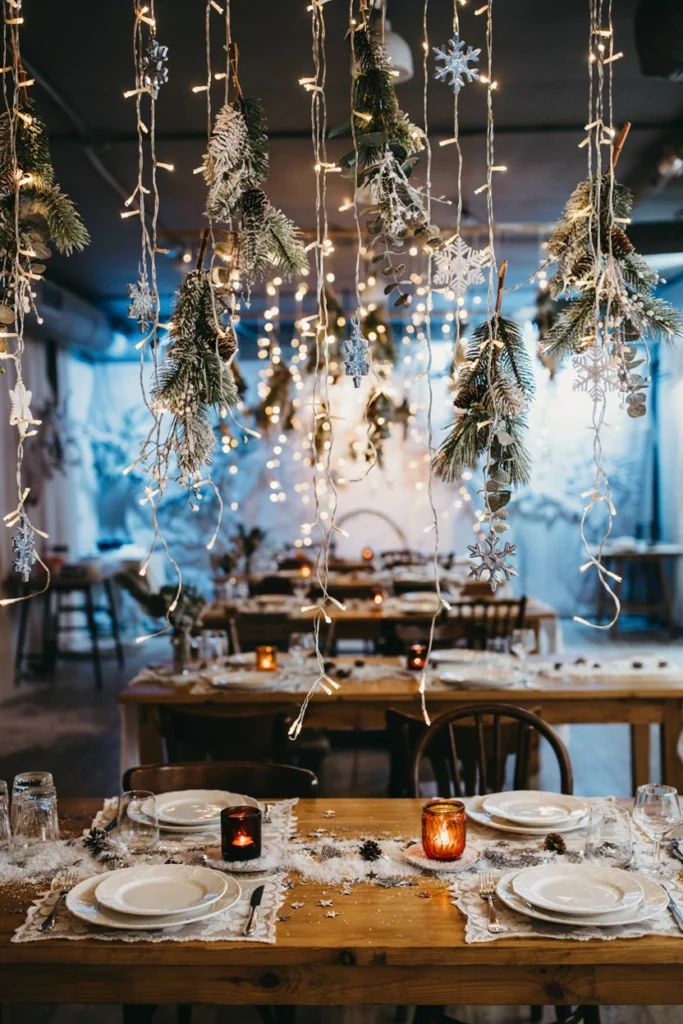
If overhead lights feel too precious, try draping fairy lights vertically around the space. Weave greenery (eucalyptus, ivy, ferns) between the strands so the lights peek through. It creates layers of texture and makes the space feel like a garden at twilight.
Styling Tips
- Test the layout with a phone flash or flashlight first—it helps you see where the light will hit before you commit.
- Secure lights and greenery loosely; the casual, organic look is the whole point.
11. Warm White Candles in Tiered Arrangements
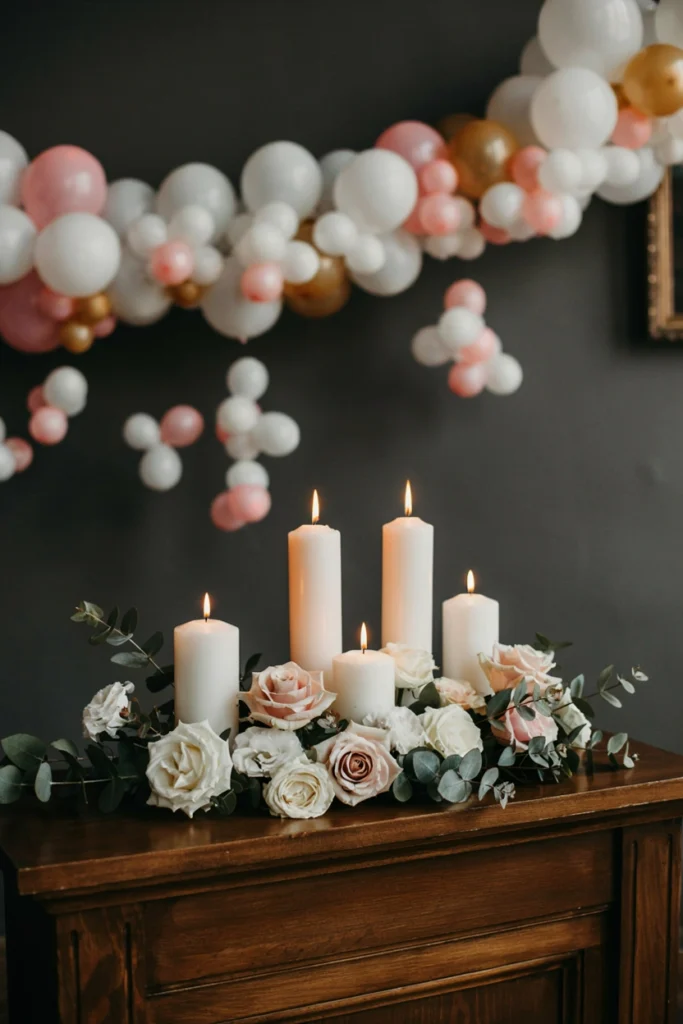
Tiered candle arrangements—where you group candles in clusters of different heights—create drama with minimal effort. Use white or cream pillar candles, and anchor them with low florals underneath so they feel intentional, not accident-prone.
Styling Tips
- Space pillar candles 3–4 inches apart so heat doesn’t interfere with wax or scent.
- Vary heights by at least 4 inches between candles so you actually see each flame.
Table Settings and Linens: Where the Texture Lives
12. Layered Linens: Blush Under Ivory
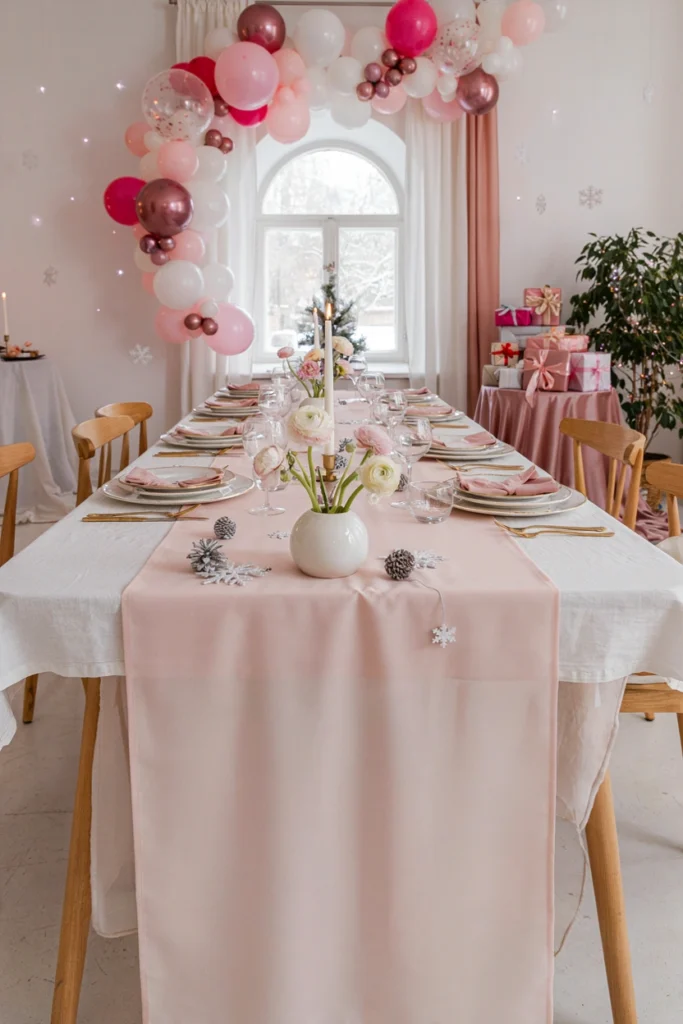
Don’t make tablecloth decisions complicated. Layering a blush runner on top of ivory linens is foolproof: it adds color without overwhelming, creates a visual center line (which feels intentional), and looks polished without fussiness.
Styling Tips
- Make sure your runner is centered and hangs evenly on both sides—asymmetry reads as accident, not design choice.
- If your linen doesn’t have finished edges, iron it well or it’ll look sad and rumpled.
13. Blush Linens with Ivory Napkins Tied with Greenery
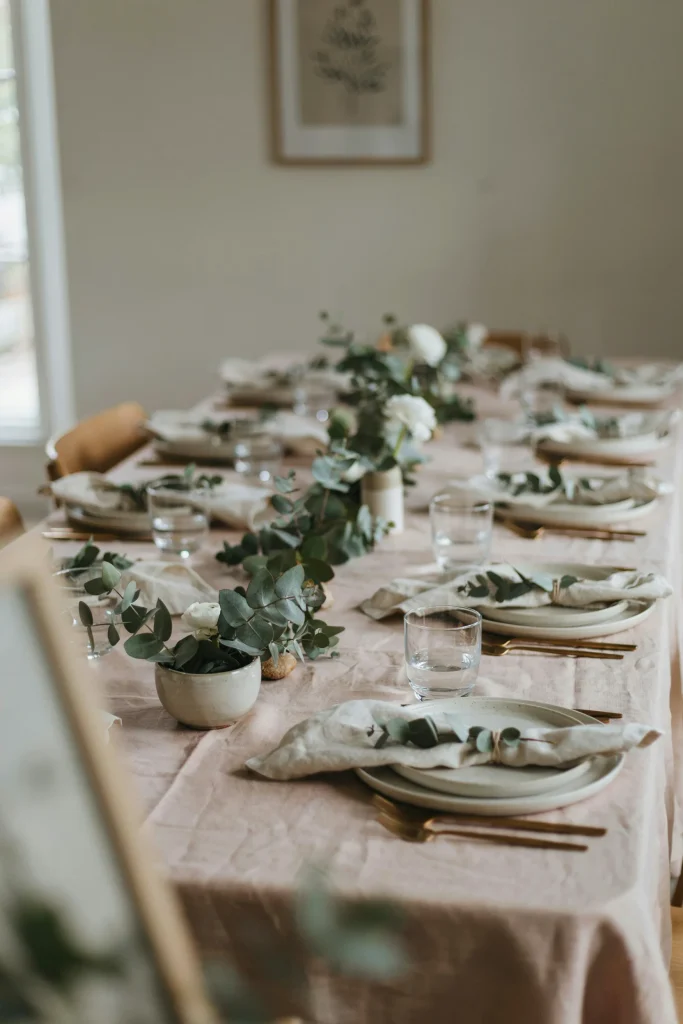
Here’s where you get creative without overcomplicating. Keep your linens simple (blush table, ivory napkins), then upgrade each napkin by tying it loosely with a sprig of fresh eucalyptus or greenery. It takes 30 seconds per napkin and transforms the entire place setting.
Styling Tips
- Tie the greenery loosely so it can flow naturally—tight knots look contrived.
- Use fresh greenery (eucalyptus, olive branches, fern) rather than dried; it smells better and looks fresher.
14. Velvet Linens for Texture and Depth
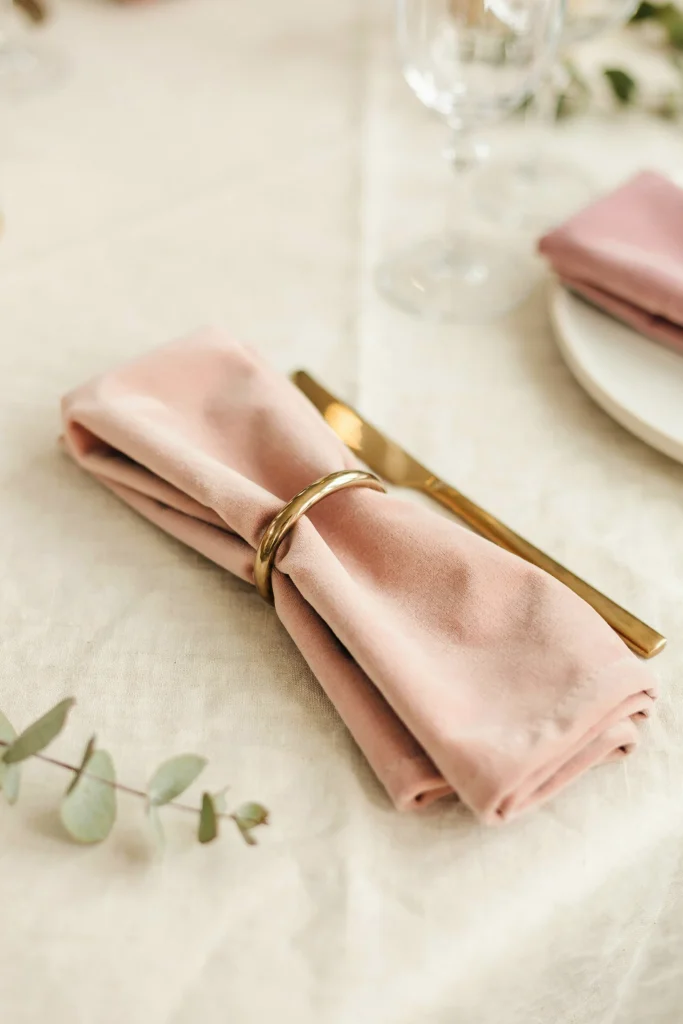
If your budget allows it, velvet linens (even if it’s just napkins) upgrade the entire aesthetic immediately. Blush velvet against white plates, white flowers, and silver accents feels expensive and deeply tactile. Guests will literally want to touch it.
Styling Tips
- Velvet shows every fingerprint and wrinkle, so handle carefully and let it breathe before the event.
- Pair velvet with shinier textures (satin napkins, silver accents) for visual contrast.
Desserts and Cakes: The Showstoppers
15. Naked Cake with Frosted Berries and White Florals
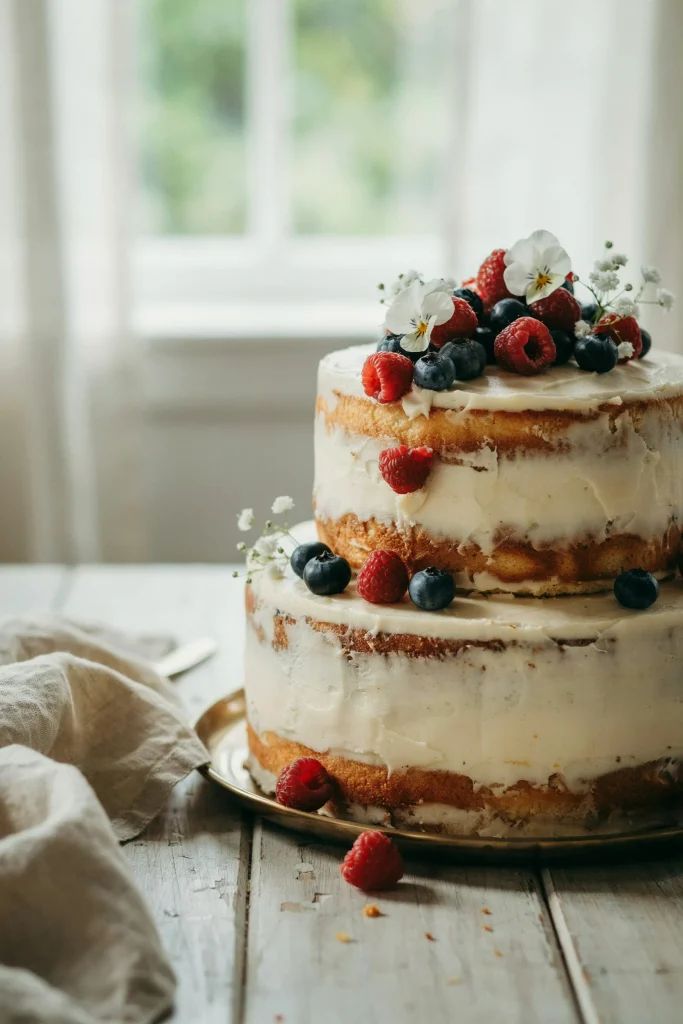
Naked cakes—where the frosting is minimal and cake layers show—are having a moment, and for good reason. They feel less formal than heavily frosted cakes, more organic, more real. Add fresh or frosted berries on top (the frosting adds texture and a fairy-tale vibe) and a few white flowers, and you’ve got your showstopper.
Styling Tips
- A glass cake stand elevates any cake visually and makes it the focal point of the dessert table.
- Frosted berries are easier than you think: toss berries in egg white, roll in sugar, let dry. It’s a pro-looking detail that takes five minutes.
16. White Buttercream Cake with Blush Ombre Effect
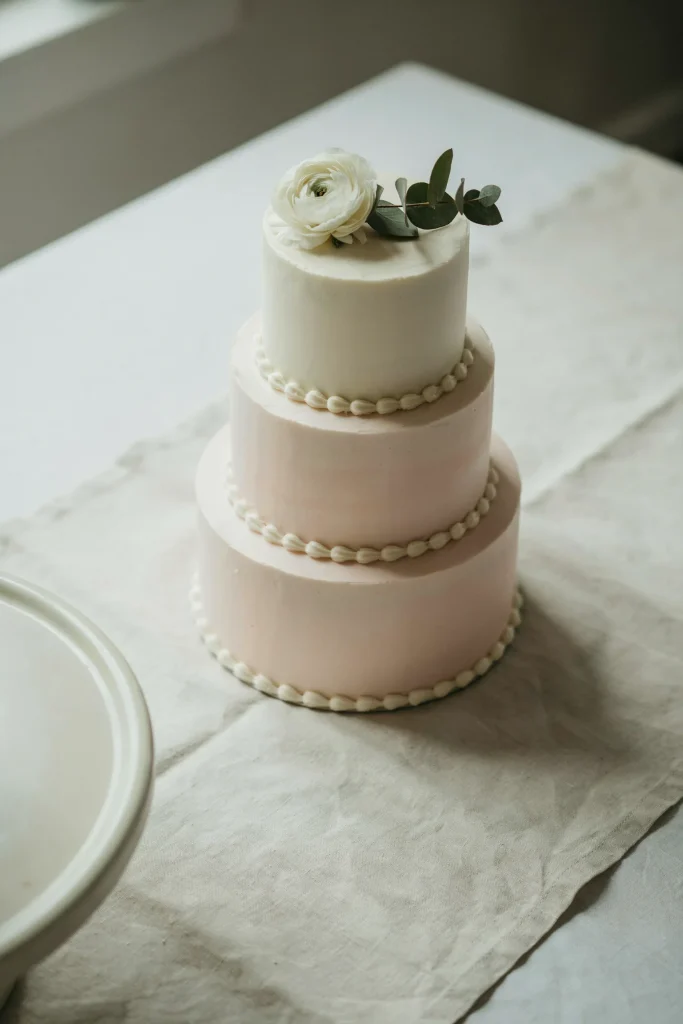
Ombre frosting (where one color gradually fades to another) looks complicated but reads as incredibly sophisticated. A white-to-blush fade captures the winter wonderland aesthetic without feeling heavy or juvenile.
Styling Tips
- Mix blush coloring into white frosting gradually (start with a toothpick amount and add as needed).
- Practice the fade technique on a test cake first; it’s easier than you think once you see it.
17. Simple White Cake with Metallic Gold Accents
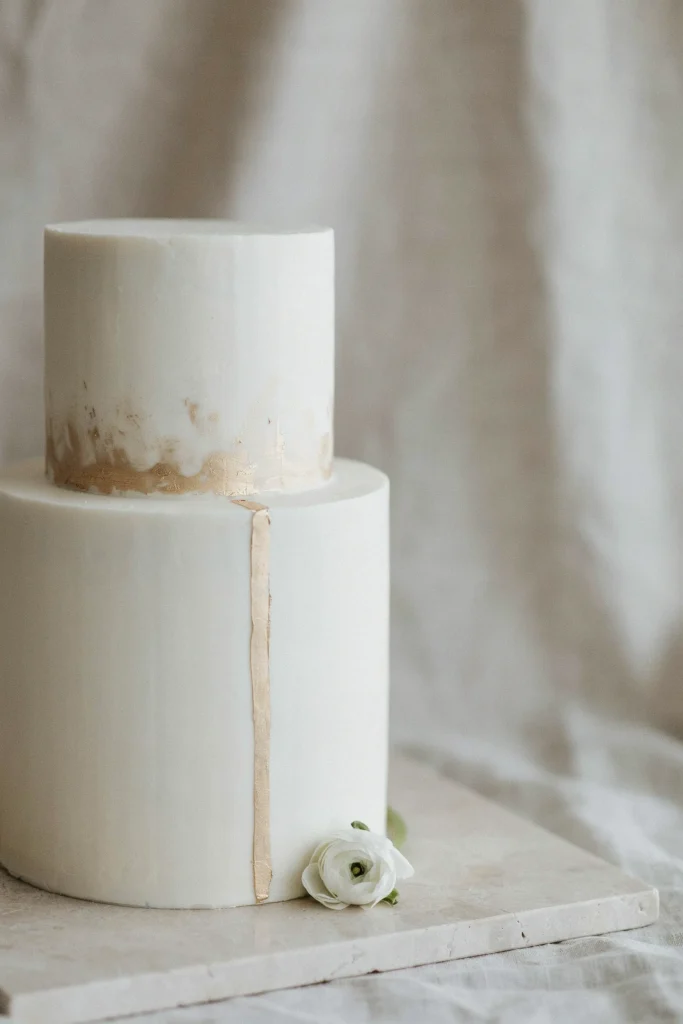
Not every cake needs to be decorated heavily. A perfectly smooth white cake with the barest touches of gold (gold leaf, gold dust, a thin gold painted line) reads as more expensive than an overcomplicated cake.
Styling Tips
- Food-grade gold leaf or luster dust (available at baking supply stores) is your friend for that high-end look.
- Less is more; a single stripe or light dusting of gold beats heavy coverage.
18. Mini Individual Cakes or Cake Pops with Winter Finishes
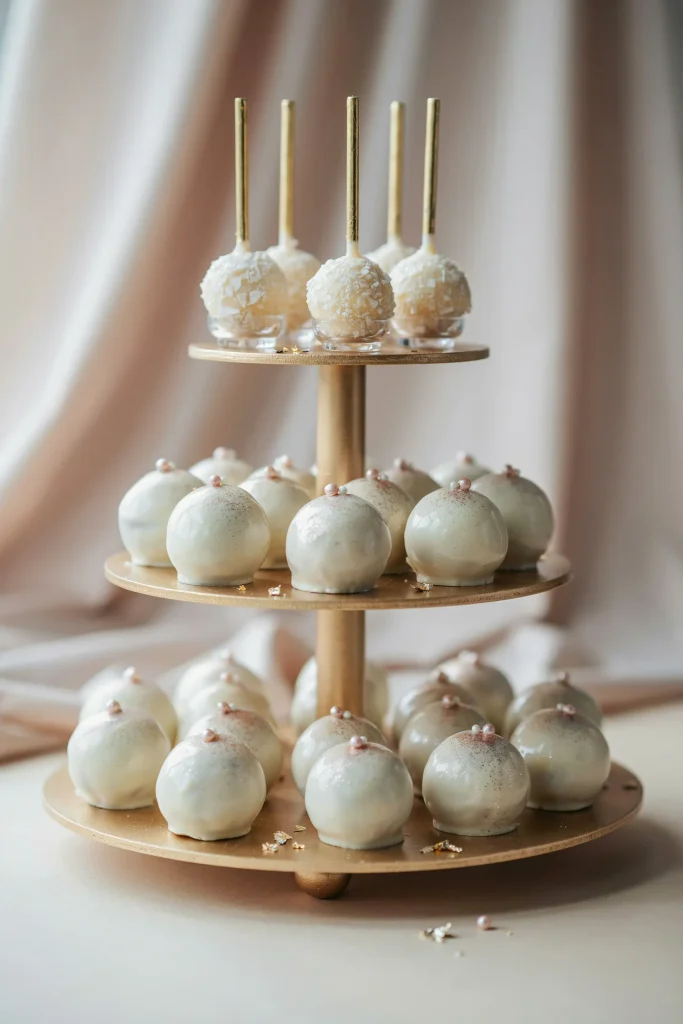
Individual cakes or cake pops eliminate the “cutting and serving cake” awkwardness and let guests feel special. Dip them in white chocolate, dust with pearl dust or edible glitter to mimic frost, and serve them on a tiered cake stand for maximum impact.
Styling Tips
- Pearl dust (edible) looks more sophisticated than rainbow sprinkles. It reads as “frosted” rather than “fun.”
- Display them on small dessert parfait cups or in individual cake boxes for a polished, bakery-quality look.
19. Macarons and Meringue Tower
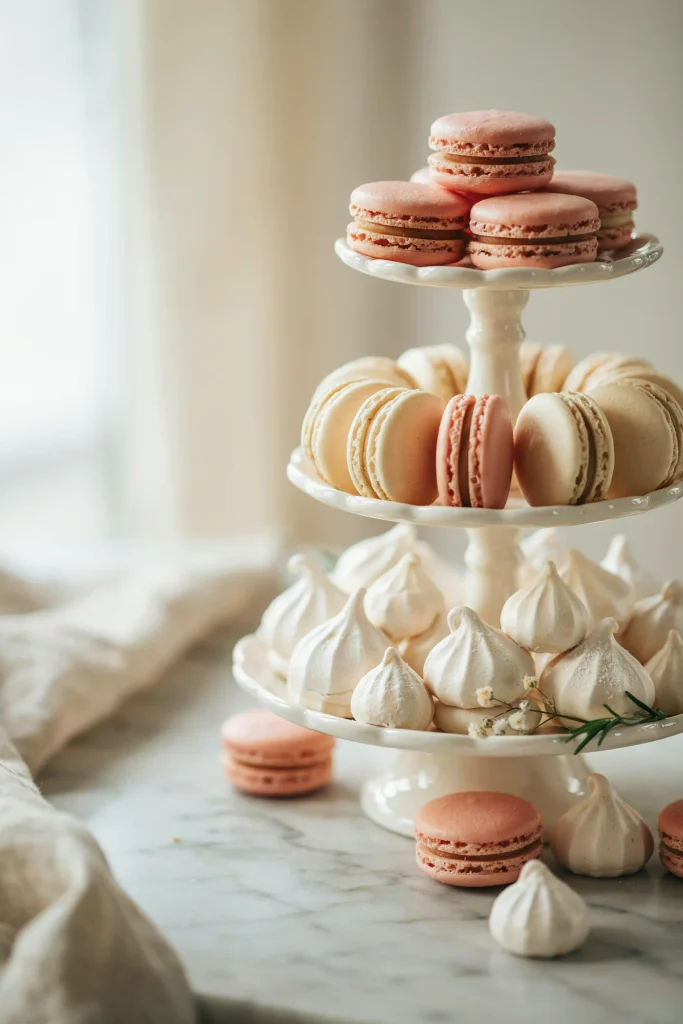
If baking a full cake feels overwhelming, go the French route. A tower of white and blush macarons, interspersed with white meringues, creates height, elegance, and a “moment” without the commitment of a full cake. Plus, they’re easier to execute than they look.
Styling Tips
- Tall glass cake stands make the tower feel more dramatic and visible from across the room.
- Tuck fresh white flowers between the macarons for softness and color variation.
Dessert Display and Beverage Stations
20. Hot Chocolate Bar with Blush Mugs and Toppings Station
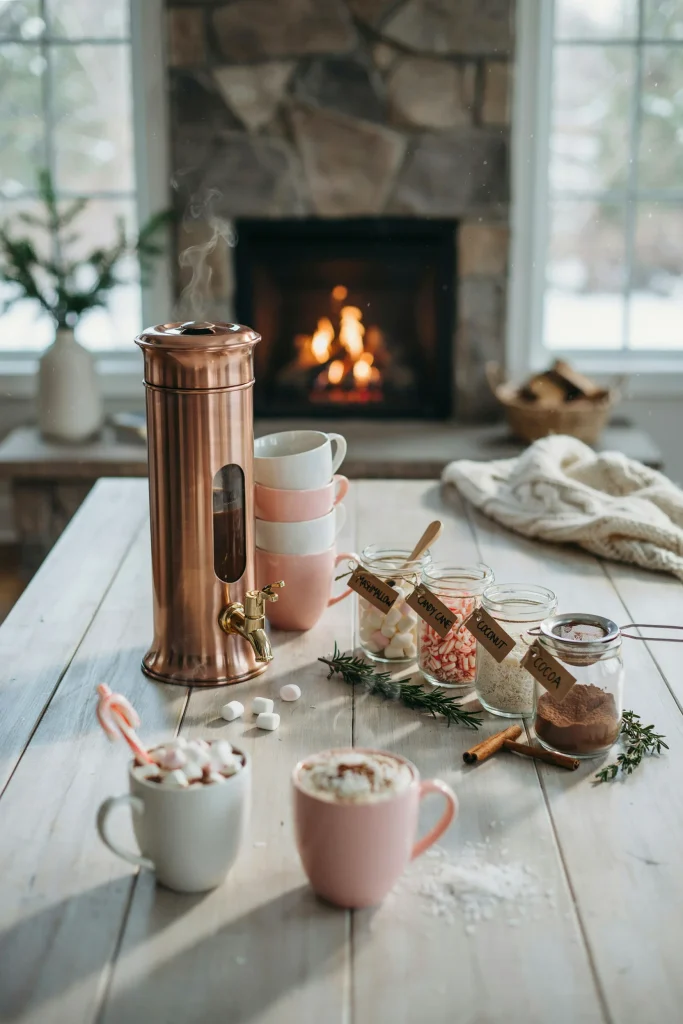
A hot chocolate bar is the winter-shower equivalent of a lemonade stand. Set up a large dispenser (or three if you’re expecting lots of guests), arrange mugs, and let guests build their own cups with toppings. It’s interactive, warm, and fits the theme perfectly.
Styling Tips
- Label each topping clearly with small chalkboard signs or printed labels so guests aren’t guessing.
- Provide small spoons for scooping toppings and offer both hot and warm milk options for flexibility.
21. Sparkling Champagne and Blush Beverage Moment
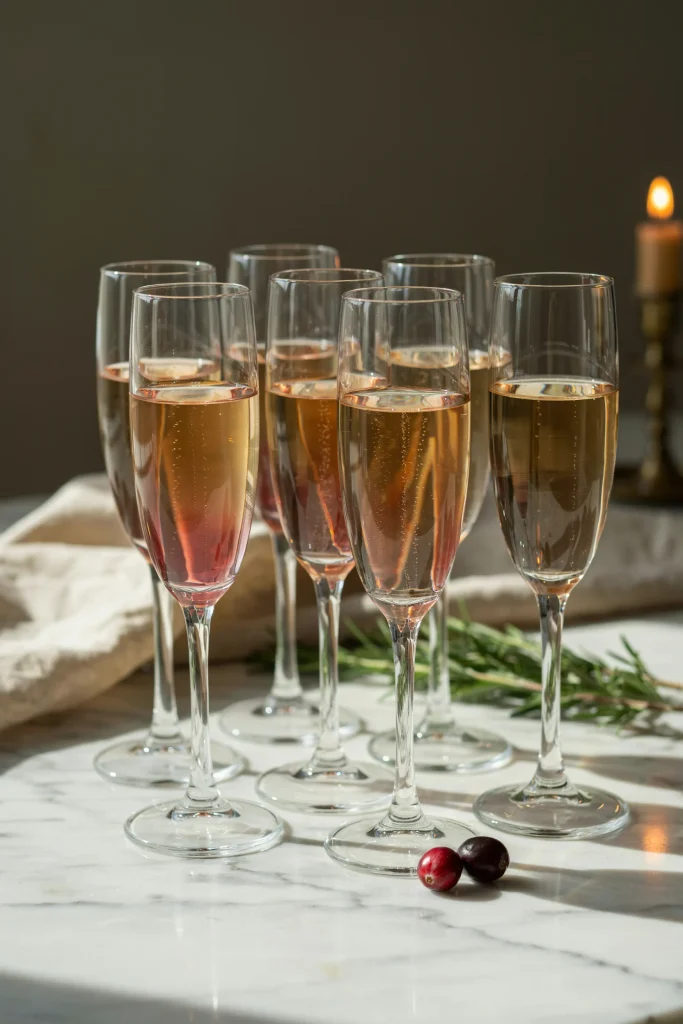
A single beverage served in matching glassware looks intentional and celebratory. Sparkling cider (non-alcoholic, shower-friendly) with a splash of cranberry juice in blush-toned champagne flutes creates a color moment that looks expensive and thoughtful.
Styling Tips
- Blush or rose-toned champagne flutes elevate the entire aesthetic and mean you don’t need to add much garnish.
- Pre-pour the beverages so guests grab and go—less fussing, more celebrating.
22. Dessert Charcuterie Board with Sweets and Chocolate
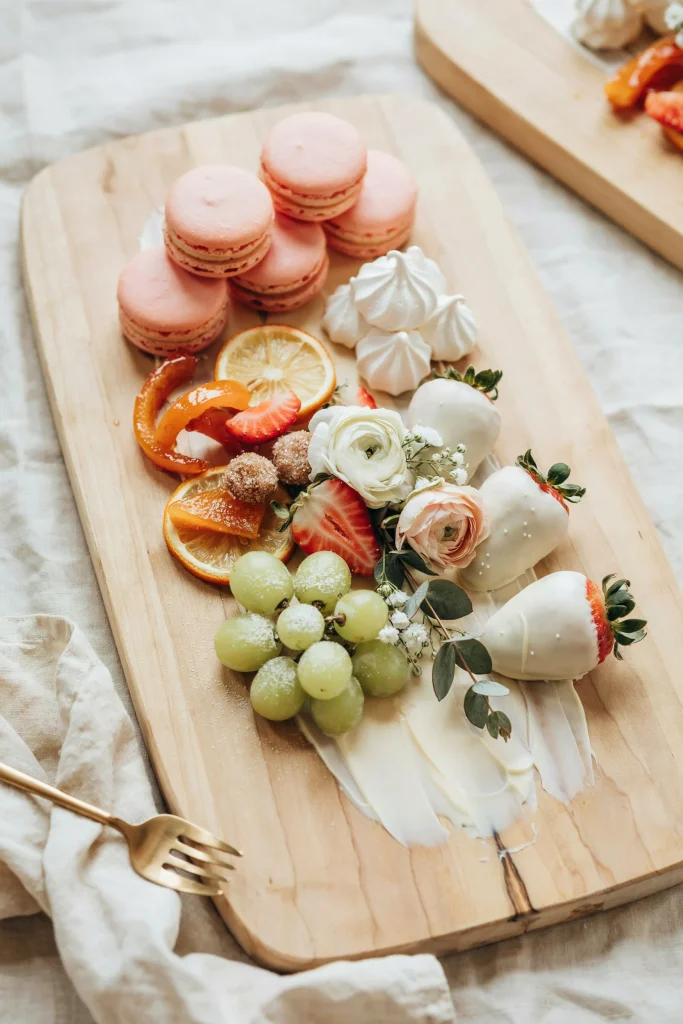
Charcuterie boards aren’t just for cheese anymore. A dessert version—white chocolate, blush macarons, white-dipped berries, candied fruit—gives you dessert abundance without the commitment of a full cake. It’s also endlessly customizable and looks generous without being wasteful.
Styling Tips
- A large wooden serving board provides the perfect neutral base for a colorful dessert spread.
- Arrange items by color for visual impact; cluster whites and blushes in different areas rather than scattering randomly.
Backdrops and Photo Moments
23. Tissue Paper Backdrop with Frosted Branches
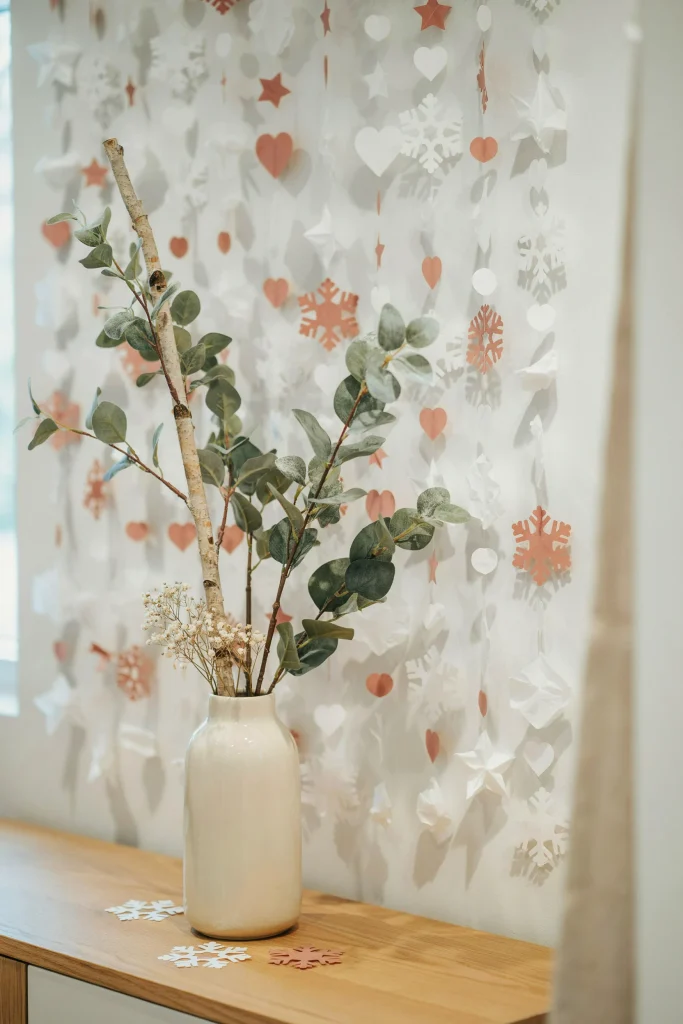
DIY backdrops are underrated. White and blush tissue paper snowflakes, hearts, or stars, layered on a blank wall, cost almost nothing and feel custom. Add frosted branches in front (or painted branches from your yard) and you have a photo backdrop worth saving.
Styling Tips
- Hot glue tissue paper directly to the wall (it won’t damage paint) and overlap pieces for depth.
- Vary the size of your tissue shapes; large and small creates more visual interest than uniform sizing.
24. White Tulle and Floral Arch
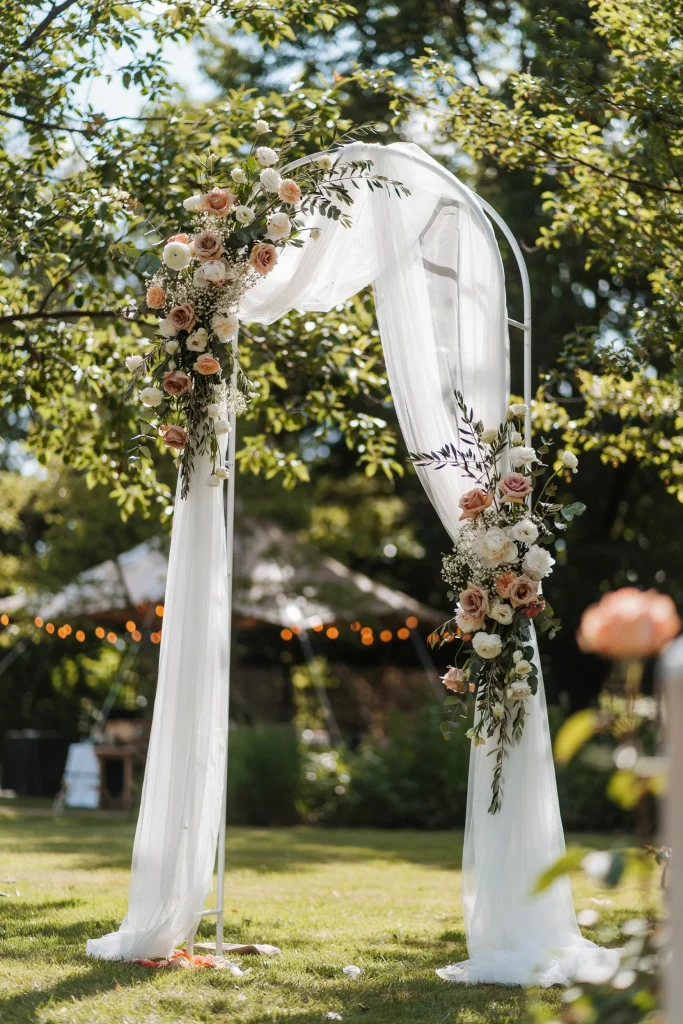
A tulle-and-floral arch is the shower equivalent of a wedding backdrop—it instantly signals “this is the photo moment.” White tulle (flowing, gauzy, romantic) with white and blush flowers threaded through feels elegant without being over-the-top formal.
Styling Tips
- Drape tulle loosely and asymmetrically; geometrically perfect tulle looks stiff and unnatural.
- Secure flowers with floral wire and floral tape; it’s more reliable than trying to tuck them directly into tulle.
25. String Lights and Eucalyptus Garland Wall
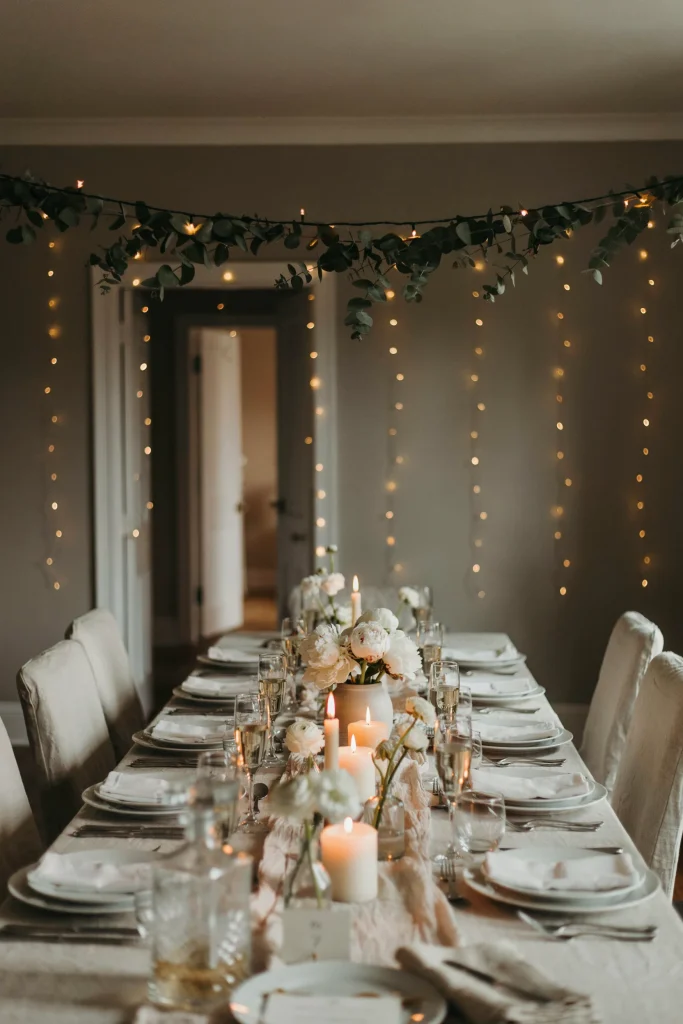
Not every backdrop needs to be ornate. A simple wall of warm white string lights with a single strand of eucalyptus garland draped horizontally looks effortlessly elegant and doesn’t compete with guests in the photo.
Styling Tips
- Warm white LED fairy lights on this kind of backdrop feel cozy without being overwhelming.
- Fresh eucalyptus stays looking good for hours; buy it the morning of the event for maximum freshness.
Complete Room Transformations and Full Setups
26. Intimate Home Dining Room Transformation
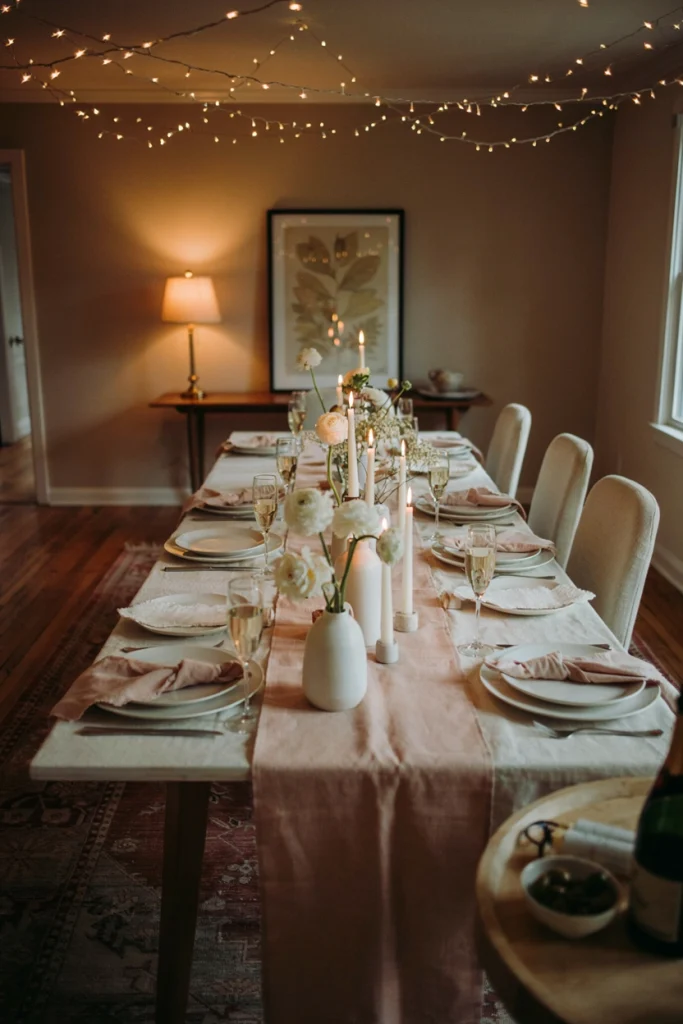
You don’t need a venue to pull off a winter wonderland shower. A home dining room with careful attention to lighting (fairy lights overhead), linens (blush and ivory), florals (white and greenery), and place settings (champagne flutes, white plates) transforms into something magazine-worthy. This is the shoestring-to-comfortable budget approach that works.
Styling Tips
- Clear the room of clutter first; a tidy space is half the battle.
- Use the ceiling as your canvas—overhead lighting transforms a space more than anything on tables.
27. Garden or Greenhouse Winter Wonderland (Outdoor Under Cover)
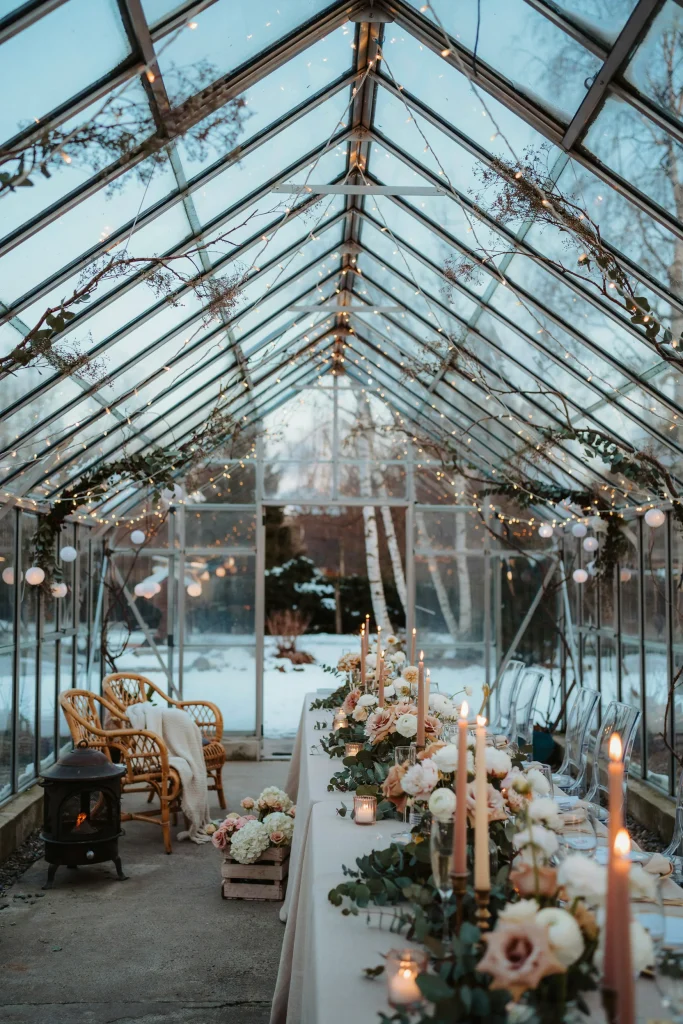
If you want outdoor beauty without freezing guests, a heated greenhouse or covered garden pavilion is perfection. The glass structure becomes part of your decoration, the plants provide natural greenery, and you get the benefits of a fresh, open feel without weather risk.
Styling Tips
- Reserve heating well in advance; this is non-negotiable for guest comfort.
- Decorate the glass itself (garland around the edges, frosted branches propped inside) to make the space feel intentional, not just “we’re in a greenhouse.”
28. Elegant Small-Scale Brunch Setup
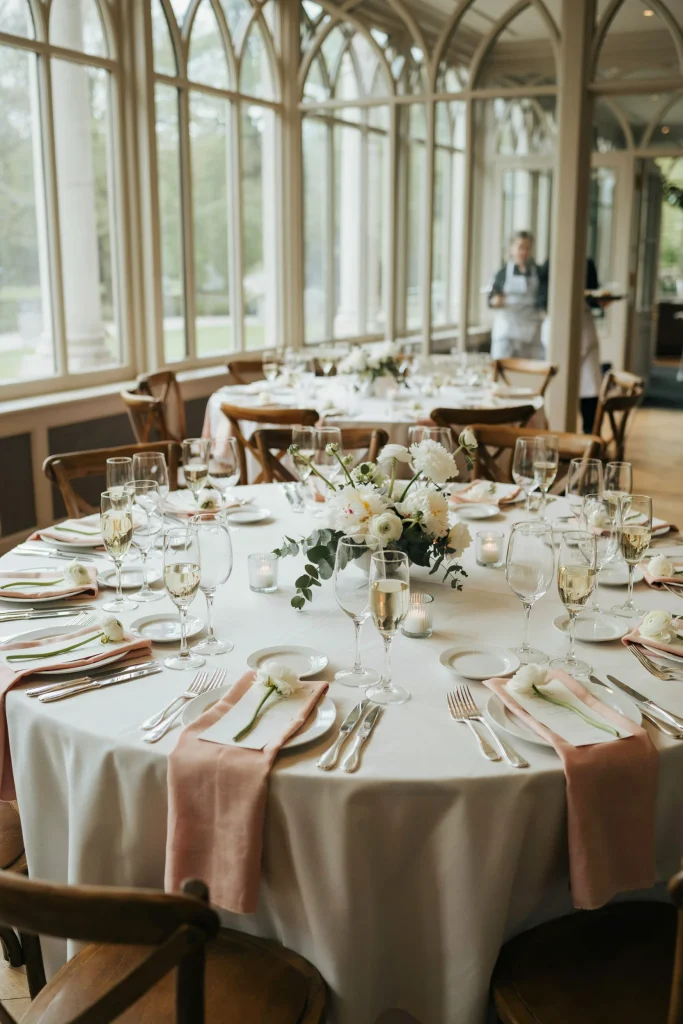
Winter wonderland doesn’t have to mean grand. An intimate brunch for close friends and family, with careful place settings, individual florals at each seat, and simple elegant food, can be just as magical as a large event. This is the “thoughtful” approach that guests remember.
Styling Tips
- Place a small white flower or sprig of greenery at each seat as a thank-you; it’s intimate and personal.
- Keep the menu simple but elevated: quiches, fresh fruit, pastries, and excellent coffee make more impact than complicated dishes.
29. Luxury Ballroom Winter Wonderland (When Budget Allows)
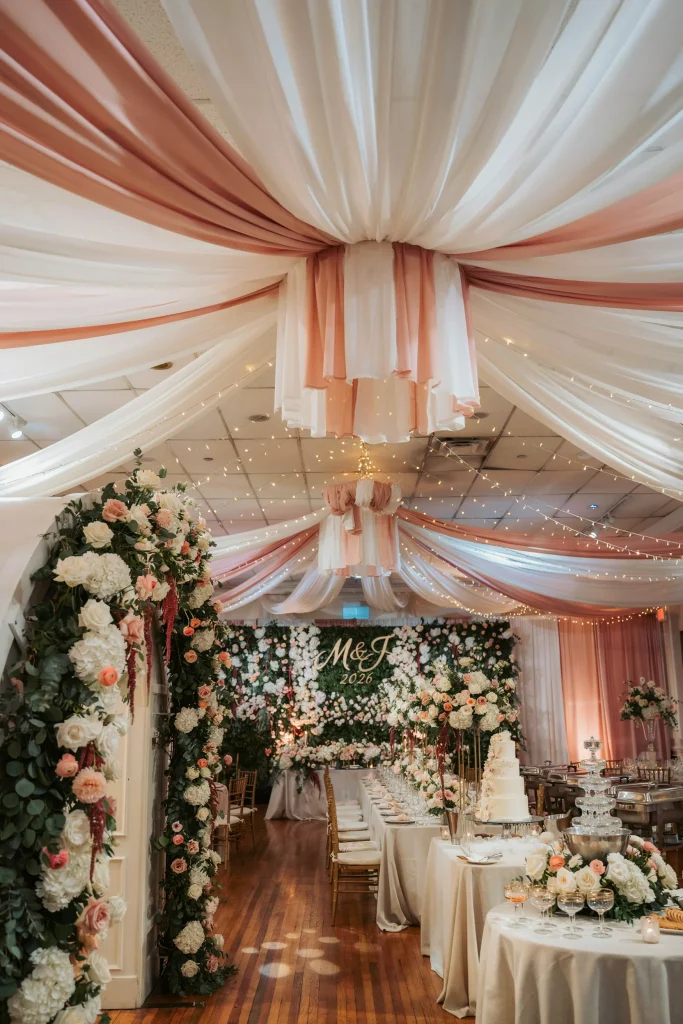
If you have the budget and want to go all-out, a professional venue with professional styling can transform a ballroom into a winter wonderland that takes your breath away. Tall floral installations, draped ceilings, professional lighting design, and coordinated catering create an event that feels like a dream.
What This Includes
- Professional florist (likely $800–2000+ for a full installation)
- Professional lighting design and uplighting
- Ceiling draping (white, blush, or combination)
- Custom signage and place cards
- Professional photo backdrop
- Catering coordinated with décor aesthetic
Making This Theme Work: Budget Breakdown and Timeline Tips
Now that you’ve seen 30 ideas, here’s the practical stuff: how much does this actually cost, and when do you need to start planning?
Budget-Tiered Breakdown
| Budget Tier | Florals | Lighting | Linens & Décor | Food & Cake | Total |
|---|---|---|---|---|---|
| Shoestring ($250–450) | Grocery store flowers, greenery from yard ($50–70) | String lights you own or borrow ($0–35) | White linens, blush napkins from home, DIY centerpieces ($35–60) | Grocery store cake, DIY desserts ($100–175) | $250–450 |
| Comfortable ($500–950) | Florist bulk order or high-end grocery florist ($175–300) | Fairy lights, candles, uplighting rental ($60–120) | Linen rental, quality napkins, place cards, small décor ($125–175) | Bakery cake, store-bought desserts, simple beverage station ($125–250) | $500–950 |
| Luxury ($1,400+) | Professional florist installation ($700–1,400) | Professional lighting design and uplighting ($350–600) | Venue’s linens, custom place cards, signage, full décor installation ($250–500) | Professional cake, catering with winter-themed menu ($350–700) | $1,400–3,000+ |
Planning Timeline
8–10 weeks before: Book florist, venue (if needed), and photographer. Start following Pinterest for inspiration and save ideas.
6–8 weeks before: Order linens if renting. Order any custom signage or printed materials. Confirm numbers and menu with caterer if using one.
4–6 weeks before: Confirm all vendor details. Order any decor items (lights, candles, vases) that aren’t local. Plan your color palette finalization.
2–3 weeks before: Confirm flower varieties and quantities with florist. Order any DIY supplies (tissue paper, floral wire, etc.). Test your recipes if baking.
1 week before: Confirm all vendor details one final time. Create any signage or labels if DIYing. Buy non-perishable flowers and greenery if ordering online.
2–3 days before: Pick up rentals (linens, candles, serving ware). Buy fresh flowers and greenery. Confirm all final details with vendors.
Day of: Set up at least 2–3 hours before guests arrive. Test lighting. Arrange flowers. Set tables. Take a breath. You’ve got this.
Related Baby Shower Ideas to Explore
- Pink Baby Shower Ideas (Beyond Winter)
- Woodland Baby Shower Themes & Ideas
- How to Throw a Magical Unicorn Baby Shower
- Ready to Pop Baby Shower Ideas
- How to Make a Baby Shower Balloon Arch (DIY)
- Baby Shower Planning FAQs
FAQ: Pink Winter Wonderland Baby Shower Questions
Can you do a winter wonderland theme in warmer months?
Absolutely. The aesthetic works year-round indoors. Focus on the color palette and florals (white roses and baby’s breath are available year-round), skip the “icy” visual cues (frosted branches, white spray-painted elements), and lean into the “elegant and whimsical” side instead. It becomes a “winter wonderland in spirit” rather than a literal season thing.
What’s the most cost-effective way to get white flowers?
Trader Joe’s and Whole Foods have beautiful flowers at half the florist price. Buy them 2–3 days before, condition them properly (cut stems at an angle, use flower food), and you’re golden. Pair 70% store-bought with 30% greenery from your yard for budget-friendly abundance.
How do you keep pregnant guests comfortable at a winter-themed shower?
The expectant mom is your priority. Make sure the space is warm (not cold or drafty), provide ample seating with good back support, avoid heavily scented candles that can trigger nausea, offer water constantly, and keep the event to 2–3 hours max. A winter theme doesn’t mean actual winter conditions.
Can you DIY the florals, or should you hire a florist?
You can absolutely DIY simple arrangements with grocery store flowers. If you want something statement-making (tall installations, elaborate centerpieces, specialized flowers), hire a florist. The middle ground: buy bulk flowers from a florist wholesaler and arrange them yourself—you get quality flowers at a discount without the design fee.
What’s the best way to display multiple desserts without it looking chaotic?
Height variation is key. Use tiered stands, cake stands of different sizes, and risers to create levels. Group items by color (whites together, blush together, metallics together) rather than scattering randomly. It organizes chaos into a curated dessert display.
Should you serve hot or cold beverages?
Both. Offer hot chocolate and/or tea (winter-appropriate, warm), plus sparkling cider or champagne (celebratory, seasonal). Let guests choose based on comfort and preference. Hot beverages especially make pregnant guests feel welcomed and cared for.
How many flowers do you actually need?
A rough rule: plan for 5–10 stems per table arrangement (if doing centerpieces) or 20–30 stems for a statement floral installation. More flowers never look bad—sparse flowers often look sparse. When in doubt, buy extra.
What’s the easiest DIY décor element for this theme?
Garland. Whether it’s fresh greenery garland (eucalyptus, olive branches, fern), white tissue-paper snowflakes, or even balloon garland kits, garland transforms a space faster than anything else. It’s also nearly impossible to mess up.
Do you need matching décor, or can it be eclectic?
Cohesion matters more than matching. Everything should feel like it’s part of the same color story (whites, blushes, ivories, greens, gold accents) even if individual pieces aren’t literally matching. A mix of textures (matte and shiny, rough and smooth) actually looks more sophisticated than perfectly matched everything.