50 Baby Shower Brunch Food Ideas
Savory bites, bakery sweets, fresh fruit, and a full drink station. 50 baby shower brunch recipes so the whole menu is basically done for you.
Heads up: This post may include affiliate links. As an Amazon Associate, I earn from qualifying purchases—at no extra cost to you. Full privacy policy and disclosure here.
Savory Bites & Mini Sandwiches
For more inspiration, check out our pink baby shower dessert table and party food appetizer ideas.
1. Mini Quiche Lorraine Bites
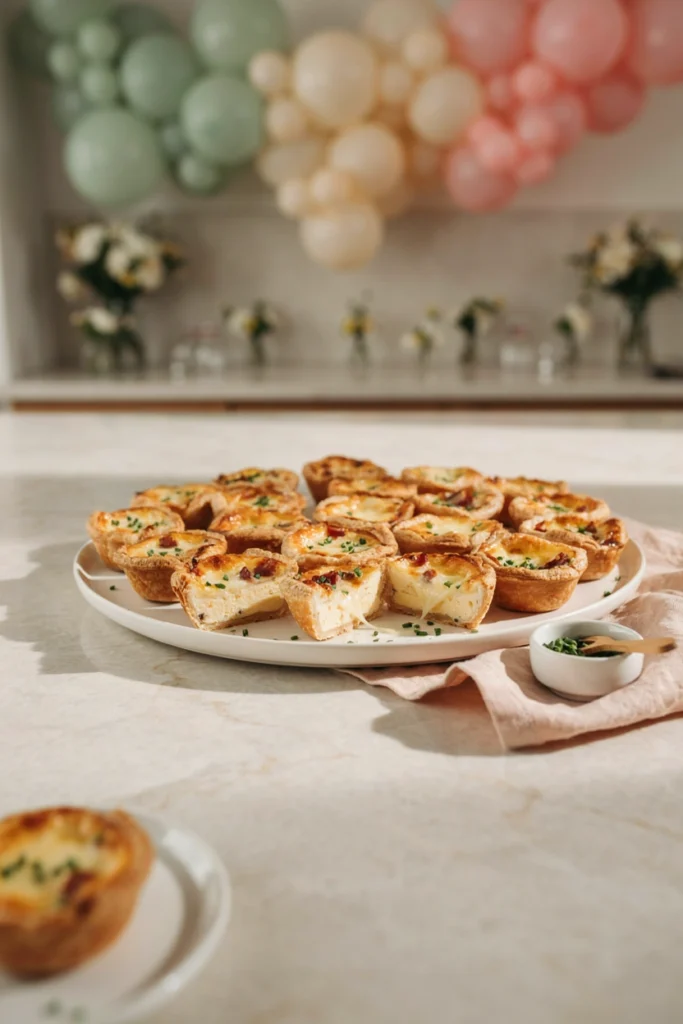
Time: 40 min | Makes: 24 mini quiches
You’ll need: frozen puff pastry, eggs, heavy cream, whole milk, bacon, shredded gruyere cheese, chives, salt, black pepper, ground nutmeg
Directions: Preheat the oven to 375°F and line a mini muffin tin, or work in two batches with a 12-cup tin. Roll the puff pastry out slightly and cut into 24 small squares, pressing each into a muffin cup to form a shallow shell. Whisk together the eggs, heavy cream, milk, salt, pepper, and nutmeg until smooth. Divide the cooked crumbled bacon and gruyere evenly among the pastry shells, then pour the egg mixture over the top, filling each cup about three-quarters full. Bake 18 to 20 minutes, until the tops are puffed and golden and the centers are just set. Cool in the tin 5 minutes, then transfer to a wire cooling rack and sprinkle with chives before serving.
2. Croissant Ham & Swiss Sliders
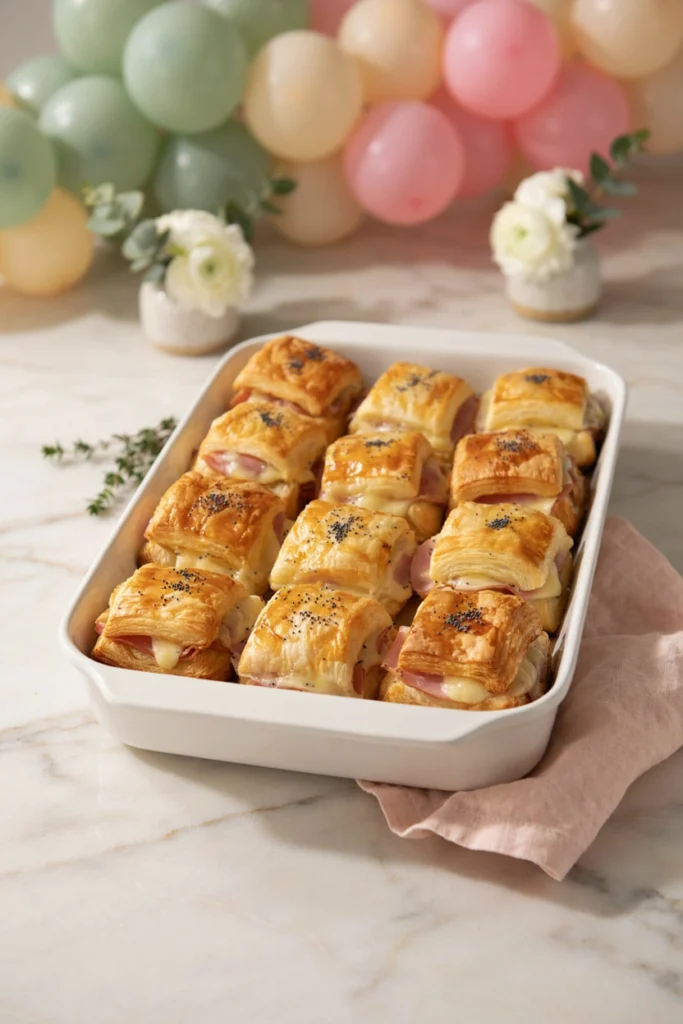
Time: 25 min | Makes: 12 sliders
You’ll need: mini croissants, deli ham, swiss cheese, unsalted butter, honey, Dijon mustard, poppy seeds, garlic powder
Directions: Preheat the oven to 350°F. Slice the croissants in half horizontally and arrange the bottoms in a single layer in a 9×13 ceramic baking dish. Layer each bottom half with a folded slice of ham, then a slice of swiss. Whisk together the melted butter, honey, Dijon, poppy seeds, and garlic powder. Set the croissant tops in place and brush the honey mustard glaze generously over the tops. Cover with foil and bake 8 minutes, then uncover and bake 2 more minutes, until the cheese is melted and the tops are lightly golden. Let rest 3 minutes before serving warm on a large breakfast serving board.
3. Caprese Skewers with Balsamic Drizzle
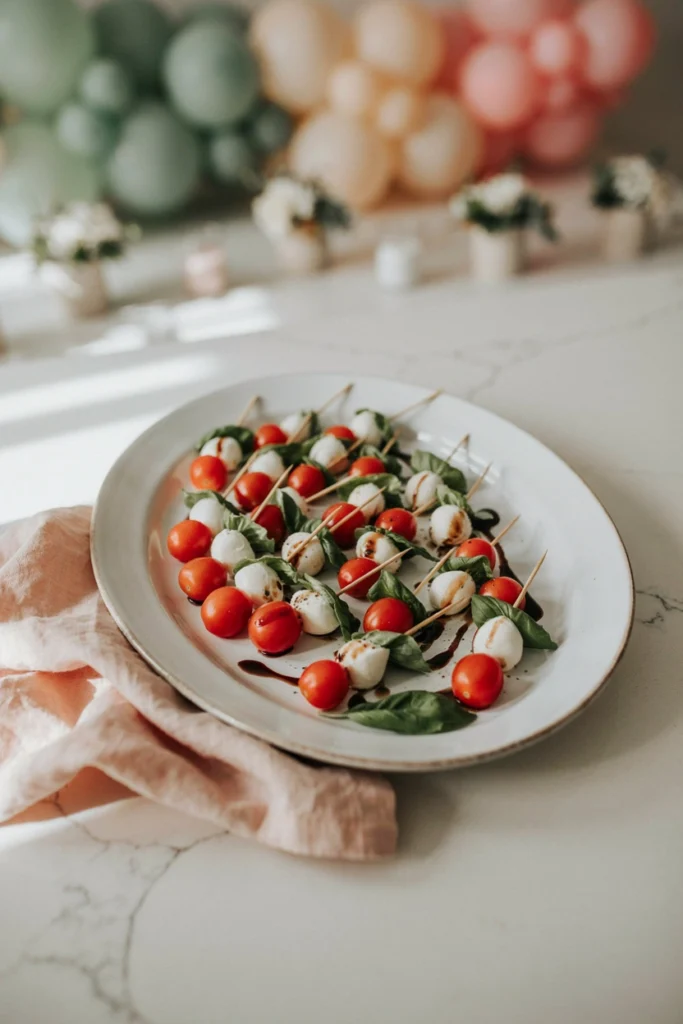
Time: 25 min | Makes: 20 skewers
You’ll need: cherry tomatoes, fresh mozzarella pearls, fresh basil leaves, balsamic vinegar, honey, extra-virgin olive oil, flaky sea salt, black pepper
Directions: Bring the balsamic vinegar and honey to a simmer in a small saucepan over medium heat, and reduce 5 to 7 minutes, stirring occasionally, until syrupy and reduced by about half. Set aside to cool. Thread one basil leaf, one mozzarella pearl, and one cherry tomato onto each bamboo skewer, then arrange on a serving platter. Drizzle with olive oil, then the cooled balsamic glaze, and finish with flaky sea salt and cracked pepper right before serving.
4. Herbed Chicken Salad Croissants
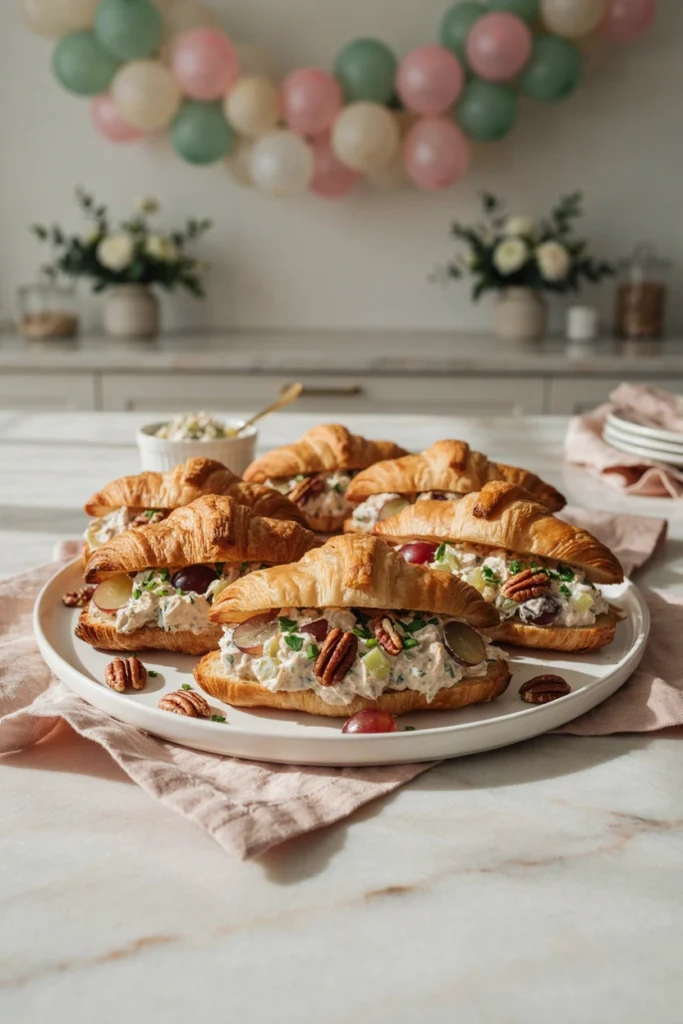
Time: 20 min | Makes: 8 croissants
You’ll need: cooked chicken breast, red seedless grapes, pecans, mayonnaise, fresh lemon juice, fresh tarragon, celery, salt, black pepper, large croissants
Directions: Combine the diced chicken, halved grapes, toasted chopped pecans, and sliced celery in a large bowl. Whisk together the mayonnaise, lemon juice, tarragon, salt, and pepper in a small bowl, then fold the dressing into the chicken mixture until evenly coated. Cover and refrigerate at least 30 minutes to let the flavors come together. Split the croissants and fill each with about 1/2 cup of chicken salad just before serving, using a bread knife to slice cleanly.
5. Bacon-Wrapped Asparagus Bites
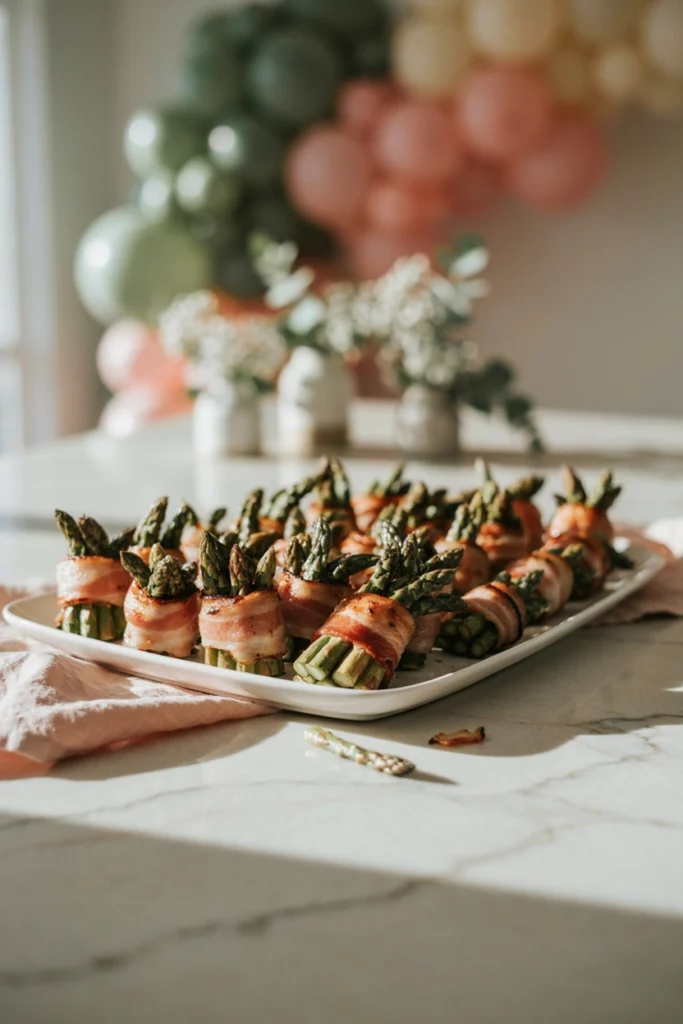
Time: 30 min | Makes: 20 bundles
You’ll need: thin asparagus spears, bacon slices, brown sugar, black pepper, olive oil
Directions: Preheat the oven to 400°F and line a nonstick sheet pan with foil. Trim the woody ends from the asparagus, then bundle two or three spears together and wrap tightly with a half slice of bacon, securing with a toothpick if needed. Arrange the bundles on the sheet pan, drizzle lightly with olive oil, and sprinkle with brown sugar and black pepper. Bake 18 to 20 minutes, turning once halfway, until the bacon is crisp and the asparagus is tender. Let cool 5 minutes before serving warm or at room temperature.
6. Smoked Salmon Cucumber Rounds
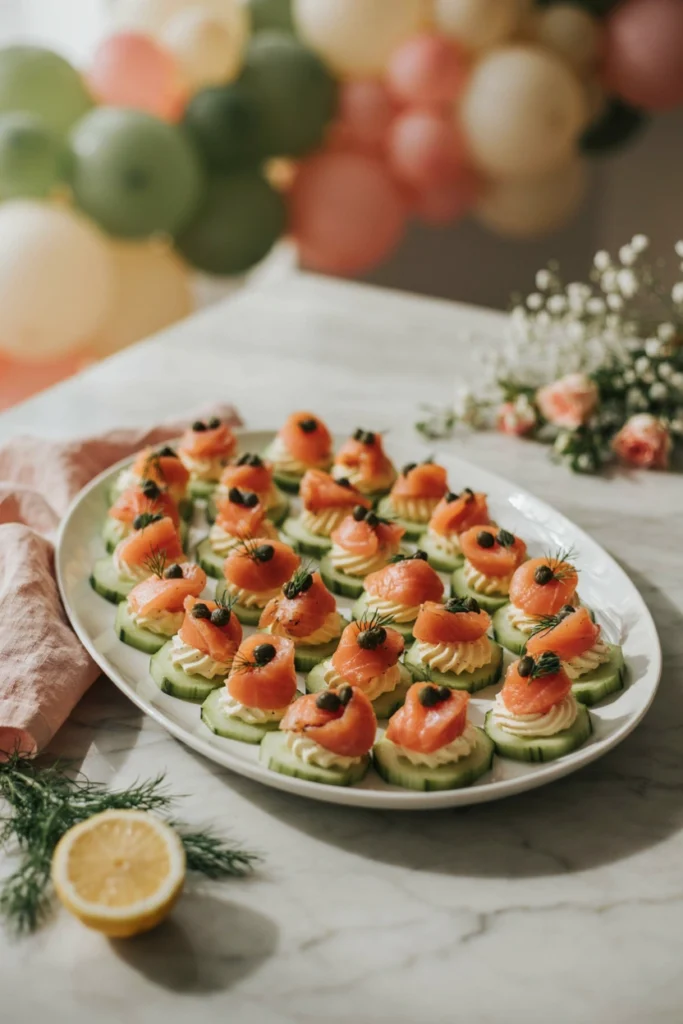
Time: 20 min | Makes: 24 rounds
You’ll need: English cucumber, smoked salmon, cream cheese, fresh dill, fresh lemon juice, capers, black pepper
Directions: Slice the cucumber into 1/4-inch rounds and pat dry with a paper towel. Beat the cream cheese with the lemon juice and a pinch of black pepper until smooth, then spread or pipe a small dollop onto each cucumber round. Fold a small piece of smoked salmon into a rosette and set it on top of the cream cheese. Finish each with a caper and a small sprig of dill, then refrigerate on a slate serving board until ready to serve.
7. Spinach Artichoke Puff Pastry Bites
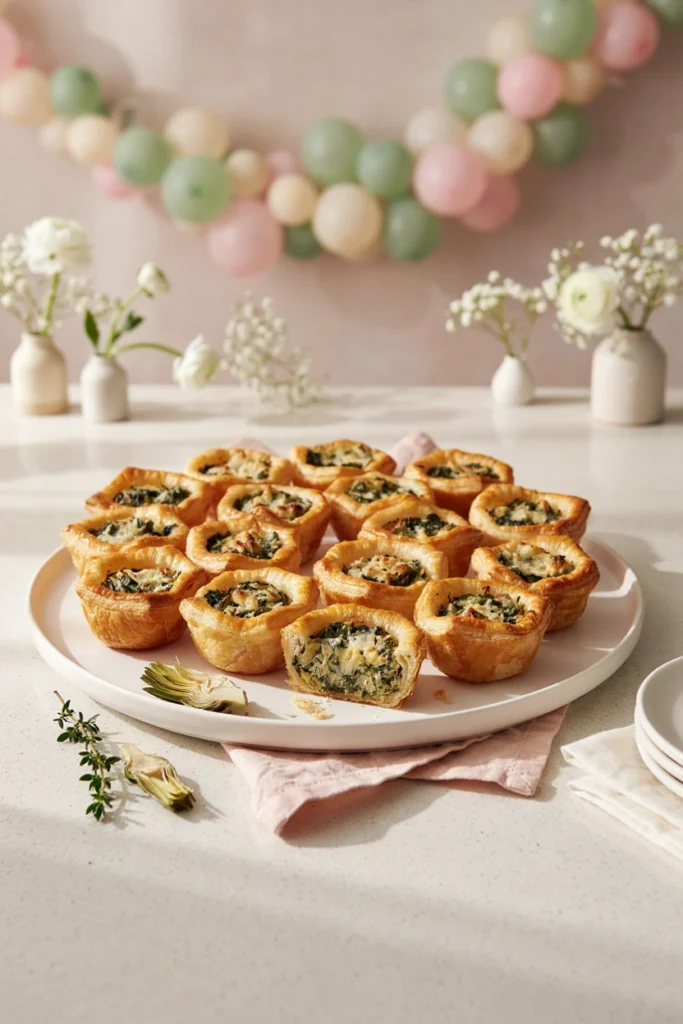
Time: 35 min | Makes: 24 bites
You’ll need: frozen puff pastry, frozen chopped spinach, canned artichoke hearts, cream cheese, sour cream, parmesan cheese, garlic, salt, black pepper
Directions: Preheat the oven to 375°F and press squares of puff pastry into a mini muffin pan to form shells, then bake 8 minutes until just set. Meanwhile, thaw and squeeze the spinach dry, and chop the artichoke hearts. Beat together the cream cheese, sour cream, parmesan, minced garlic, salt, and pepper, then fold in the spinach and artichokes. Spoon the filling into the pre-baked shells and bake 10 to 12 minutes more, until bubbling and golden on top. Cool 5 minutes before serving.
8. Prosciutto-Wrapped Melon Bites
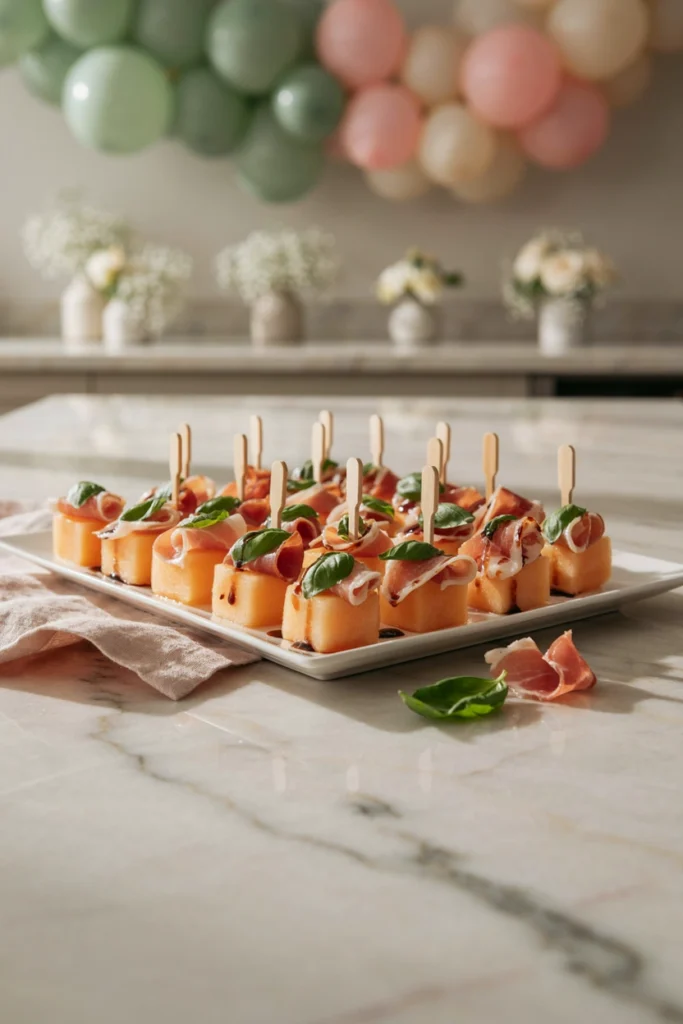
Time: 15 min | Makes: 20 bites
You’ll need: cantaloupe, thinly sliced prosciutto, fresh basil leaves, balsamic glaze, black pepper
Directions: Cut the cantaloupe into 1-inch cubes. Slice the prosciutto into strips and wrap one strip around each melon cube, tucking a small basil leaf underneath as you wrap. Secure with a toothpick and arrange on a large wooden charcuterie board. Drizzle lightly with balsamic glaze and finish with a crack of black pepper right before serving.
9. Mini BLT Sliders
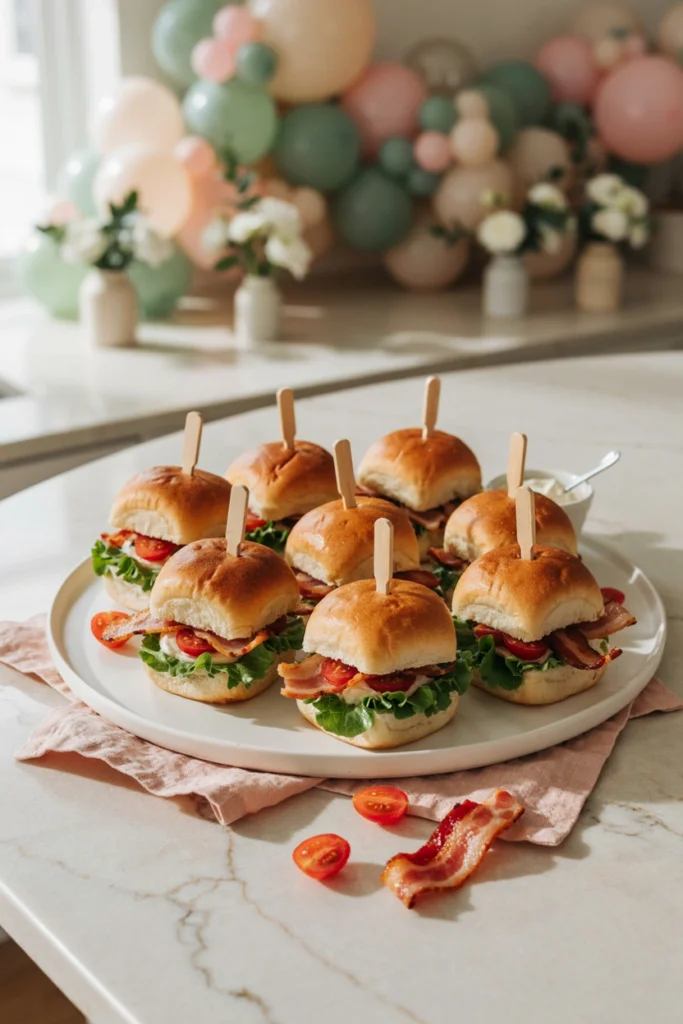
Time: 25 min | Makes: 12 sliders
You’ll need: mini brioche buns, bacon, cherry tomatoes, butter lettuce, mayonnaise, garlic powder, black pepper
Directions: Cook the bacon in a cast-iron skillet over medium heat until crisp, then drain on paper towels and cut each strip in half. Whisk the mayonnaise with garlic powder and black pepper. Slice the mini brioche buns in half and spread the seasoned mayonnaise on both cut sides. Layer each bottom bun with a lettuce leaf, two bacon halves, and a sliced cherry tomato, then set the top bun in place. Arrange on a platter and serve immediately while the bacon is still warm.
10. Deviled Egg Bites with Chive
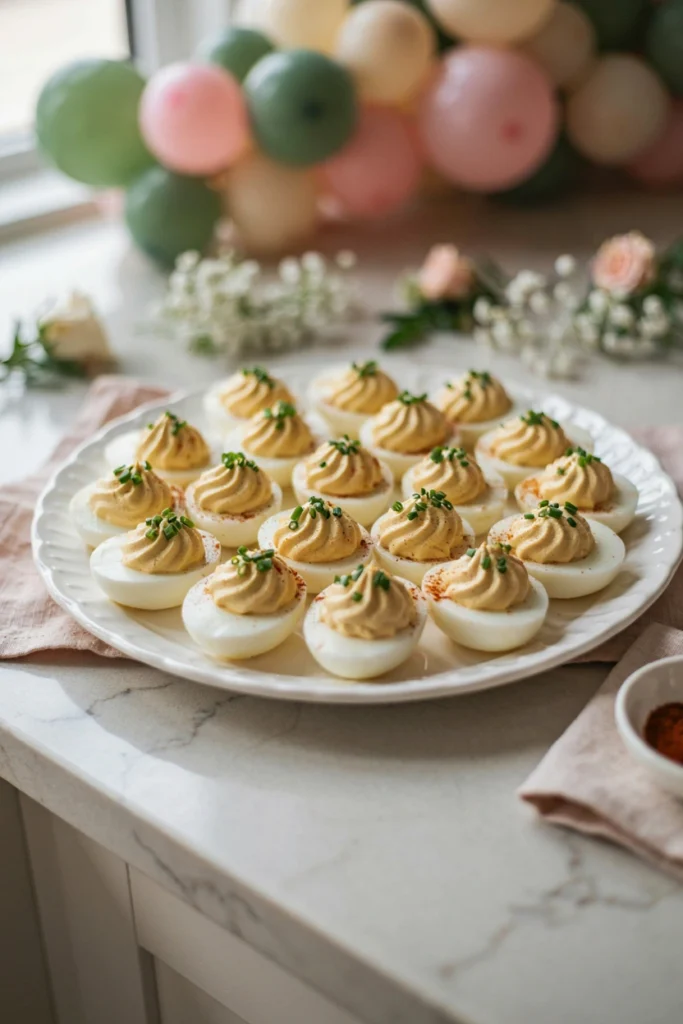
Time: 30 min | Makes: 24 halves
You’ll need: large eggs, mayonnaise, Dijon mustard, white vinegar, salt, paprika, fresh chives
Directions: Place the eggs in a saucepan and cover with cold water, then bring to a boil, cover, and remove from heat, letting them sit 11 minutes. Transfer to an ice bath, then peel and slice each egg in half lengthwise. Scoop the yolks into a bowl and mash with the mayonnaise, Dijon, vinegar, and salt until smooth. Pipe or spoon the filling back into the egg white halves using a piping bag and decorating tip, dust with paprika, and top each with a sprinkle of chopped chives. Refrigerate on a deviled egg serving tray until ready to serve.
11. Cheddar Chive Biscuit Sandwiches
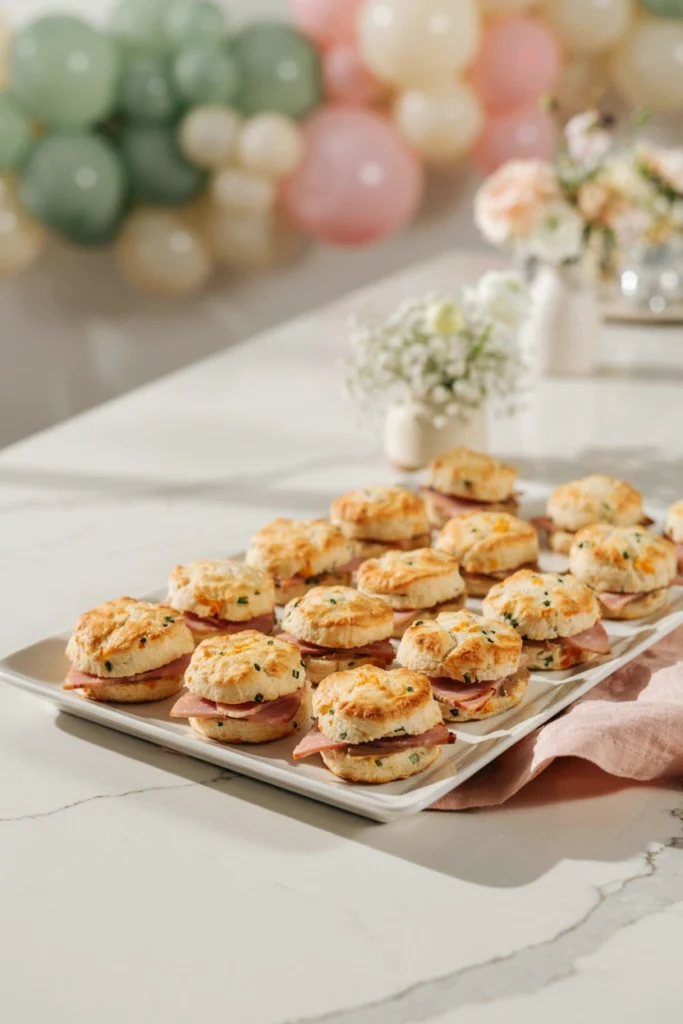
Time: 35 min | Makes: 16 mini sandwiches
You’ll need: all-purpose flour, baking powder, salt, cold unsalted butter, shredded sharp cheddar, fresh chives, buttermilk, deli ham or turkey, Dijon mustard
Directions: Preheat the oven to 425°F. Whisk together the flour, baking powder, and salt, then cut in the cold butter with a pastry cutter until pea-sized crumbs form. Stir in the cheddar and chives, then add the buttermilk and mix just until a shaggy dough comes together. Pat the dough to 3/4-inch thickness with a rolling pin and cut into small rounds, placing them on a parchment-lined baking sheet. Bake 12 to 14 minutes, until golden and risen. Cool slightly, then split each biscuit, spread with a little Dijon, and fill with a folded slice of ham or turkey.
How Much Food You Actually Need
Quantities are the number one source of shower-hosting stress, so use this as your baseline and adjust up for a hungrier crowd. For more planning help, see our guide to hosting a baby shower on a budget.
| Guest Count | Total Bites Needed | Drink Servings |
|---|---|---|
| 10 guests | 40-50 bites | 10-15 servings |
| 15 guests | 60-75 bites | 20-25 servings |
| 20 guests | 80-100 bites | 25-30 servings |
| 30 guests | 120-150 bites | 40-45 servings |
Split that total evenly across five categories, savory, sweet, fresh, and drinks, rather than trying to make one dish do all the work.
Sweet Treats & Bakery Favorites
12. Mini Lemon Poppyseed Muffins
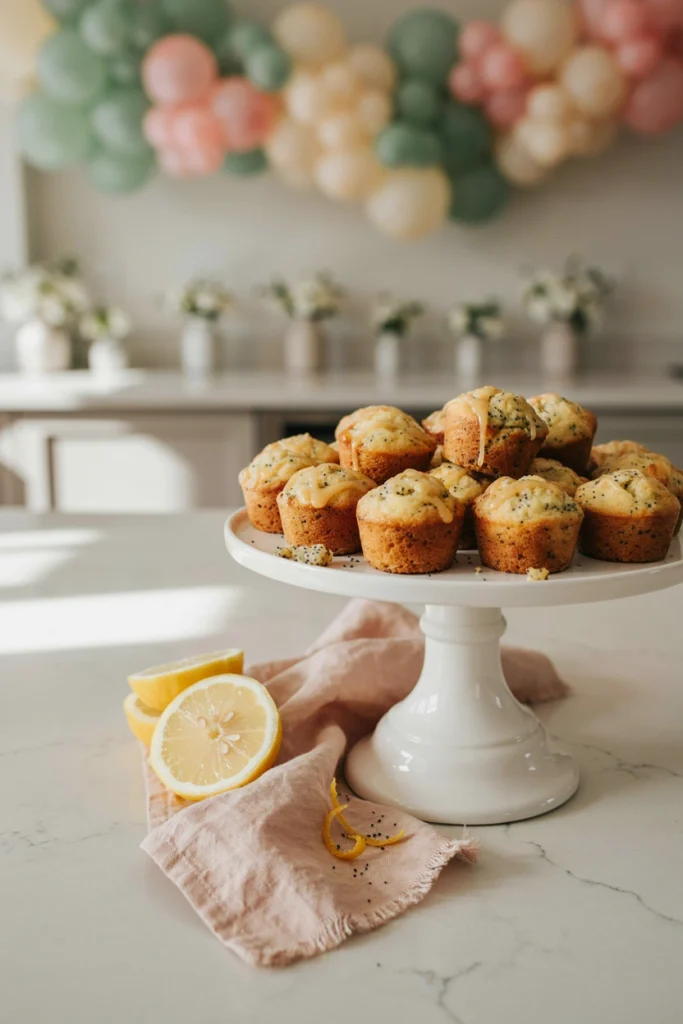
Time: 27 min | Makes: 24 mini muffins
You’ll need: all-purpose flour, granulated sugar, baking powder, salt, poppy seeds, whole milk, vegetable oil, egg, fresh lemon juice, lemon zest, vanilla extract, powdered sugar
Directions: Preheat the oven to 350°F and grease a 24-cup mini muffin tin. Whisk together the flour, sugar, baking powder, salt, and poppy seeds in a large bowl. In a separate bowl, whisk the milk, oil, egg, lemon juice, lemon zest, and vanilla extract. Pour the wet ingredients into the dry and stir just until combined, don’t overmix. Divide the batter evenly among the muffin cups, filling each about two-thirds full, and bake 10 to 12 minutes, until a toothpick comes out clean. Cool in the tin 5 minutes, then transfer to a wire rack. Whisk the powdered sugar with 2 to 3 teaspoons of lemon juice into a thin glaze and drizzle over the cooled muffins.
13. Frosted Vanilla Cupcakes with Piped Swirls
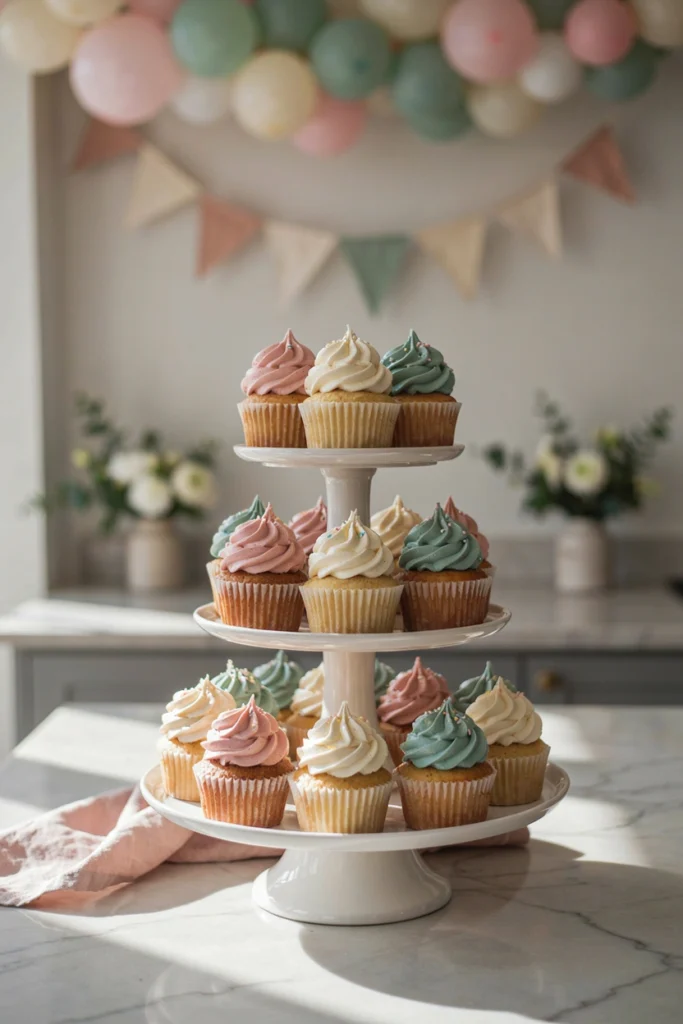
Time: 43 min | Makes: 18 cupcakes
You’ll need: all-purpose flour, baking powder, salt, unsalted butter, granulated sugar, eggs, vanilla extract, whole milk, powdered sugar, heavy cream, gel food coloring
Directions: Preheat the oven to 350°F and line a muffin tin with 18 cupcake liners. Whisk together the flour, baking powder, and salt. In a separate bowl using a stand mixer, cream the softened butter and sugar until light and fluffy, about 3 minutes, then beat in the eggs one at a time and add the vanilla. Add the flour mixture and milk alternately, beginning and ending with flour, mixing just until combined. Divide the batter among the liners, filling two-thirds full, and bake 16 to 18 minutes, until a toothpick comes out clean. Cool completely on a wire rack before frosting. For the frosting, beat the softened butter until smooth, then gradually add the powdered sugar, cream, and vanilla, beating on high 3 to 4 minutes until light and fluffy, tinting with gel food coloring if desired. Pipe a tall swirl onto each cooled cupcake using a Wilton 1M piping tip.
14. Chocolate-Dipped Strawberry Tower
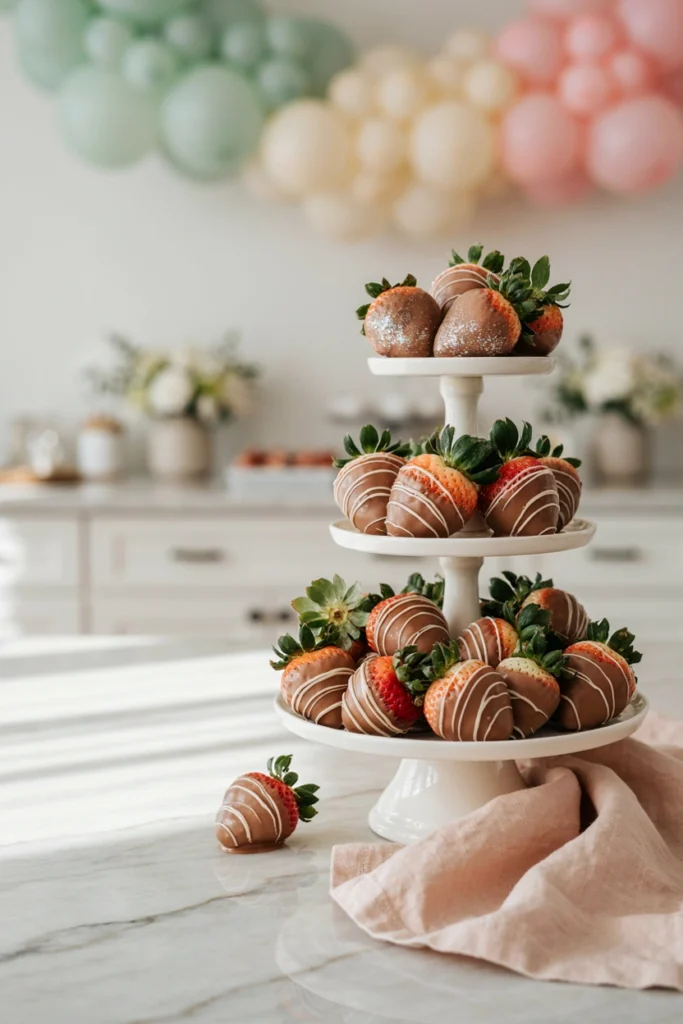
Time: 50 min (includes chilling) | Makes: 30 strawberries
You’ll need: fresh strawberries, semi-sweet chocolate chips, white chocolate chips, coconut oil, edible glitter or shimmer dust
Directions: Line a baking sheet with parchment paper. Melt the semi-sweet chocolate chips with 2 teaspoons of coconut oil in the microwave in 30-second bursts, stirring between each, until smooth. Holding each strawberry by the stem, dip three-quarters of the way into the melted chocolate using chocolate dipping tools, twirling gently to remove excess. Place on the parchment-lined sheet and refrigerate 15 minutes, until set. Melt the white chocolate chips with the remaining coconut oil the same way, then drizzle over the set strawberries. While the white chocolate is still wet, dust lightly with edible glitter. Chill 5 more minutes, then stack on a tiered serving tray to serve.
15. Soft-Baked Sugar Cookies
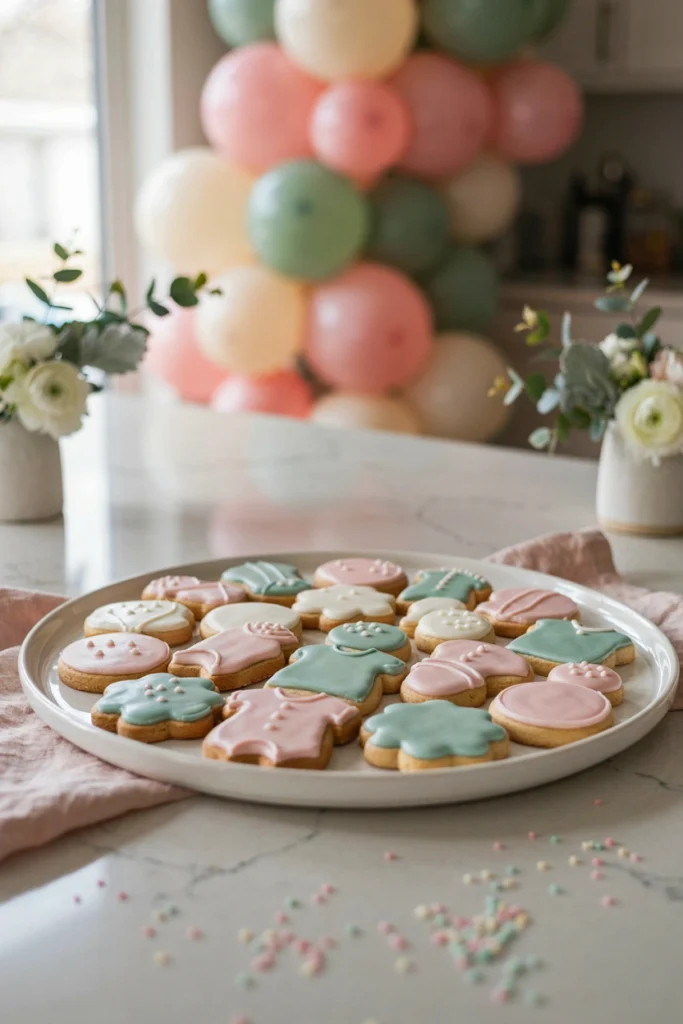
Time: 1 hr | Makes: 24 cookies
You’ll need: all-purpose flour, baking soda, baking powder, salt, unsalted butter, granulated sugar, egg, vanilla extract, powdered sugar, milk, light corn syrup, gel food coloring
Directions: Whisk together the flour, baking soda, baking powder, and salt. Cream the butter and sugar together until fluffy, about 2 to 3 minutes, then beat in the egg and vanilla. Gradually mix in the flour mixture until a soft dough forms, then wrap and chill 30 minutes. Preheat the oven to 350°F. Roll the dough to 1/4-inch thickness on a silicone baking mat and cut into shapes. Place 2 inches apart on a parchment-lined baking sheet and bake 9 to 10 minutes, until the edges are just set but the centers still look slightly soft. Cool on the sheet 5 minutes, then transfer to a wire rack to cool completely. Whisk the powdered sugar, milk, and corn syrup into a smooth icing, tint with food coloring, and spread or pipe over the cooled cookies. Let the icing set 20 minutes before stacking in airtight cookie tins.
16. Mini Powdered Donuts with Sprinkles
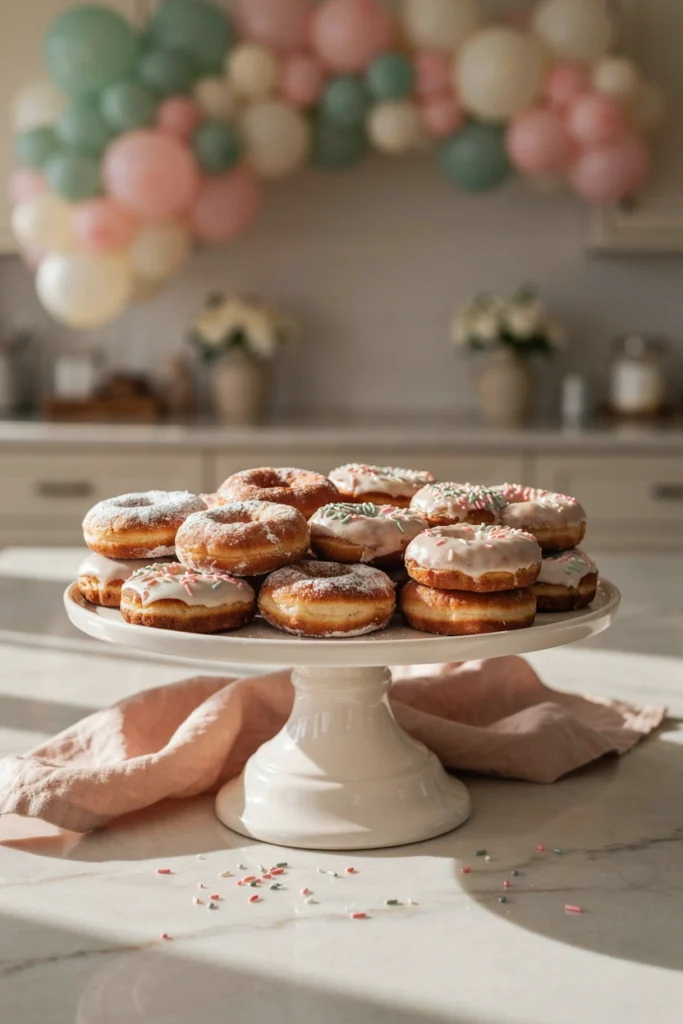
Time: 25 min | Makes: 24 mini donuts
You’ll need: all-purpose flour, granulated sugar, baking powder, salt, ground nutmeg, whole milk, egg, unsalted butter, vanilla extract, powdered sugar, rainbow sprinkles
Directions: Preheat the oven to 350°F and grease a donut baking pan. Whisk together the flour, sugar, baking powder, salt, and nutmeg. In a separate bowl, whisk the milk, egg, melted butter, and vanilla. Combine wet and dry ingredients, stirring just until smooth, then spoon the batter into a piping bag or zip-top bag with the corner snipped. Pipe the batter into the donut pan cavities, filling each about two-thirds full, and bake 8 to 10 minutes, until the donuts spring back when lightly touched. Cool in the pan 5 minutes, then turn out onto a rack. Toss half in powdered sugar, and for the other half, brush lightly with milk and immediately dip into rainbow sprinkles.
17. Make-Ahead Banana Bread Muffins
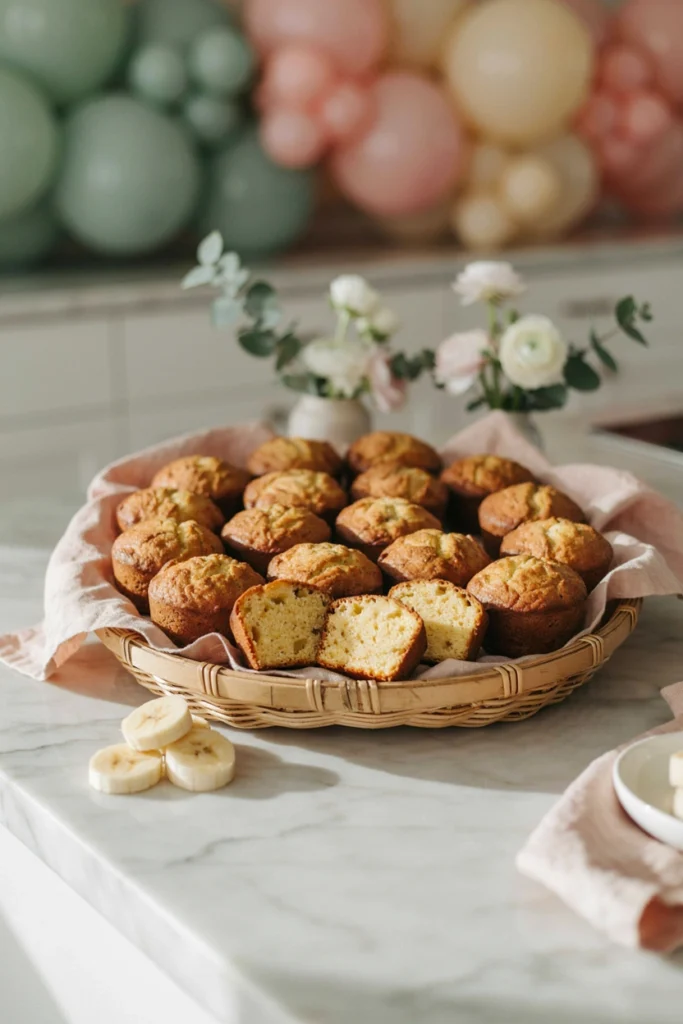
Time: 35 min | Makes: 18 muffins
You’ll need: ripe bananas, unsalted butter, brown sugar, eggs, vanilla extract, all-purpose flour, baking soda, salt, ground cinnamon, sour cream
Directions: Preheat the oven to 375°F and line an 18-cup muffin tin, or two 12-cup tins, with liners. Beat the mashed bananas, melted butter, and brown sugar together using a hand mixer until combined, then beat in the eggs and vanilla. Whisk together the flour, baking soda, salt, and cinnamon in a separate bowl. Add the dry ingredients and sour cream to the banana mixture, mixing on low just until combined. Divide the batter evenly among the muffin cups, filling three-quarters full, and bake 18 to 20 minutes, until a toothpick comes out clean. Cool in the tin 5 minutes, then transfer to a wire rack, or freeze in freezer-safe baking pans for later.
18. Mini Cinnamon Roll Bites
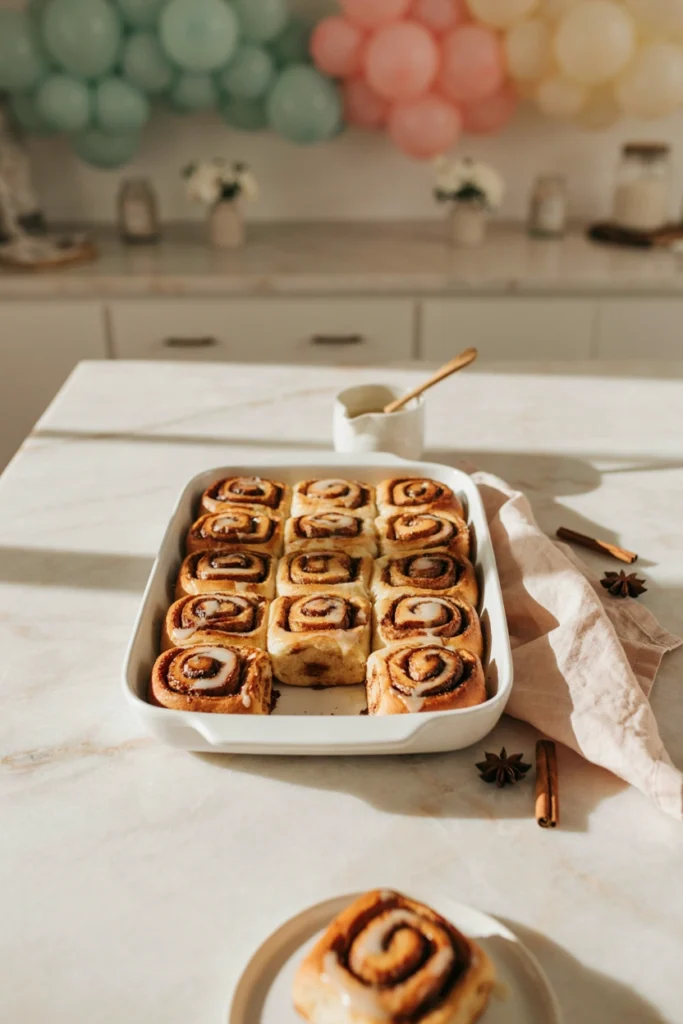
Time: 45 min | Makes: 24 bites
You’ll need: refrigerated crescent dough sheet, unsalted butter, brown sugar, ground cinnamon, powdered sugar, milk, vanilla extract
Directions: Preheat the oven to 375°F and grease a mini muffin tin. Roll the crescent dough sheet out on a floured surface into a rectangle using a rolling pin. Spread with softened butter, then sprinkle evenly with brown sugar and cinnamon. Roll the dough up tightly into a log with a dough scraper and slice into 24 rounds. Place each round cut-side up into a mini muffin cup and bake 12 to 14 minutes, until golden. Cool in the tin 5 minutes, then whisk the powdered sugar, milk, and vanilla into a thin glaze and drizzle over the warm bites, serving in a cinnamon roll baking dish.
19. Blueberry Lemon Scones
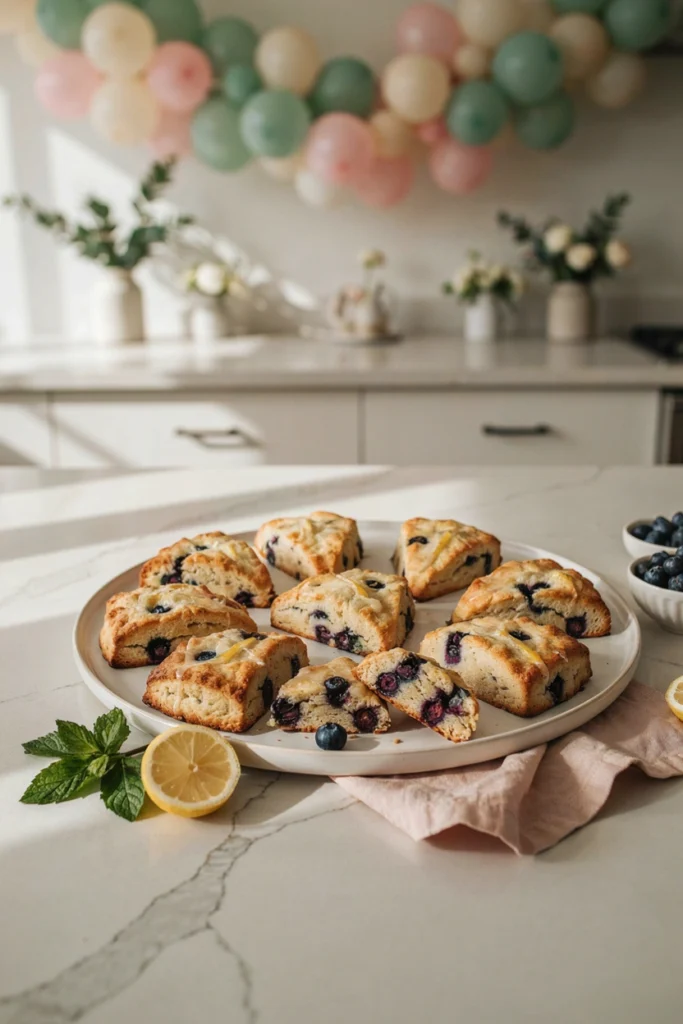
Time: 40 min | Makes: 12 scones
You’ll need: all-purpose flour, granulated sugar, baking powder, salt, cold unsalted butter, fresh blueberries, lemon zest, heavy cream, egg, powdered sugar, fresh lemon juice
Directions: Preheat the oven to 400°F. Whisk together the flour, sugar, baking powder, and salt, then cut in the cold butter with a pastry cutter until pea-sized crumbs form. Toss in the blueberries and lemon zest. Whisk the cream and egg together, then stir into the dry mixture just until a shaggy dough forms. Pat the dough into two 6-inch rounds on a parchment-lined baking sheet and cut each into 6 wedges, spacing them slightly apart. Bake 18 to 20 minutes, until golden. Cool 10 minutes, then whisk the powdered sugar with lemon juice into a glaze and drizzle over the warm scones.
20. Funfetti Cake Pops
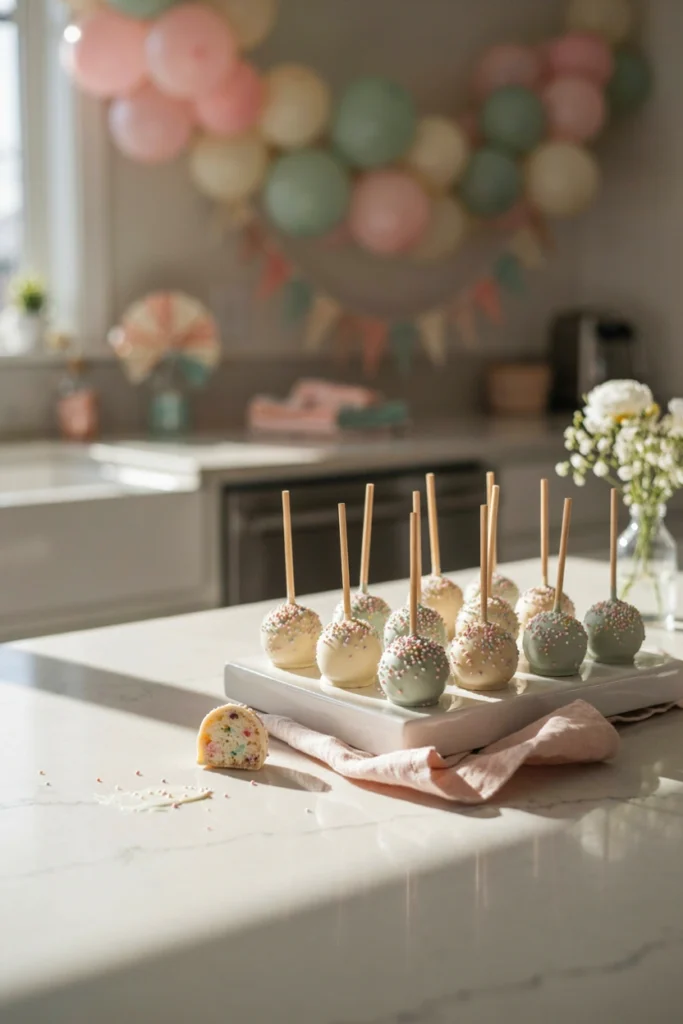
Time: 1 hr 15 min (includes chilling) | Makes: 24 pops
You’ll need: boxed funfetti cake mix and its called-for ingredients, vanilla frosting, white candy melts, rainbow sprinkles, cake pop sticks
Directions: Bake the cake according to the package directions, then let it cool completely and crumble it into a large bowl. Add the vanilla frosting a few tablespoons at a time, mixing until the crumbs hold together when pressed. Roll into 24 balls and freeze 20 minutes. Melt the candy melts using a double boiler melting pot, dip the tip of each cake pop stick into the melted coating, and insert into a cake ball. Freeze 10 more minutes, then dip each pop fully into the melted coating, tapping off the excess, and immediately roll in sprinkles. Stand upright in a cake pop stand to set.
21. Mini Cheesecake Bites with Berry Compote
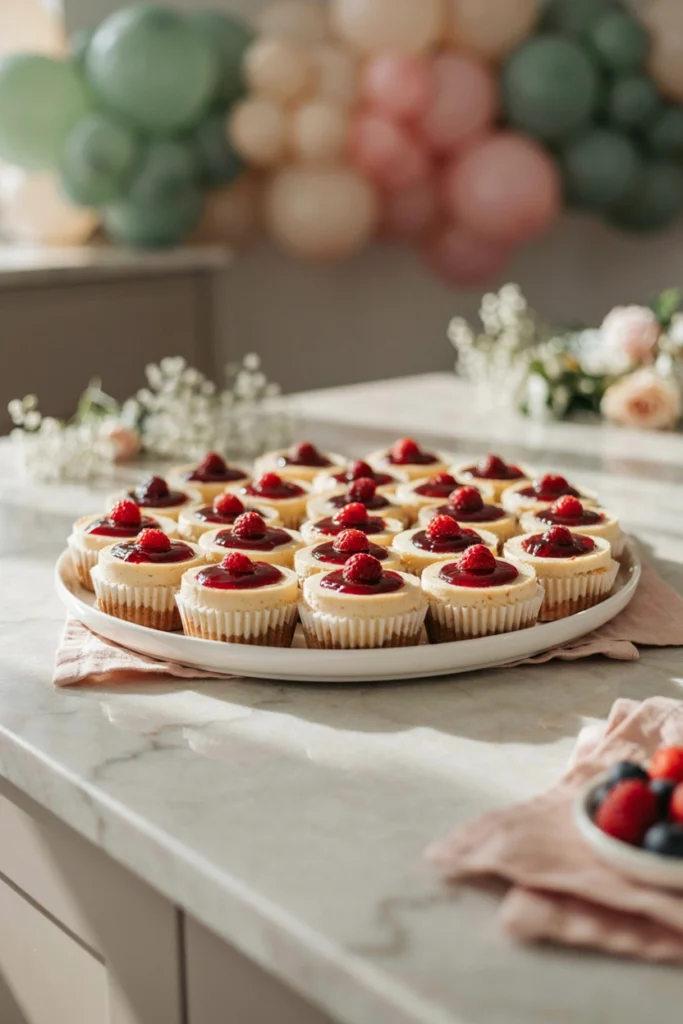
Time: 50 min (plus 3 hr chilling) | Makes: 24 mini cheesecakes
You’ll need: graham cracker crumbs, unsalted butter, granulated sugar, cream cheese, eggs, vanilla extract, sour cream, mixed berries, cornstarch
Directions: Preheat the oven to 325°F and line a mini cheesecake pan with paper liners. Mix the graham cracker crumbs with melted butter and 2 tablespoons of sugar, then press about a teaspoon into the bottom of each liner. Beat the cream cheese and remaining sugar until smooth, then beat in the eggs one at a time, followed by the vanilla and sour cream. Spoon the filling over the crusts, filling each cup nearly to the top, and bake 14 to 16 minutes, until just set with a slight jiggle in the center. Cool completely, then refrigerate at least 3 hours. Simmer the berries with a splash of water and cornstarch in a small saucepan 5 to 7 minutes, until thickened, then cool and spoon over the chilled cheesecakes.
22. Chocolate Chip Cookie Bars
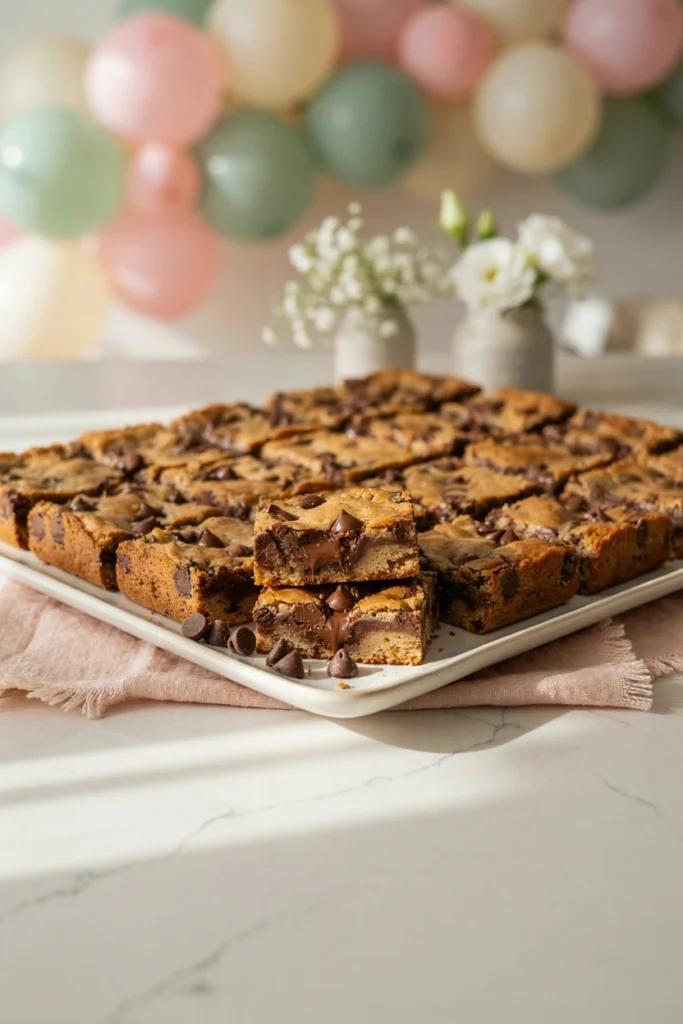
Time: 35 min | Makes: 24 bars
You’ll need: all-purpose flour, baking soda, salt, unsalted butter, brown sugar, granulated sugar, eggs, vanilla extract, semi-sweet chocolate chips
Directions: Preheat the oven to 350°F and line a 9×13-inch pan with parchment paper sheets. Whisk together the flour, baking soda, and salt. Cream the softened butter with both sugars until light and fluffy, then beat in the eggs and vanilla. Mix in the flour mixture just until combined, then fold in the chocolate chips. Spread the batter evenly into the prepared pan and bake 22 to 25 minutes, until the top is golden and a toothpick comes out with a few moist crumbs. Cool completely in the pan before slicing into 24 small squares.
23. Pastel Macarons
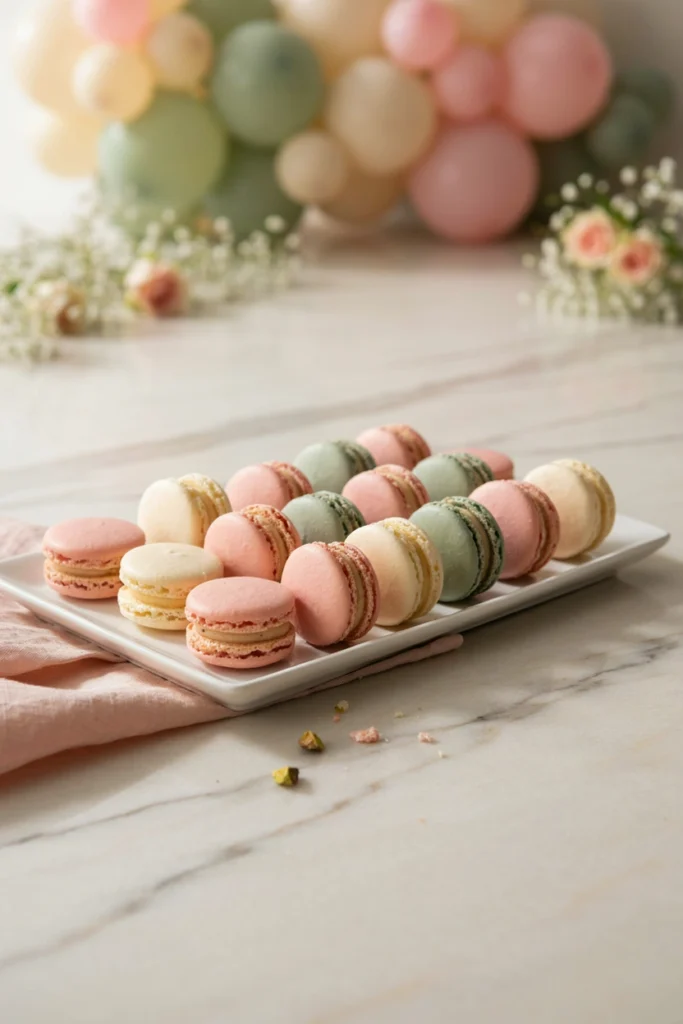
Time: 1 hr 30 min (includes resting) | Makes: 24 filled macarons
You’ll need: almond flour, powdered sugar, egg whites, granulated sugar, gel food coloring, unsalted butter, vanilla extract, powdered sugar for buttercream
Directions: Sift the almond flour and powdered sugar together twice and set aside. Whip the egg whites to soft peaks with a hand mixer, then gradually add the granulated sugar and whip to stiff, glossy peaks, adding gel coloring near the end. Fold the almond flour mixture into the meringue in thirds until the batter flows in a slow ribbon. Pipe 1.5-inch rounds onto parchment-lined baking sheets, tap firmly to release air bubbles, and let sit at room temperature 30 to 45 minutes, until a skin forms and the tops aren’t tacky. Bake at 300°F for 15 to 17 minutes, rotating halfway, then cool completely before peeling off the parchment. Beat the butter, powdered sugar, and vanilla into a smooth buttercream with an offset spatula and pipe onto half the shells before sandwiching with the remaining shells.
24. Cream Puffs with Vanilla Bean Filling
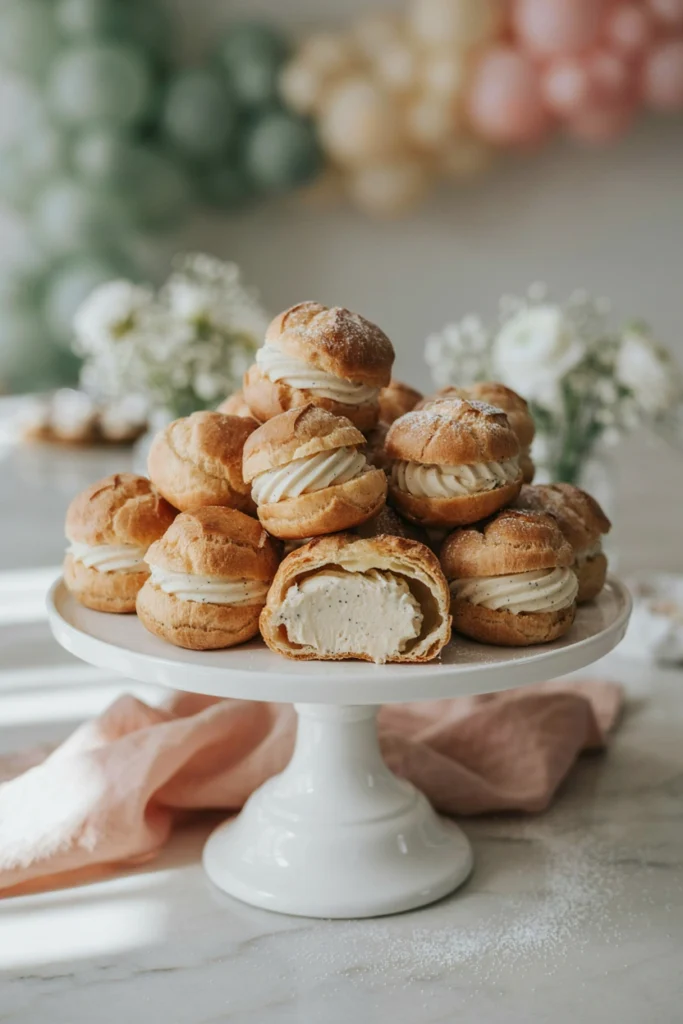
Time: 1 hr | Makes: 20 cream puffs
You’ll need: water, unsalted butter, salt, all-purpose flour, eggs, whole milk, granulated sugar, cornstarch, egg yolks, vanilla bean paste, powdered sugar
Directions: Preheat the oven to 400°F. Bring the water, butter, and salt to a boil, then add the flour all at once and stir vigorously until the dough pulls into a ball. Cool 5 minutes, then beat in the eggs one at a time until glossy. Pipe 1.5-inch mounds onto a parchment-lined baking sheet and bake 20 minutes, then reduce the oven to 350°F and bake 10 to 12 more minutes, until deeply golden and dry to the touch. Cool completely. For the filling, whisk the milk, sugar, cornstarch, and egg yolks in a saucepan over medium heat until thickened, then stir in the vanilla bean paste and chill completely. Slice the tops off the cooled puffs, pipe in the filling, replace the tops, and dust with powdered sugar.
Make-Ahead Friendly Options
The secret to hosting without spending your entire morning in the kitchen is knowing exactly what can wait, and what can’t.
| Timing | What to Prep |
|---|---|
| 1-2 days before | Quiche bites, banana bread muffins, sugar cookies, chicken salad filling, cheesecake bites |
| Night before | Fruit kabobs, parfait cups (without granola), croissant slider glaze, deviled egg filling |
| Morning of | Assemble croissant sliders, dress salads, frost cupcakes if not done already |
| Last 30 minutes | Set up drink station, add granola to parfaits, plate chocolate-dipped strawberries |
Fresh & Light Options
25. Rainbow Fruit Kabobs
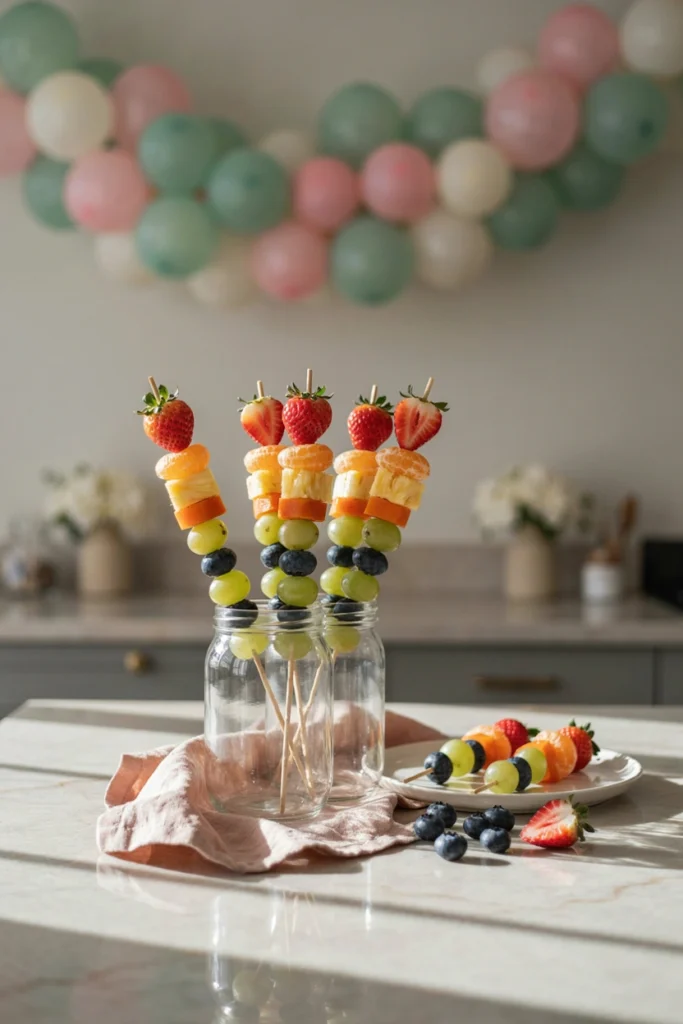
Time: 20 min | Makes: 12 skewers
You’ll need: strawberries, cantaloupe or mandarin segments, pineapple chunks, green grapes, blueberries, wooden skewers
Directions: Wash and thoroughly dry all the fruit. Thread each bamboo skewer starting with a strawberry, followed by two orange segments, two pineapple chunks, two grapes, and finishing with two blueberries, keeping the color gradient consistent from red to blue. Trim any sharp skewer tips if serving to a mixed-age crowd. Stand skewers upright in small mason jars, or lay flat on a platter, and refrigerate until ready to serve, up to 4 hours.
26. Yogurt Parfait Bar
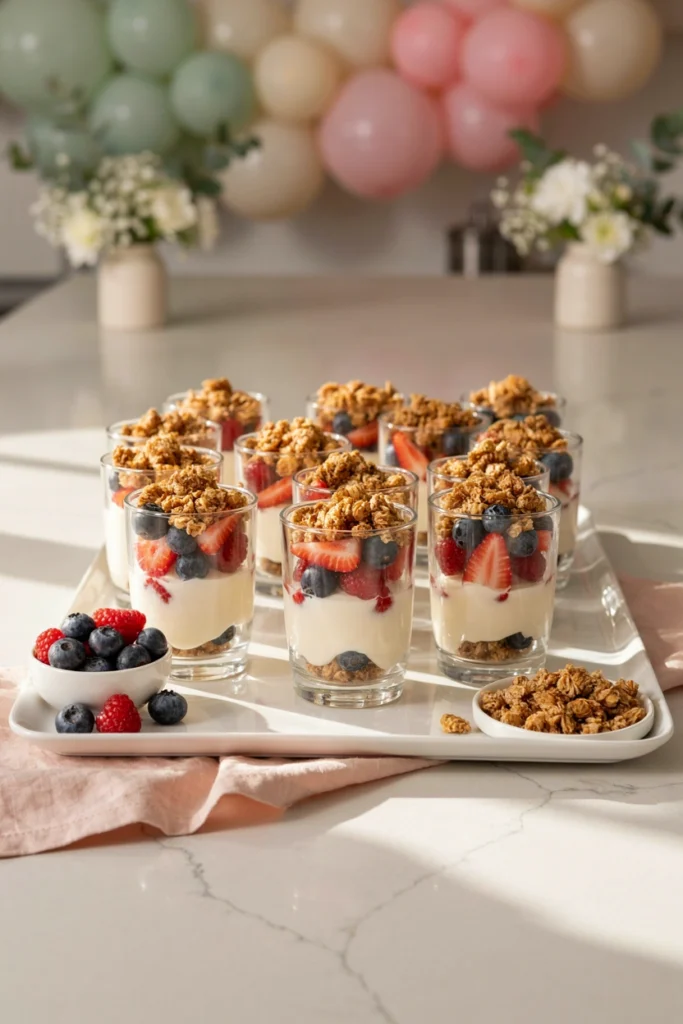
Time: 15 min | Makes: 10 parfaits
You’ll need: plain or vanilla Greek yogurt, honey, granola, mixed berries
Directions: Stir the honey into the yogurt until smooth. Spoon about 2 tablespoons of yogurt into the bottom of each mini glass dessert cup, add a layer of mixed berries, then another layer of yogurt, repeating until the cups are nearly full and ending with a small dollop of yogurt on top. Cover and refrigerate until just before serving, then top each parfait with a generous spoonful of granola right before guests arrive.
27. Watermelon Mint Salad
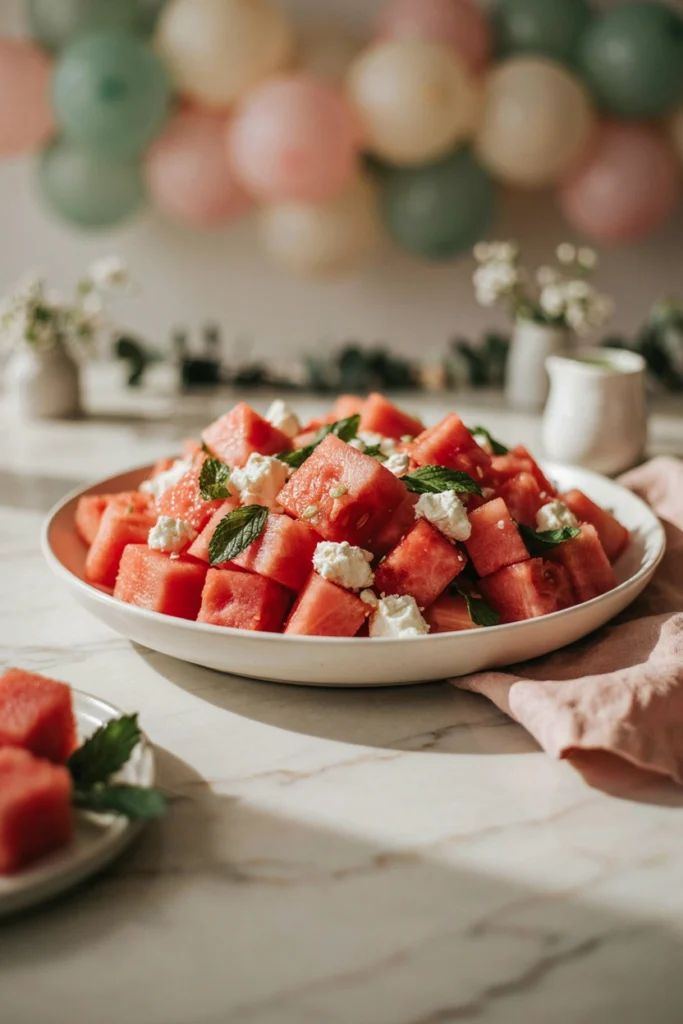
Time: 15 min | Makes: 8 servings
You’ll need: seedless watermelon, feta cheese, fresh mint leaves, fresh lime juice, extra-virgin olive oil, flaky sea salt
Directions: Place the watermelon cubes in a large shallow bowl. Whisk together the lime juice and olive oil, drizzle it over the watermelon, and toss gently. Scatter the feta and torn mint over the top and finish with a pinch of flaky sea salt right before serving.
28. Citrus Arugula Salad with Feta
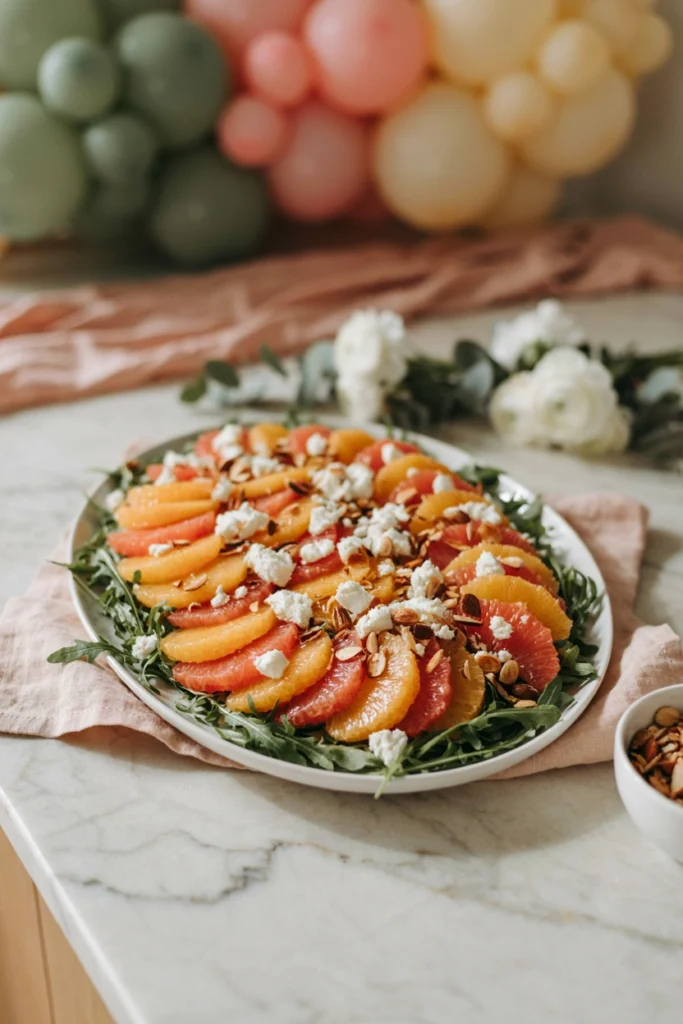
Time: 25 min | Makes: 8 servings
You’ll need: baby arugula, oranges, grapefruit, feta cheese, sliced almonds, extra-virgin olive oil, fresh orange juice, honey, salt, black pepper
Directions: Toast the sliced almonds in a cast-iron skillet over medium heat 3 to 4 minutes, stirring often, until fragrant, then set aside to cool. Whisk together the olive oil, orange juice, honey, salt, and pepper for the dressing. Arrange the arugula on a large platter, top with the orange and grapefruit segments, then scatter the feta and toasted almonds over the top. Drizzle with the dressing right before serving and toss gently at the table.
29. Tropical Mango Coconut Bites
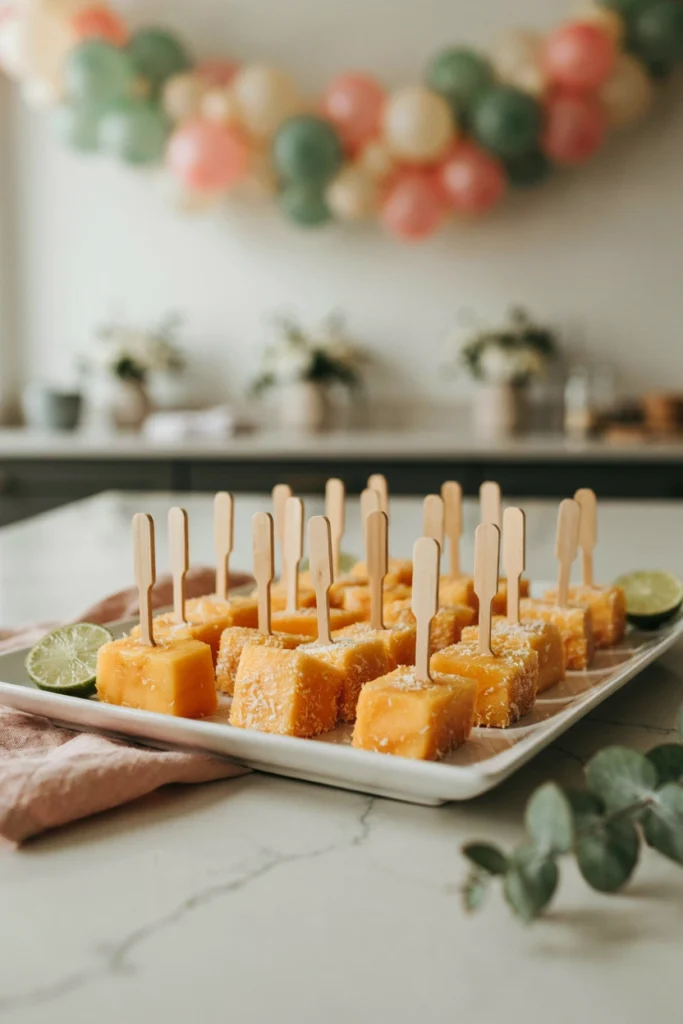
Time: 15 min | Makes: 20 bites
You’ll need: ripe mango, unsweetened shredded coconut, fresh lime juice, honey, toothpicks
Directions: Toast the shredded coconut in a dry skillet over medium-low heat 2 to 3 minutes, stirring constantly, until lightly golden, then let cool. Cut the mango into 1-inch cubes. Whisk the honey and lime juice together in a small bowl, then toss the mango cubes in the mixture until coated. Roll each cube in the toasted coconut, pressing gently so it sticks, then skewer with a toothpick and arrange on a platter.
30. Cucumber Mint Gazpacho Shooters
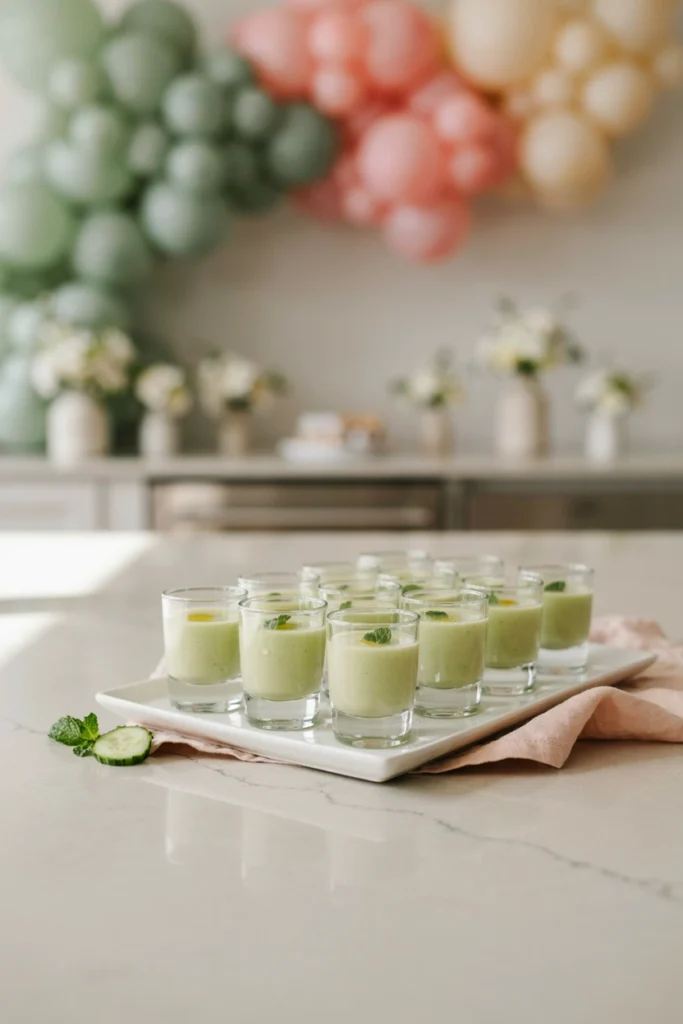
Time: 20 min (plus 1 hr chilling) | Makes: 12 shooters
You’ll need: English cucumbers, plain Greek yogurt, fresh mint leaves, fresh lime juice, garlic, salt, olive oil
Directions: Roughly chop the cucumbers and add them to a blender with the yogurt, mint leaves, lime juice, garlic, and salt. Blend until completely smooth, then chill at least 1 hour, until very cold. Pour into dessert shot glasses, drizzle each with a touch of olive oil, and garnish with a small mint leaf right before serving.
31. Roasted Beet and Goat Cheese Salad
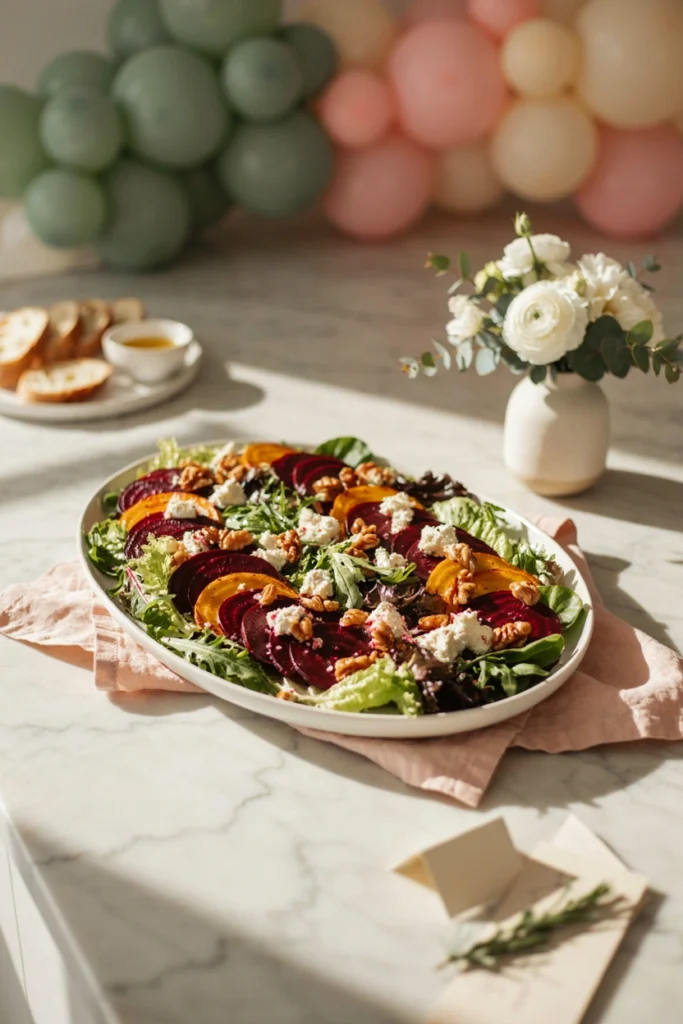
Time: 1 hr | Makes: 8 servings
You’ll need: medium beets, mixed salad greens, goat cheese, walnuts, olive oil, red wine vinegar, honey, salt, black pepper
Directions: Preheat the oven to 400°F. Wrap the beets individually in foil and roast 45 to 55 minutes, until a knife slides in easily. Cool slightly, then peel and slice into rounds. Whisk together the olive oil, red wine vinegar, honey, salt, and pepper for the dressing. Arrange the greens on a platter, top with the beet slices, crumbled goat cheese, and toasted walnuts, then drizzle with the dressing right before serving.
32. Pineapple Coconut Skewers
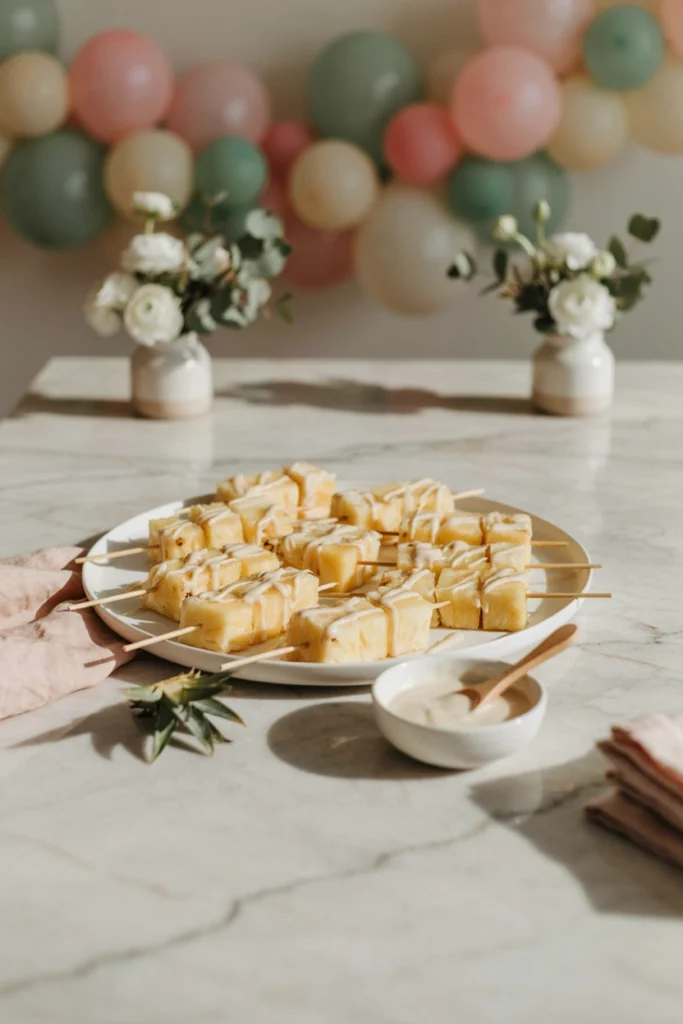
Time: 20 min | Makes: 12 skewers
You’ll need: fresh pineapple, coconut cream, honey, fresh lime juice, wooden skewers
Directions: Cut the pineapple into 1-inch chunks and thread three or four pieces onto each bamboo skewer. Whisk together the coconut cream, honey, and lime juice in a small bowl. Arrange the skewers on a platter and drizzle generously with the coconut lime sauce right before serving, reserving extra sauce in a small bowl for dipping.
33. Strawberry Spinach Salad with Poppyseed Dressing
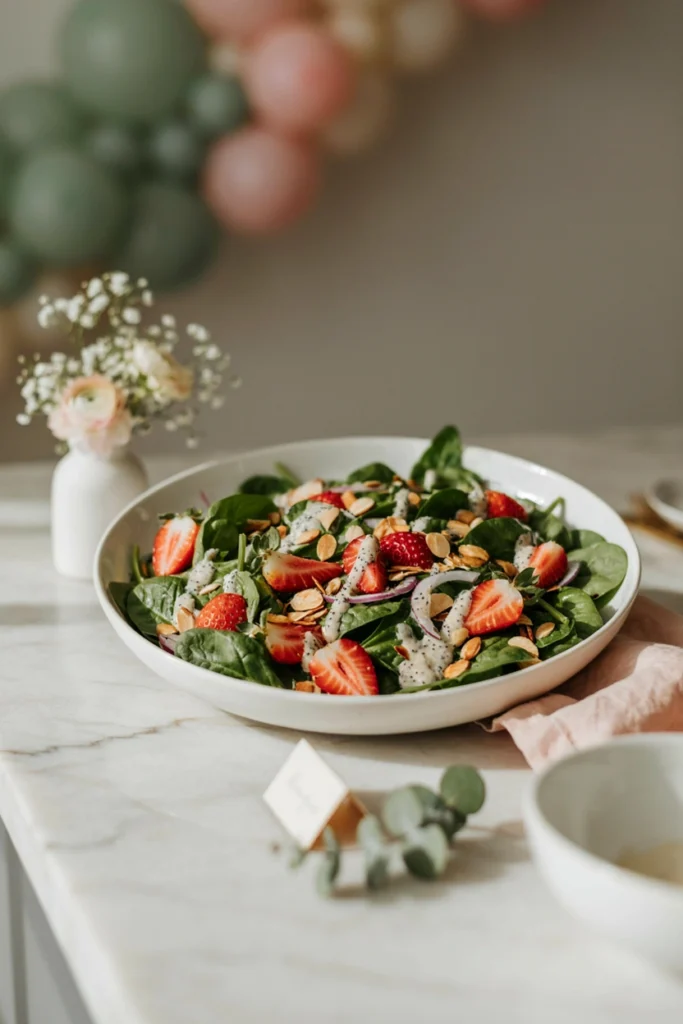
Time: 20 min | Makes: 8 servings
You’ll need: baby spinach, fresh strawberries, sliced almonds, red onion, mayonnaise, apple cider vinegar, granulated sugar, poppy seeds
Directions: Whisk together the mayonnaise, apple cider vinegar, sugar, and poppy seeds until smooth to make the dressing. Toast the sliced almonds in a dry skillet 2 to 3 minutes, until fragrant, then cool. Arrange the spinach on a large platter, top with sliced strawberries, thinly sliced red onion, and the toasted almonds. Drizzle with the poppyseed dressing right before serving and toss gently at the table.
Drink Station Ideas
34. Mimosa Bar
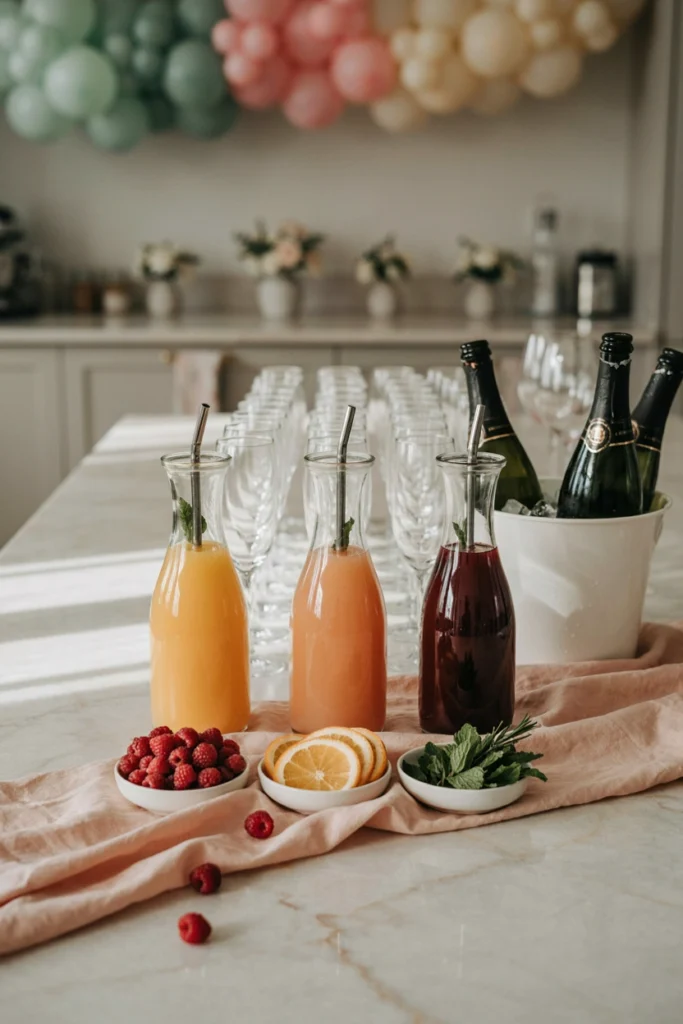
Time: 15 min | Makes: 10 servings
You’ll need: sparkling wine or prosecco, orange juice, peach nectar, cranberry juice, fresh raspberries, orange, fresh mint sprigs
Directions: Set out champagne flutes or rocks glasses in a row on a small table or bar cart. Pour each juice into its own labeled pitcher or carafe using a drink pitcher and arrange them next to the glasses, then place the chilled sparkling wine bottles in an ice bucket nearby. Set out small bowls of raspberries, orange slices, and mint sprigs for garnish. To build a mimosa, fill a glass halfway with sparkling wine, top with the juice of choice, and finish with a garnish. A mimosa bar sign helps guests know what to do.
35. Sparkling Berry Mocktail

Time: 10 min | Makes: 8 servings
You’ll need: fresh raspberries, granulated sugar, fresh lime juice, sparkling water, fresh mint leaves, ice
Directions: Combine the raspberries, sugar, and 1/4 cup water in a small saucepan and simmer over medium heat 5 minutes, mashing the berries as they soften, then remove from heat. Strain through a fine-mesh sieve into a jar, pressing to extract the simple syrup, and let it cool completely. Fill glasses with ice from a large ice cube mold, add about 2 tablespoons of the berry syrup to each, then top with sparkling water and a splash of lime juice, stirring gently. Garnish with fresh raspberries and mint before serving.
36. Iced Coffee & Tea Station
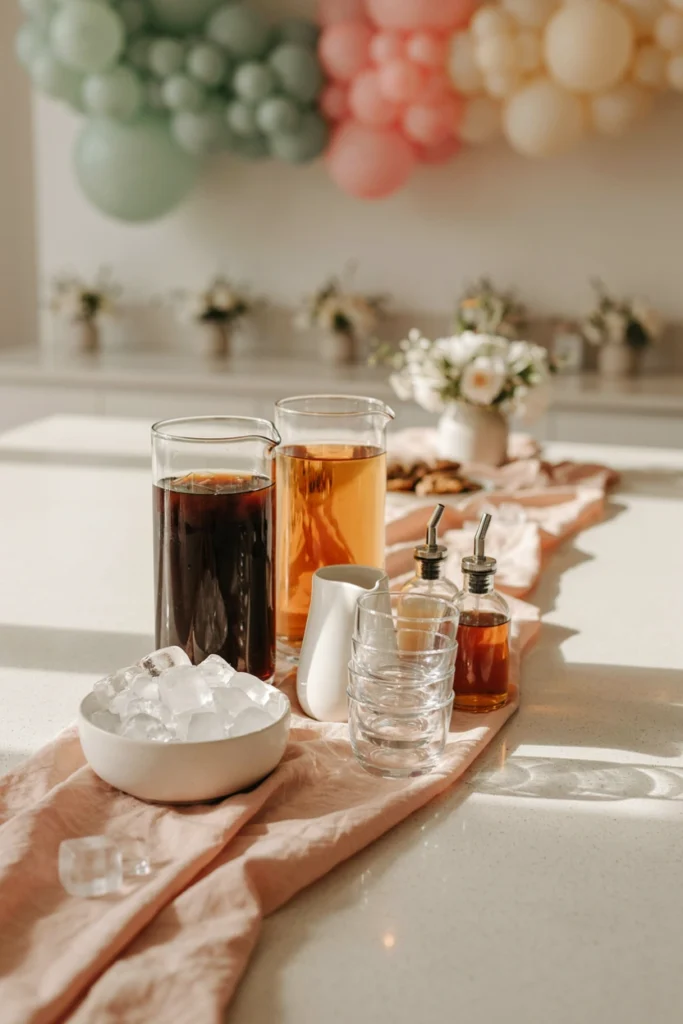
Time: 10 min active (plus overnight steeping) | Makes: 10 servings
You’ll need: coarsely ground coffee, water, black tea bags, half-and-half or milk, simple syrup, vanilla or caramel syrup, ice
Directions: The night before, combine the ground coffee and cold water in a large jar or pitcher, cover, and steep in the refrigerator 12 to 18 hours. Strain through a fine-mesh sieve lined with a coffee filter into a clean pitcher. Steep the tea bags in hot water 5 minutes, remove the bags, and refrigerate the tea until cold. Set the pitchers of cold brew and iced tea on the drink table alongside a bucket of ice, and arrange the half-and-half and syrups in syrup bottles with coffee bar accessories so guests can customize their own glass.
37. Fruit-Infused Water Trio
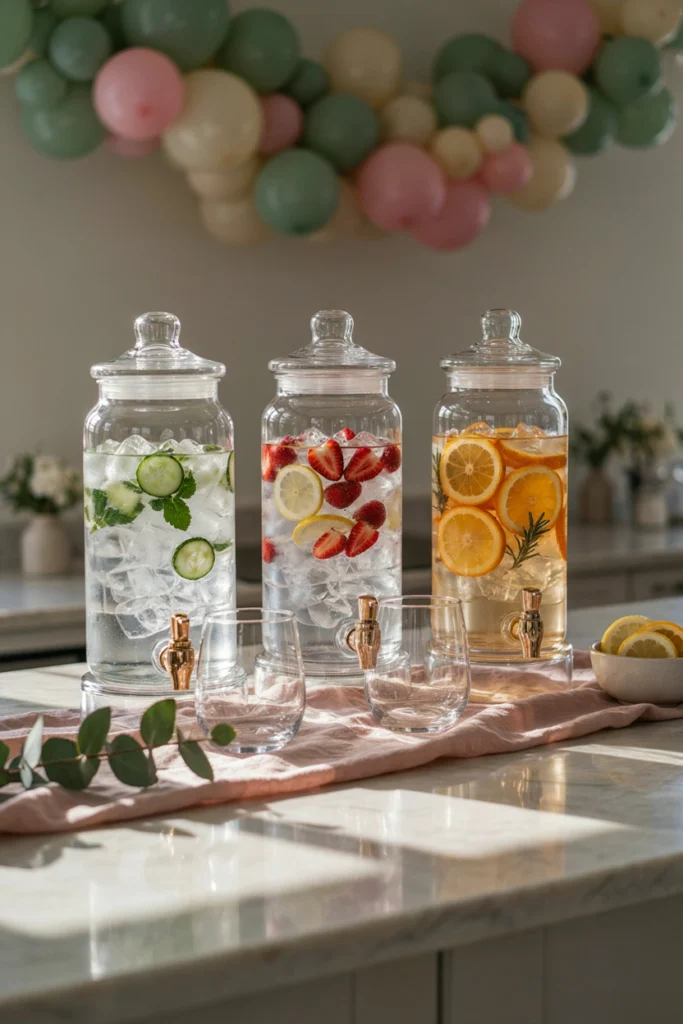
Time: 15 min active (plus 1 hr infusing) | Makes: 3 pitchers (about 12 servings)
You’ll need: cucumber, fresh mint leaves, strawberries, lemon, orange, fresh rosemary, cold water, ice
Directions: Fill three glass beverage dispensers with 4 cups of cold water each. To the first, add sliced cucumber and mint leaves. To the second, add sliced strawberries and lemon slices. To the third, add sliced orange and rosemary sprigs. Add a handful of ice to each and refrigerate at least 1 hour before serving so the flavors infuse. Top off with fresh fruit and herbs right before guests arrive, and set the dispensers on a clear acrylic drink dispenser stand.
38. Peach Bellini Bar

Time: 15 min | Makes: 10 servings
You’ll need: ripe peaches, granulated sugar, fresh lemon juice, prosecco or sparkling wine, sparkling water
Directions: Peel and pit the peaches, then blend with the sugar and lemon juice until smooth to make a peach puree. Chill the puree until cold. Spoon about 2 tablespoons of puree into each champagne flute, then top slowly with chilled prosecco, stirring gently to combine. For a non-alcoholic version, top with sparkling water instead. Set the puree and bottles out together in a batch pitcher so guests can pour their own.
39. Strawberry Basil Spritzer
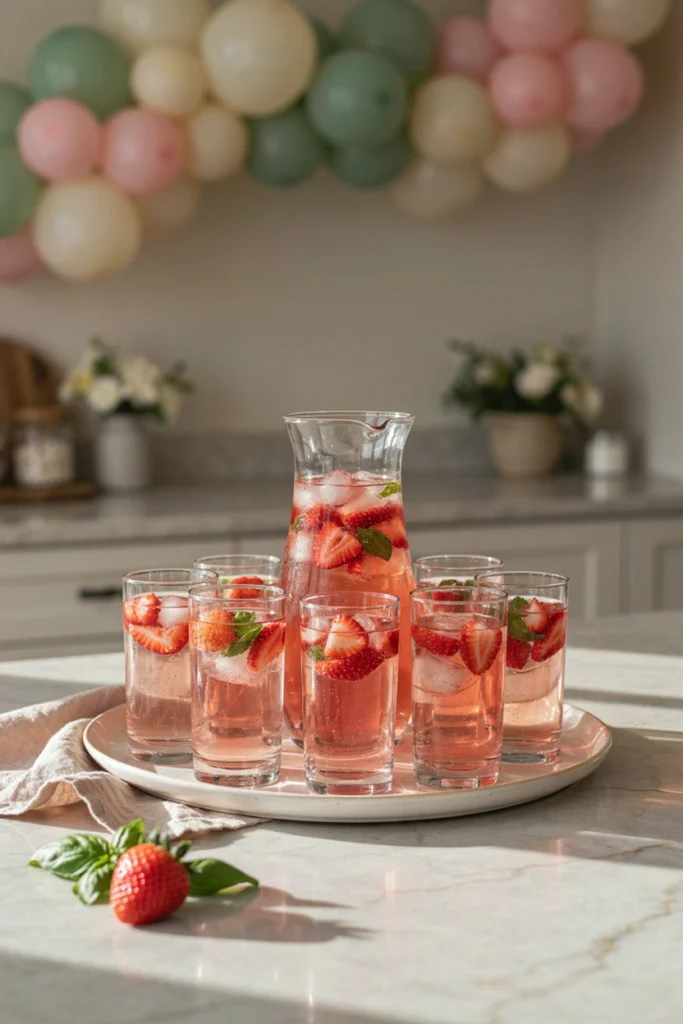
Time: 15 min | Makes: 8 servings
You’ll need: fresh strawberries, fresh basil leaves, granulated sugar, fresh lemon juice, sparkling water, ice
Directions: Combine the strawberries, basil, sugar, and 1/4 cup water in a small saucepan and simmer over medium heat 5 minutes, mashing gently, until syrupy. Strain through a fine-mesh sieve into a jar and cool completely. Fill glasses with ice, add 2 tablespoons of the strawberry basil syrup, a splash of lemon juice, and top with sparkling water. Stir gently with a bar spoon and garnish with a fresh basil leaf.
40. Lavender Lemonade
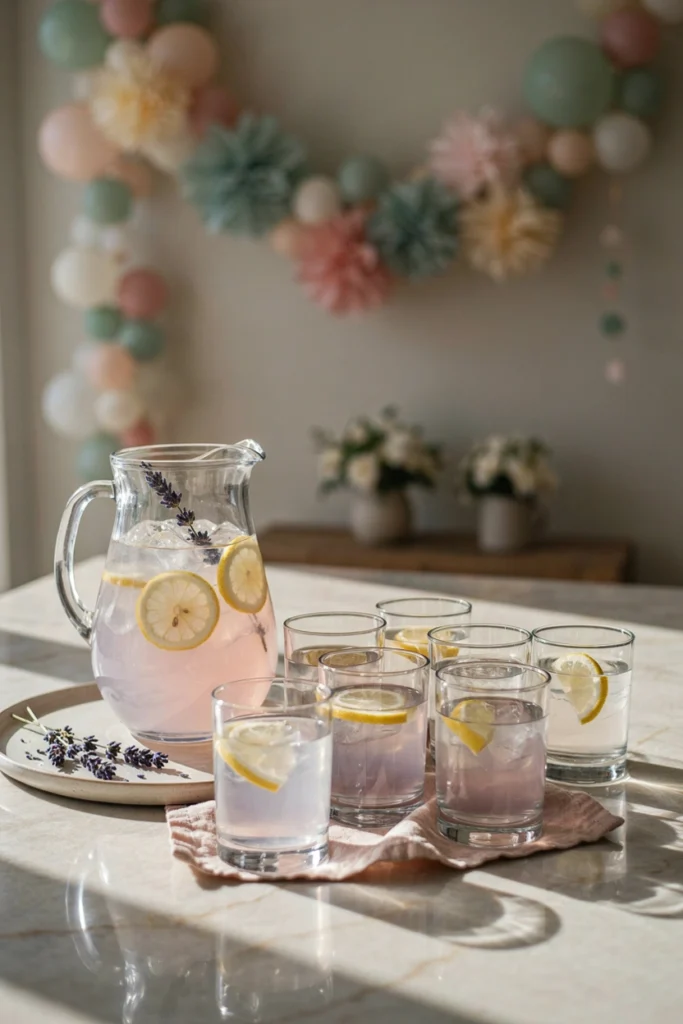
Time: 15 min (plus 30 min steeping) | Makes: 8 servings
You’ll need: dried culinary lavender, granulated sugar, fresh lemon juice, water, ice, lemon slices
Directions: Bring 1 cup of water to a boil, then remove from heat, add the sugar and lavender, and stir until the sugar dissolves. Let steep 30 minutes, then strain out the lavender into a large pitcher. Add the lemon juice and remaining water, stirring to combine, then chill until cold. Serve over ice with lemon slices for garnish, sliced with a peeler for thin curls.
41. Iced Matcha Latte Station
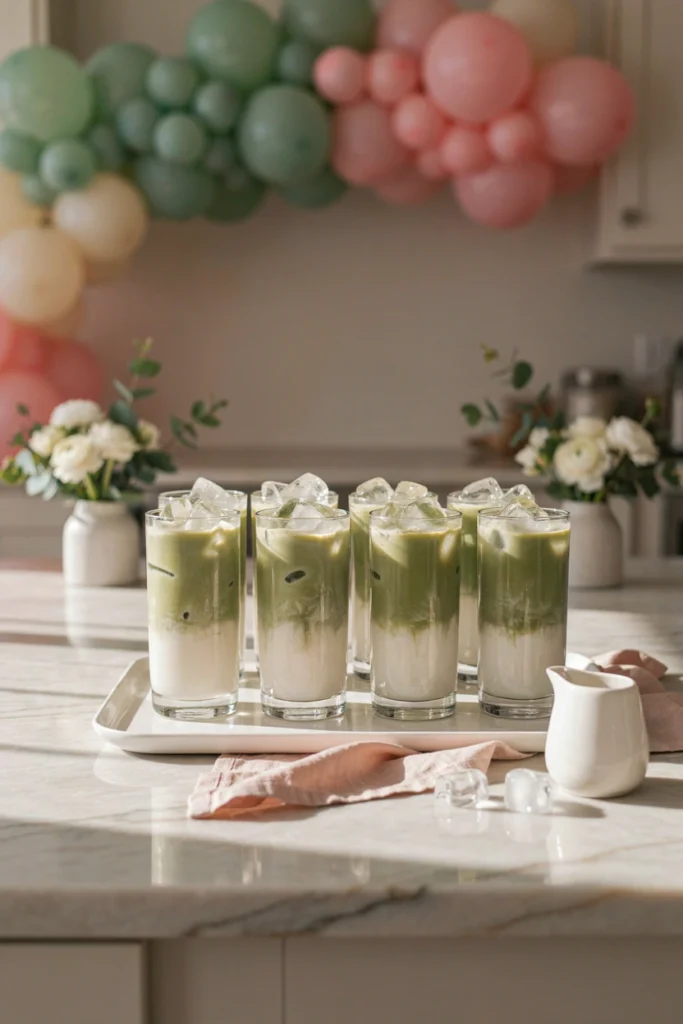
Time: 15 min | Makes: 8 servings
You’ll need: culinary-grade matcha powder, hot water, whole milk or oat milk, simple syrup, ice
Directions: Whisk the matcha powder with a small amount of hot water in each glass until smooth and no clumps remain. Fill the glasses with ice, then slowly pour in the milk, leaving room at the top. Set out a small pitcher of simple syrup on the side so guests can sweeten their own glass to taste, and stir well before drinking.
Setting Up the Table
A few pieces of gear make the whole spread run smoother without much extra effort. A tiered serving tray gives desserts some height, small ramekins or bowls are perfect for dips and spreads, and mini chalkboard labels or baby shower food labels let guests know what they’re grabbing, especially useful for anyone with allergies. A warming tray keeps the quiches and sliders from going cold on a buffet-style table, and a set of mini appetizer forks means nobody’s using their fingers on the chicken salad. If you’re sending anyone home with leftovers, food storage containers make that easy too, and an insulated food carrier keeps everything at the right temperature on the drive over.
No-Fuss & Budget-Friendly Picks
42. Bakery Croissant & Pastry Tray
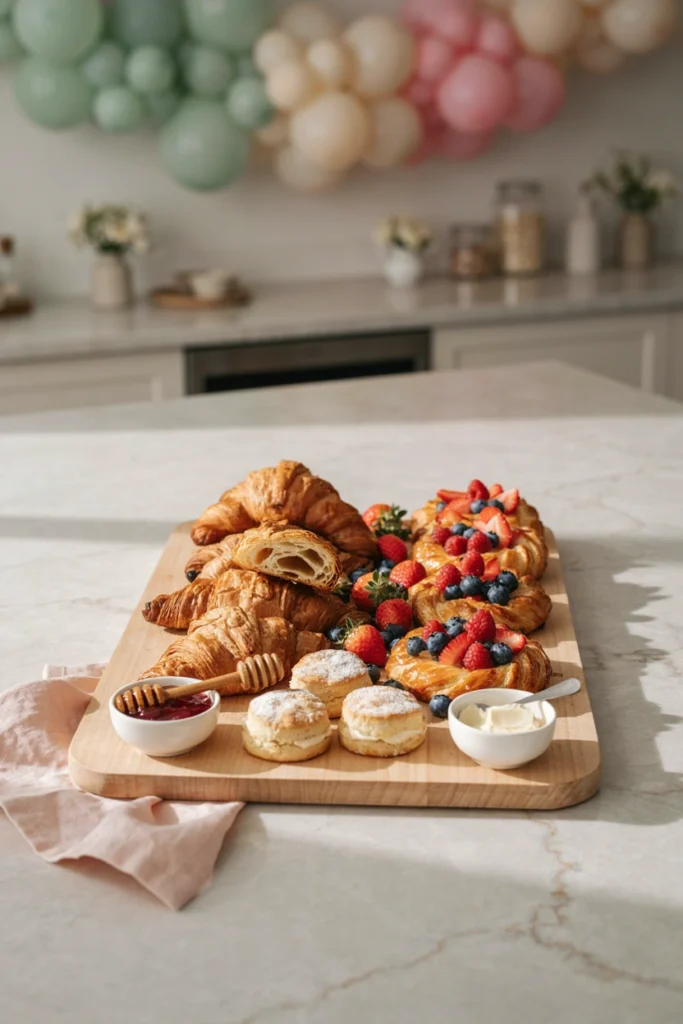
Time: 15 min | Makes: 20 pastries
You’ll need: assorted croissants, fruit danishes, mini scones, assorted jams, softened butter, fresh berries
Directions: Order or pick up the pastry tray from your bakery the morning of the shower, or the day before if freezing overnight. Transfer the pastries from the plastic tray onto a large breakfast serving board. Group like items together, croissants in one cluster, danishes in another, scones in a third, rather than mixing them randomly. Fill any small gaps with fresh berries for color, and set out small bowls of jam and softened butter alongside the board for guests to add themselves.
43. Deli Sandwich Platter
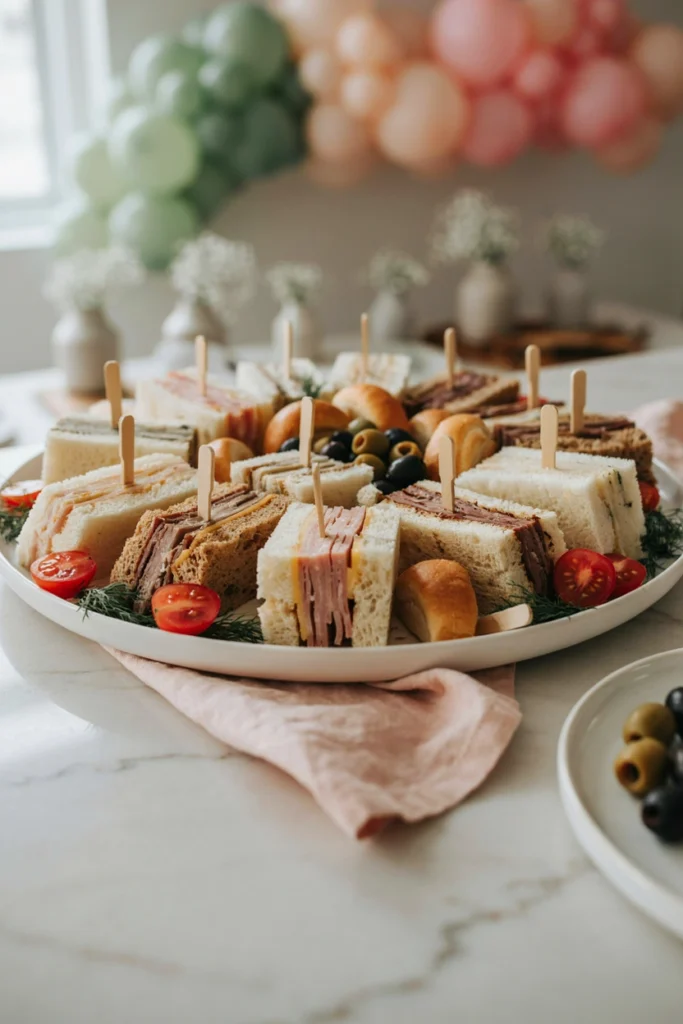
Time: 10 min | Makes: 20 mini sandwiches
You’ll need: pre-made deli sandwich platter, fresh parsley or dill, cherry tomatoes, mixed olives, toothpick flags or skewers
Directions: Order the sandwich platter from your grocery store or deli one to two days ahead. Transfer the sandwiches from the plastic tray onto your own serving platter, arranging by type. Scatter the chopped herbs over the top for color and freshness, and fill in gaps around the edges with halved cherry tomatoes and olives. Secure with cocktail picks if desired, then cover and refrigerate until 15 minutes before serving.
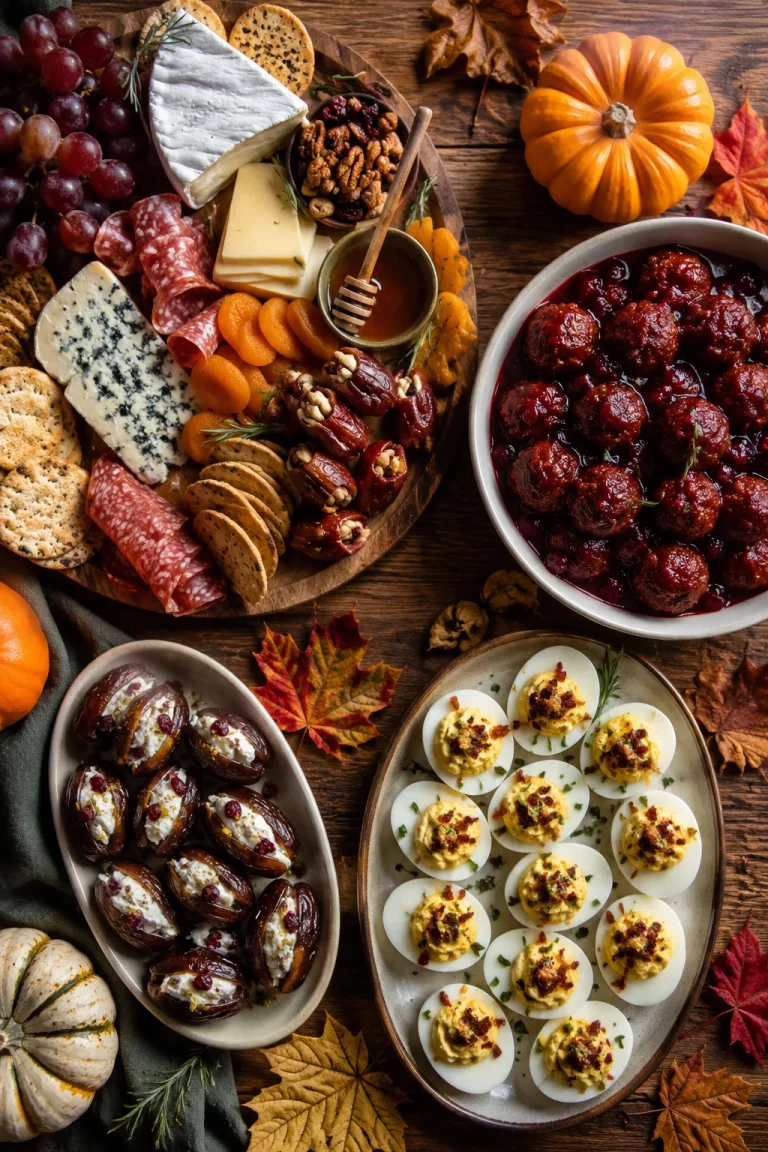
44. Grazing Board with Crackers & Cheese
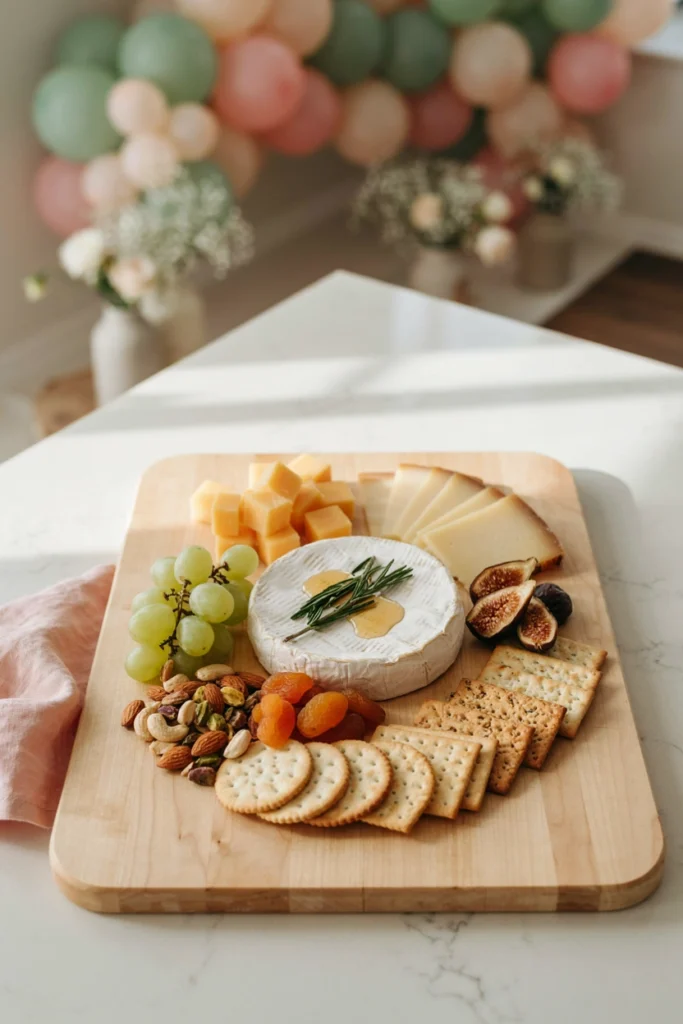
Time: 20 min | Makes: 10-12 servings
You’ll need: sharp cheddar, brie or camembert, manchego, assorted crackers, mixed nuts, dried apricots, dried figs, honey, fresh grapes, fresh rosemary sprigs
Directions: Set the brie in the center of a large wooden charcuterie board and let it come to room temperature about 20 minutes before serving. Arrange the cubed cheddar and sliced manchego in separate clusters around the brie, slicing with a cheese knife set. Fan the crackers out in small overlapping stacks between the cheese clusters, then fill remaining gaps with mixed nuts, dried apricots, and figs. Tuck in small grape clusters and rosemary sprigs for color, and drizzle honey over the brie right before serving.
45. Store-Bought Fruit Tray Upgrade
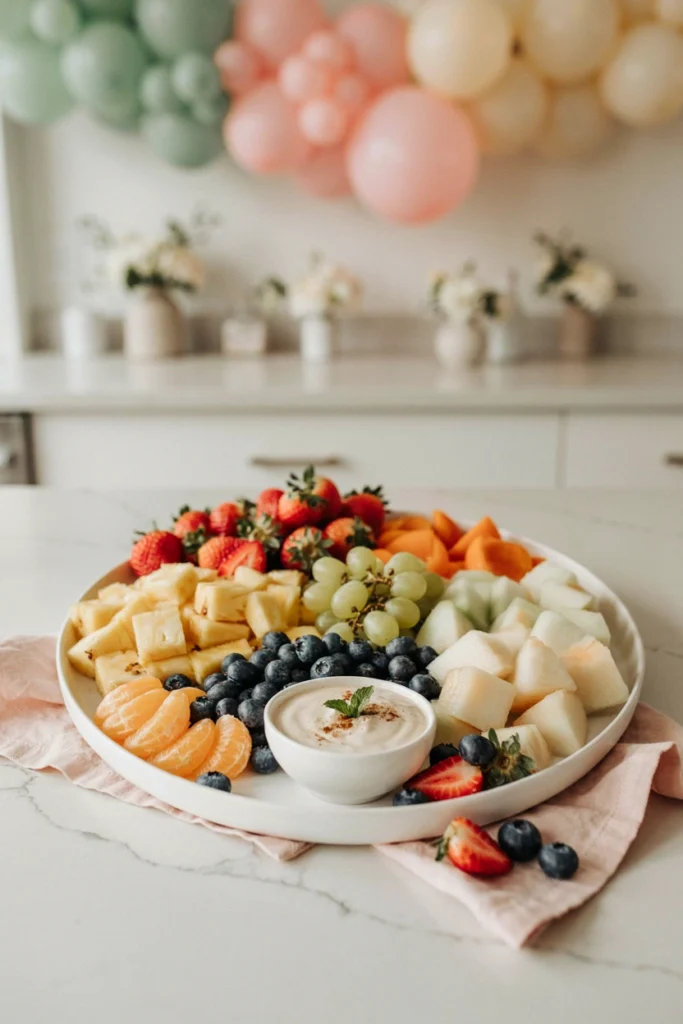
Time: 10 min | Makes: 12 servings
You’ll need: grocery store fruit tray, vanilla Greek yogurt, honey, ground cinnamon
Directions: Stir together the Greek yogurt, honey, and cinnamon in a small bowl until smooth. Carefully transfer the fruit from the store-bought tray onto your own decorative platter, keeping it grouped by type. Place the bowl of yogurt dip in the center, then rearrange any loose fruit around the bowl to fill gaps and keep the platter looking full. Cover and refrigerate until just before guests arrive.
46. Store-Bought Bagel & Lox Board
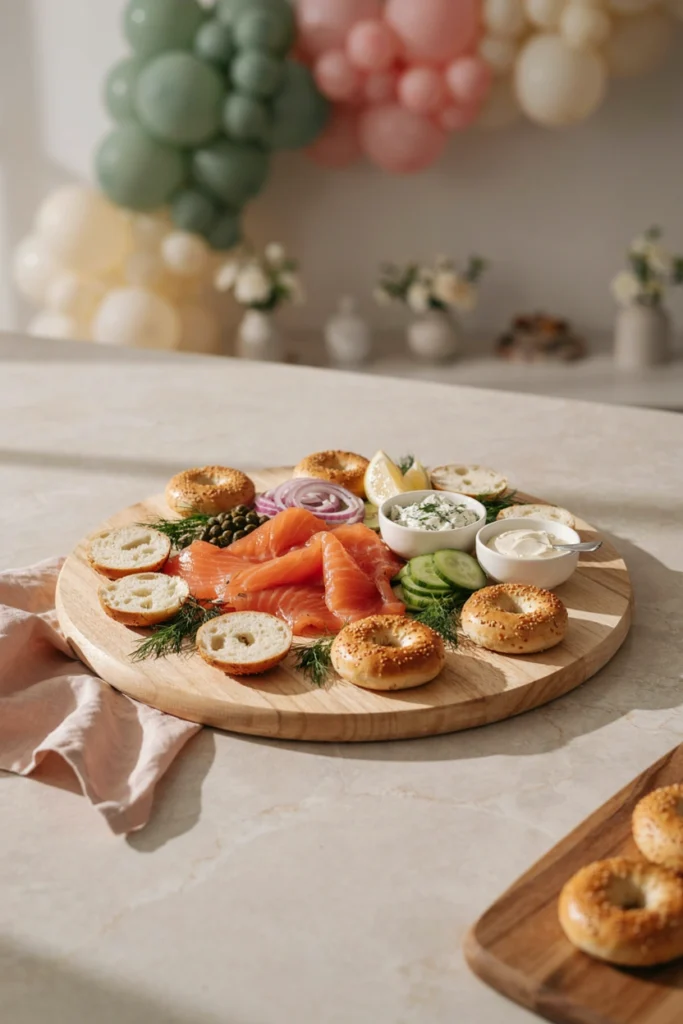
Time: 15 min | Makes: 12 servings
You’ll need: mini bagels, smoked salmon, plain and herb cream cheese, capers, red onion, fresh dill, lemon wedges
Directions: Slice the mini bagels in half with a bagel slicer and arrange them cut-side up on a large board. Set out small bowls of plain and herb cream cheese with spreading knives nearby. Fan the smoked salmon in loose piles across the board and scatter with thinly sliced red onion, capers, and dill sprigs. Tuck lemon wedges around the edges and let guests build their own bagels.
47. Pre-Made Hummus & Veggie Platter
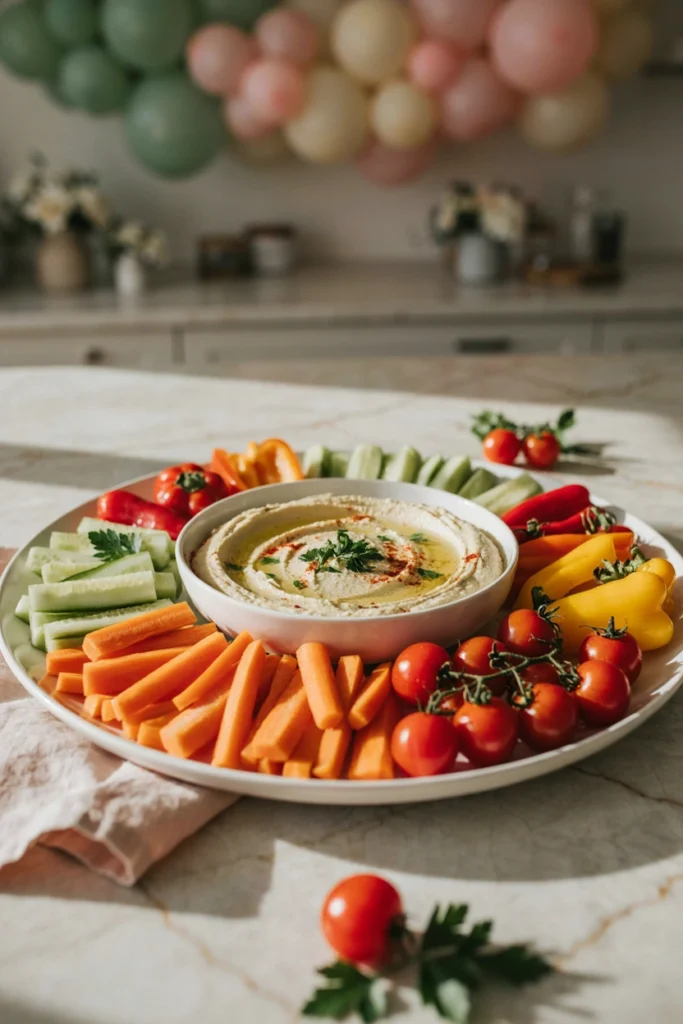
Time: 10 min | Makes: 12 servings
You’ll need: store-bought hummus, cherry tomatoes, mini bell peppers, cucumber, carrots, olive oil, paprika, fresh parsley
Directions: Spoon the hummus into a shallow serving bowl and swirl the back of a spoon across the top to create a well. Drizzle with olive oil and dust with paprika, then scatter chopped parsley over the top. Slice the cucumber and carrots into sticks and halve the mini peppers and cherry tomatoes. Arrange the vegetables around the hummus bowl in color-grouped clusters and serve within a few hours of assembling.
48. Grocery Store Cupcake Upgrade
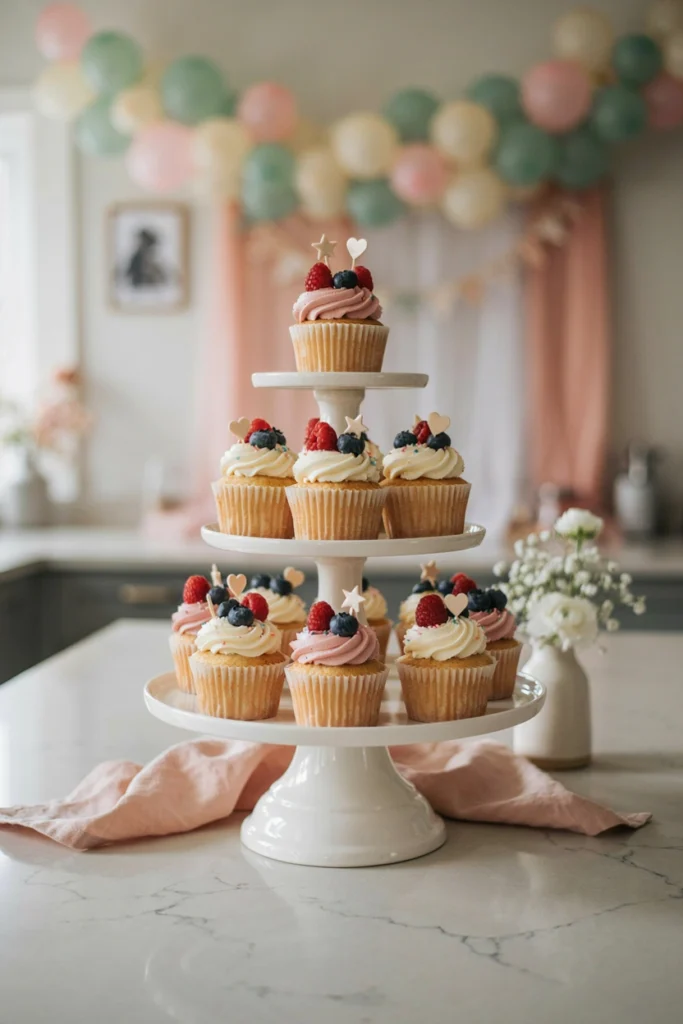
Time: 15 min | Makes: 12 cupcakes
You’ll need: store-bought frosted cupcakes, fresh edible flowers or fresh berries, sprinkles, mini cupcake toppers
Directions: Arrange the store-bought cupcakes on a tiered cupcake dessert stand, alternating colors if the frosting varies. Press a small edible flower or fresh berry gently into the top of each cupcake’s frosting swirl. Add a light scatter of sprinkles over half the cupcakes for variety, and insert a mini topper into a few for visual interest. Keep chilled in an airtight cupcake carrier until 30 minutes before serving so the frosting isn’t too firm.
49. Frozen Waffle Bar
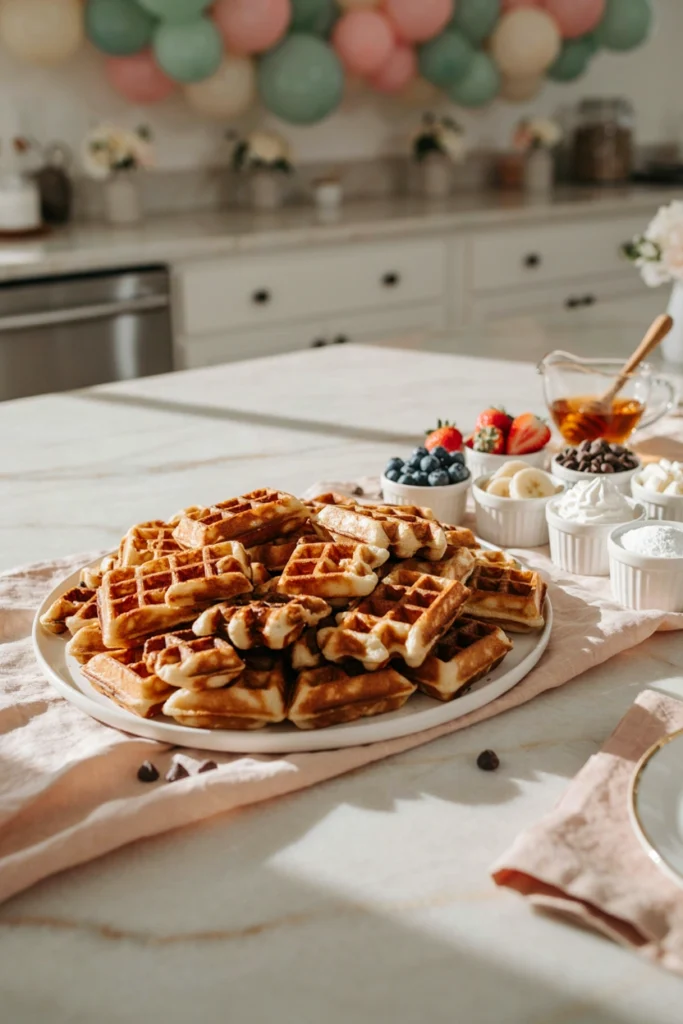
Time: 20 min | Makes: 12 servings
You’ll need: frozen waffles, maple syrup, whipped cream, mixed berries, sliced bananas, chocolate chips, powdered sugar
Directions: Toast the frozen waffles according to the package directions and cut each into quarters, then arrange them on a large platter or warming tray. Set out small bowls of maple syrup from a maple syrup dispenser, whipped cream, mixed berries, sliced bananas, chocolate chips, and powdered sugar in a row alongside the waffles. Let guests build their own plate, and keep the waffles warm as guests serve themselves.
50. Rotisserie Chicken Salad Cups
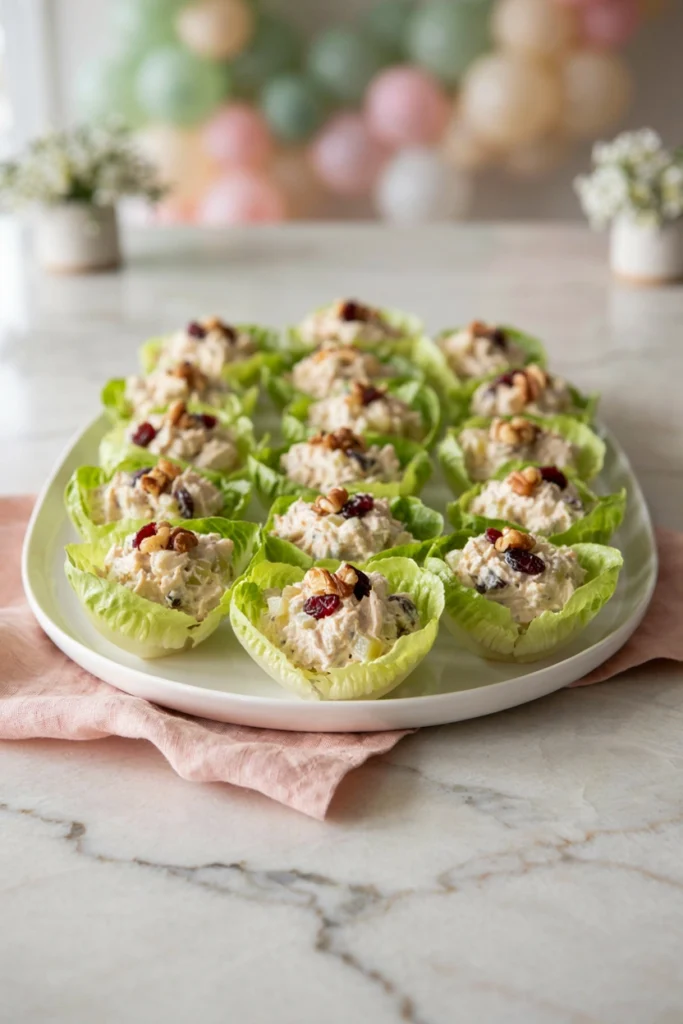
Time: 20 min | Makes: 16 cups
You’ll need: rotisserie chicken, mayonnaise, Dijon mustard, celery, dried cranberries, walnuts, salt, black pepper, butter lettuce leaves
Directions: Shred the rotisserie chicken, discarding the skin and bones, and place it in a large bowl. Stir in the mayonnaise, Dijon, diced celery, dried cranberries, and chopped walnuts until evenly combined, then season with salt and pepper. Spoon about 2 tablespoons of the chicken salad into each butter lettuce leaf, folding the leaf slightly to cup the filling, and secure with small tongs for serving. Arrange on a platter and serve immediately, or refrigerate the filling separately and assemble the cups just before guests arrive.
Frequently Asked Questions
What food do you serve at a baby shower brunch?
A mix of savory bites like mini quiches or croissant sliders, sweet bakery treats, fresh fruit, and a drink station such as a mimosa bar. Aim for five to seven dish categories rather than dozens of separate items to keep both planning and shopping simple.
How much food do I need for a baby shower brunch?
Plan on roughly four to five small bites per guest across your menu categories, plus one drink serving per person. For 20 guests, that works out to about 80 to 100 total bites split across savory, sweet, and fresh options.
What are the best make-ahead baby shower brunch foods?
Quiches, banana bread muffins, sugar cookies, cheesecake bites, and chicken salad filling can all be made one to two days ahead and either reheated or served cold, which frees up your morning of the party.
Can I host a baby shower brunch with no cooking at all?
Yes, a bakery pastry tray, a deli sandwich platter, a store-bought fruit tray, a bagel and lox board, and a simple cheese and cracker board can cover your entire menu with zero stovetop time. Check out our dollar store baby shower ideas for budget-friendly finds.
What should I serve besides cake at a baby shower?
Mini muffins, chocolate-dipped strawberries, sugar cookies, cream puffs, and a mini donut bar all work well as cake companions or alternatives.
What drinks should I serve at a baby shower brunch?
A mimosa bar for guests who drink, paired with a sparkling berry mocktail for the mom-to-be and any pregnant guests, plus infused water, a peach bellini bar, or an iced coffee station rounds out the drink menu nicely.