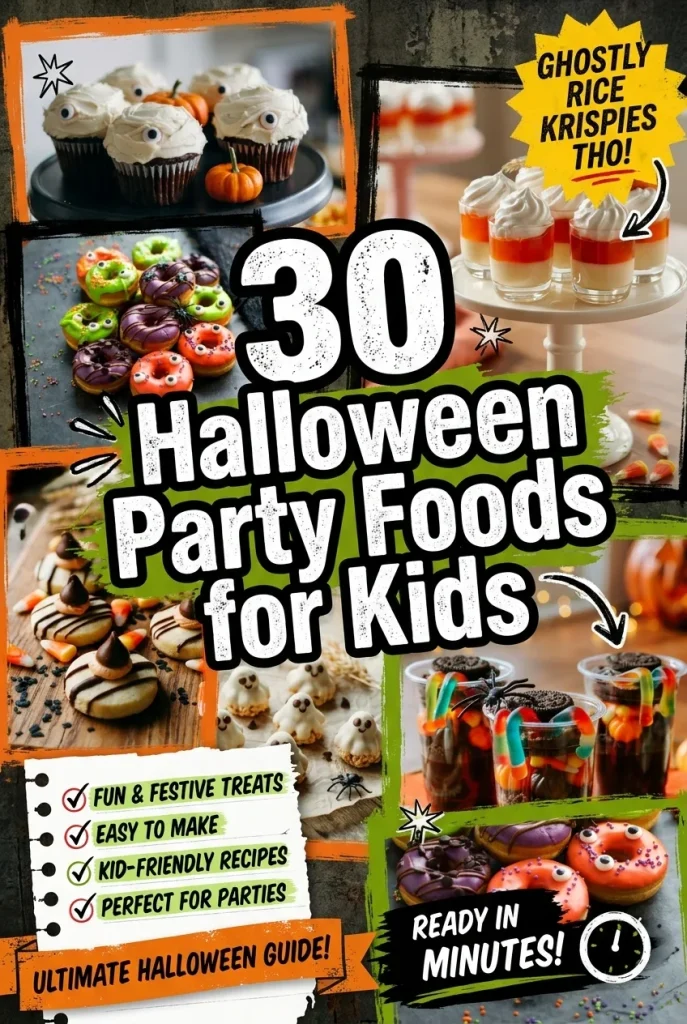
The best Halloween party foods for kids mix sweet treats (mummy cupcakes, ghost Rice Krispies), savory finger foods (mummy hot dogs, jack-o’-lantern quesadillas), DIY craft stations, and fun non-caffeinated drinks. Every idea below is tagged No-Bake, Quick, or Bake Required, so you can pick based on how much time you actually have.
Heads up: This post may include affiliate links. As an Amazon Associate, I earn from qualifying purchases—at no extra cost to you. Full privacy policy and disclosure here.
Sweet Halloween Treats
1. Mummy Cupcakes
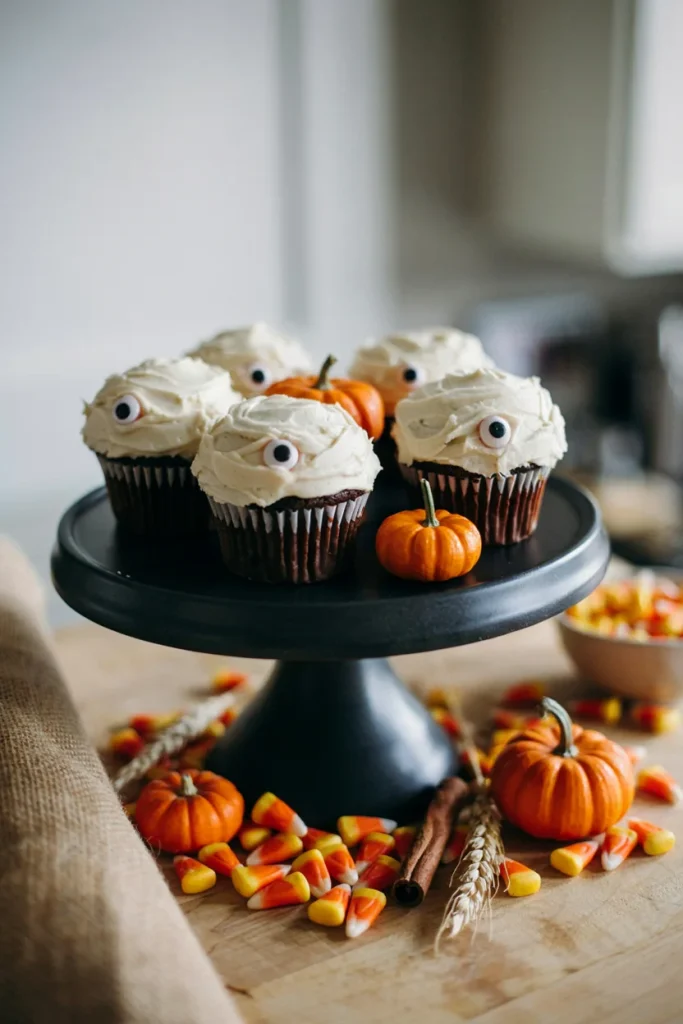
White icing piped in messy, overlapping strips turns an ordinary cupcake into something kids beg to unwrap first. Two candy eyeballs peeking through the “bandages” is the detail that gets the giggles going.
Prep Time: 10 min | Cook Time: 0 min | Total Time: 10 min | Servings: 12 cupcakes | Difficulty: Easy
Ingredients
- 12 baked chocolate cupcakes (box mix works fine)
- 2 cups white buttercream frosting
- 24 candy eyeballs
Instructions
- If baking from a mix, bake per package directions and cool completely.
- Fit a piping bag with a flat ribbon tip and fill with white frosting.
- Pipe overlapping strips across the top of each cupcake, leaving a small gap.
- Press 2 candy eyeballs into the gap on each cupcake.
- Serve within a few hours for the best frosting texture.
Effort: Quick (15 min)
Start with store-bought or box-mix cupcakes — the only skill required is piping straight lines, and even wobbly ones read as “mummy.”
Mom Tip
Use a flat piping tip, not round, for that authentic wrapped-bandage look. A Halloween cupcake decorating kit comes with everything pre-portioned.
2. Monster Eyeball Donuts
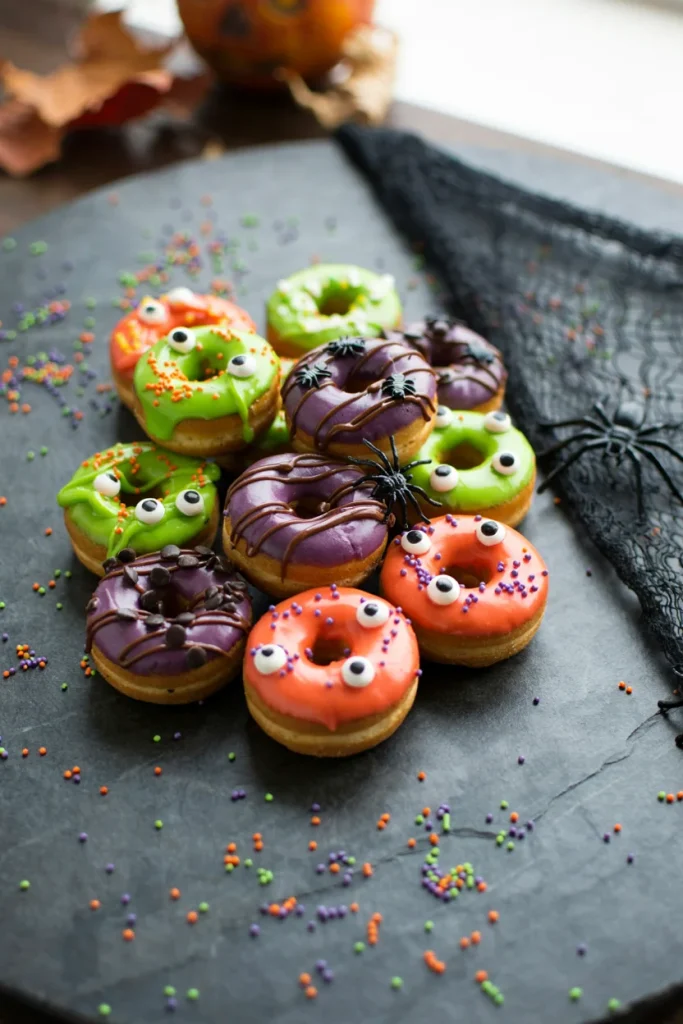
Neon frosting against a dark chocolate drizzle makes these look like they belong in a monster’s kitchen, not yours. The uneven, hand-swirled frosting is the whole point — perfection isn’t the goal here.
Prep Time: 10 min | Cook Time: 0 min | Total Time: 10 min | Servings: 12 donuts | Difficulty: Easy
Ingredients
- 12 mini cake donuts (store-bought)
- 1 cup green frosting
- 1 cup purple frosting
- 24 candy eyeballs
- 1/4 cup chocolate, melted
Instructions
- Spread or dip donut tops in green or purple frosting, alternating colors.
- While the frosting is still wet, press 2 candy eyeballs onto each donut.
- Drizzle melted chocolate over the tops in a zigzag pattern.
- Let set 5 minutes before serving.
Effort: No-Bake
Grab mini donuts from the store and skip the oven entirely.
Why You’ll Love It
It doubles as a decorating station — kids top their own, so you’re not the only one on frosting duty.
3. Witch Hat Cookies
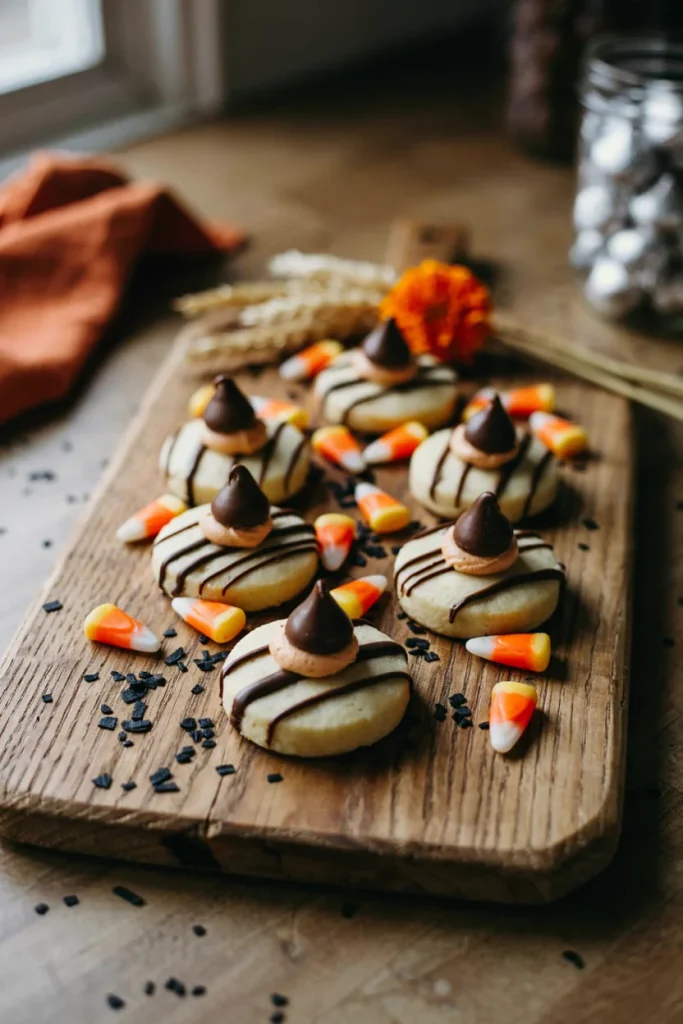
Three ingredients stack into a hat shape that reads instantly, no piping skill needed. The little dab of orange frosting at the brim is what sells the whole illusion.
Prep Time: 10 min | Cook Time: 0 min | Total Time: 10 min | Servings: 24 cookies | Difficulty: Easy
Ingredients
- 24 fudge stripe cookies
- 24 Hershey’s Kisses, unwrapped
- 1/4 cup orange frosting
Instructions
- Pipe a small dot of frosting onto the flat side of each fudge stripe cookie.
- Press a Hershey’s Kiss point-up into the center of the frosting.
- Pipe a thin ring of orange frosting around the base of the Kiss to form the hat brim.
- Let set 10 minutes before serving.
Effort: No-Bake
Fudge stripe cookies, a Hershey’s Kiss, and a dot of frosting — nothing touches the oven.
Best For
Last-minute contributions when someone asks “can you bring a treat” the night before.
4. Pumpkin Patch Dirt Cups
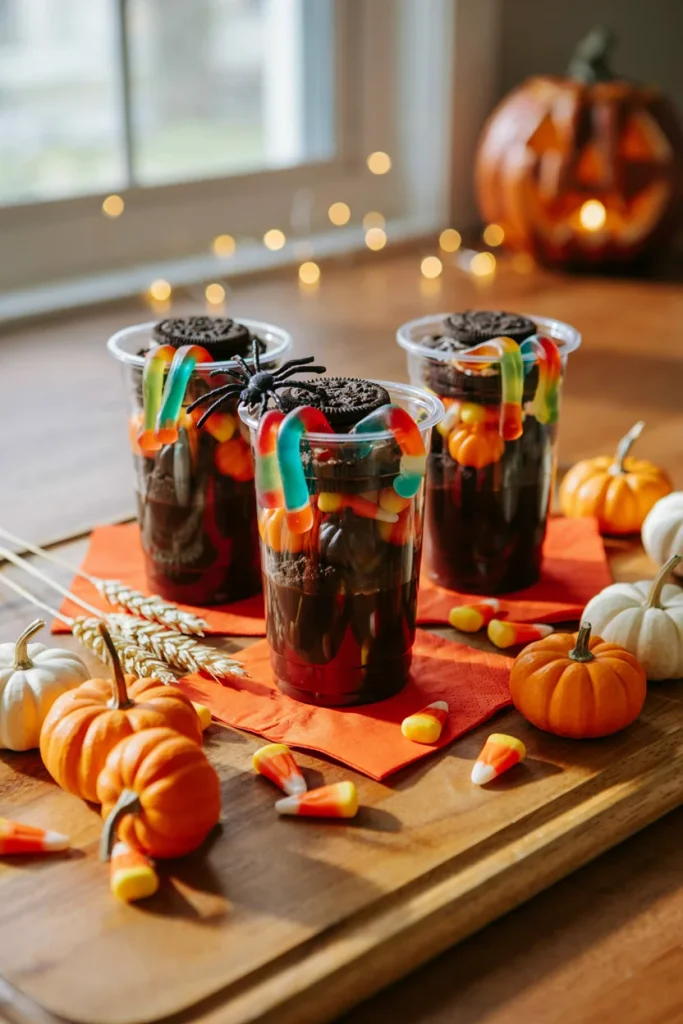
Layered in clear cups, the “dirt” effect shows through the plastic before anyone even takes a bite. A gummy worm poking out the top is the detail kids fish out first.
Prep Time: 15 min | Cook Time: 0 min | Total Time: 1 hr 15 min (incl. chilling) | Servings: 6 cups | Difficulty: Easy
Ingredients
- 2 cups chocolate pudding
- 1 1/2 cups crushed Oreo cookies
- 12 candy pumpkins
- 6 gummy worms
Instructions
- Spoon 1/4 cup chocolate pudding into each of 6 clear cups.
- Top with a layer of crushed Oreos.
- Repeat the pudding and cookie layers once more.
- Top each cup with 2 candy pumpkins and a gummy worm poking out.
- Chill at least 1 hour before serving.
Effort: No-Bake
Just layering — pudding, crushed cookies, candy pumpkins, done.
Good to Know
Assemble a few hours ahead so the “dirt” layer sets without going soggy.
5. Ghost Rice Krispie Treats
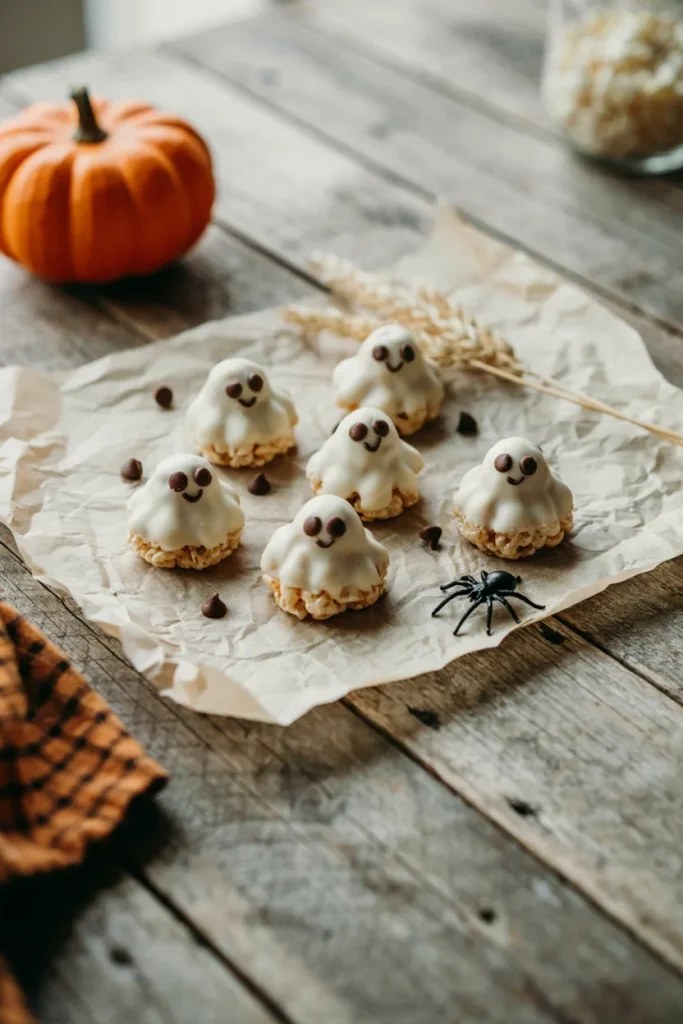
Cutting the treats into a rounded ghost silhouette before dipping is what separates these from a plain white square — the shape does the storytelling.
Prep Time: 15 min | Cook Time: 5 min | Total Time: 30 min | Servings: 12 treats | Difficulty: Easy
Ingredients
- 6 tbsp butter
- 1 (10 oz) bag mini marshmallows
- 6 cups Rice Krispies cereal
- 12 oz white chocolate melting wafers
- 24 mini chocolate chips
Instructions
- Melt butter in a large pot over low heat.
- Add marshmallows and stir until fully melted.
- Remove from heat and fold in the cereal.
- Press mixture into a greased 9×13-inch pan and cool 30 minutes.
- Cut into rounded ghost shapes using a cookie cutter.
- Melt white chocolate and dip each ghost halfway.
- Press 2 mini chocolate chips onto each for eyes before the chocolate sets.
Effort: Quick (15 min)
Melting white chocolate for dipping is the only step that takes real attention.
Styling Tips
Let kids place the mini chocolate chip faces themselves — no two ghosts end up with the same expression, which is half the charm.
6. Candy Corn Parfaits
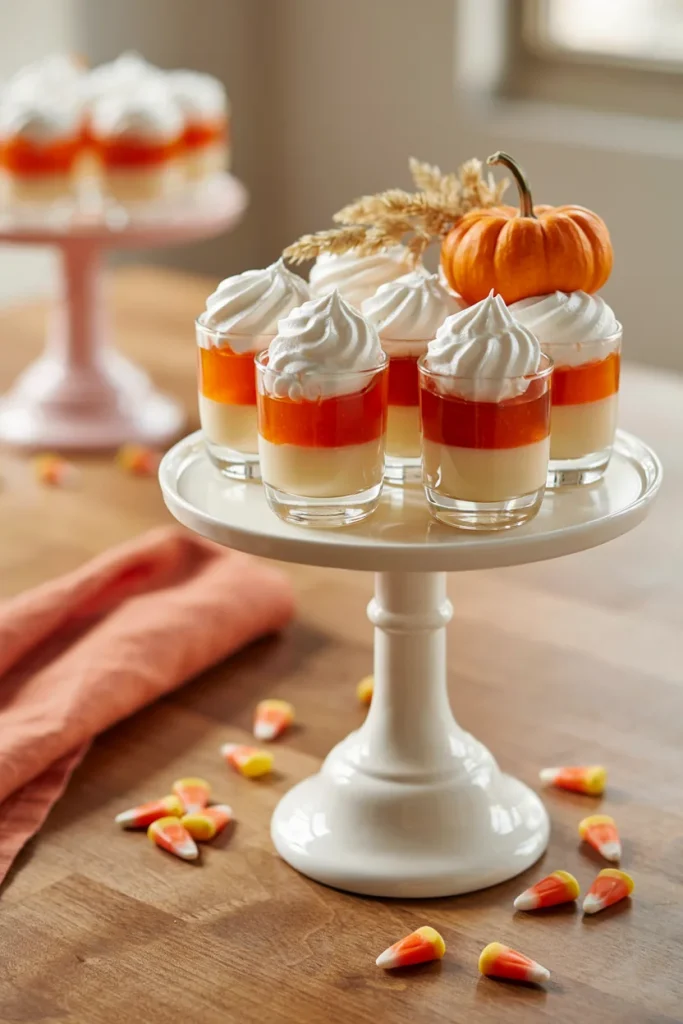
Layered orange, cream, and white, these mimic the exact stripe pattern of the candy they’re named for — a visual trick that lands every time.
Prep Time: 15 min | Cook Time: 0 min | Total Time: 2 hr 15 min (incl. chilling) | Servings: 6 parfaits | Difficulty: Easy
Ingredients
- 1 (3 oz) box orange Jell-O
- 2 cups vanilla pudding
- 1 cup whipped cream
Instructions
- Prepare the Jell-O according to package directions and chill until set, about 2 hours.
- Spoon a layer of orange Jell-O into small cups.
- Top with a layer of vanilla pudding.
- Finish with a layer of whipped cream.
- Chill 15 minutes before serving.
Effort: No-Bake
Layer and chill; no cooking beyond making Jell-O.
Best For
Parents trying to dial back straight-sugar candy without losing the Halloween look.
7. Dracula Denture Cookies
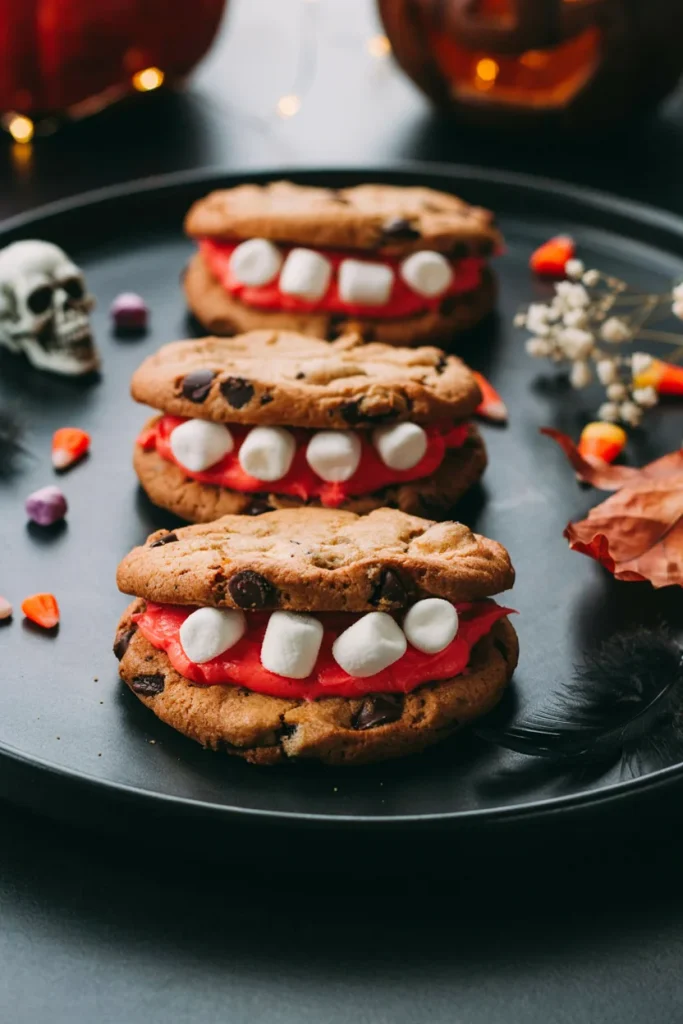
Red icing gums and marshmallow teeth turn a cookie sandwich into a gross-out gag that older kids specifically request by name.
Prep Time: 15 min | Cook Time: 0 min | Total Time: 15 min | Servings: 12 sandwiches | Difficulty: Easy
Ingredients
- 24 chocolate chip cookies (12 sandwich pairs)
- 1/2 cup red decorating icing
- 1 cup mini marshmallows
Instructions
- Spread red icing on the flat side of half the cookies.
- Press 4-5 mini marshmallows around the edge of the icing to look like teeth.
- Top with the second cookie, pressing gently so the icing peeks out like gums.
- Serve immediately, or chill up to 1 day.
Effort: No-Bake
Store-bought cookies, red icing, marshmallows — no baking required.
Best For
Tweens and older kids who want something funnier than cute.
Savory Snacks & Finger Foods
8. Mummy Hot Dogs

Crescent dough strips wrapped loosely — not perfectly — give these their signature bandaged look straight out of the oven, mustard-dot eyes and all.
Prep Time: 15 min | Cook Time: 15 min | Total Time: 30 min | Servings: 8 hot dogs | Difficulty: Easy
Ingredients
- 8 hot dogs
- 1 (8 oz) can crescent roll dough
- Mustard, for eyes
Instructions
- Preheat oven to 375°F.
- Unroll the crescent dough and cut into thin strips.
- Wrap each hot dog loosely with 4-5 strips, leaving a gap near the top for a face.
- Place on a parchment-lined baking sheet.
- Bake 12-15 minutes until the dough is golden brown.
- Cool 2 minutes, then dot on mustard eyes.
Effort: Bake Required
About 15 minutes in the oven until the dough turns golden.
Mom Tip
Line the pan with parchment sheets so nothing sticks and cleanup takes seconds.
9. Jack-o’-Lantern Quesadillas
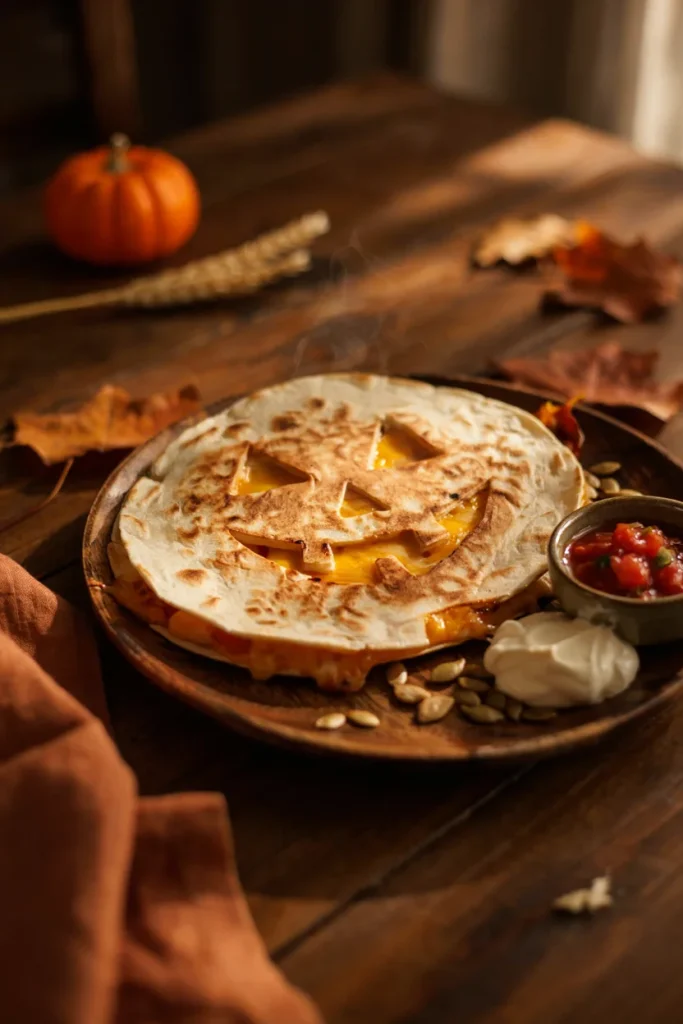
Melted cheese glowing through a cut-out pumpkin face is the visual hook — it looks like a jack-o’-lantern lit from inside.
Prep Time: 10 min | Cook Time: 5 min | Total Time: 15 min | Servings: 4 quesadillas | Difficulty: Easy
Ingredients
- 8 flour tortillas
- 2 cups shredded cheddar cheese
- 2 tbsp butter
- Salsa, for serving
Instructions
- Use a small knife or cutter to cut a jack-o’-lantern face out of half the tortillas.
- Heat butter in a skillet over medium heat.
- Place a whole tortilla in the skillet, top with cheese, and cover with a cut tortilla.
- Cook 2-3 minutes per side until the cheese melts and the tortilla is golden.
- Slice and serve warm with salsa.
Effort: Quick (15 min)
A few minutes in a skillet is all it takes once the face is cut.
Good to Know
A pumpkin cutter set makes the face cut-out fast and consistent.
10. Mini Monster Burgers
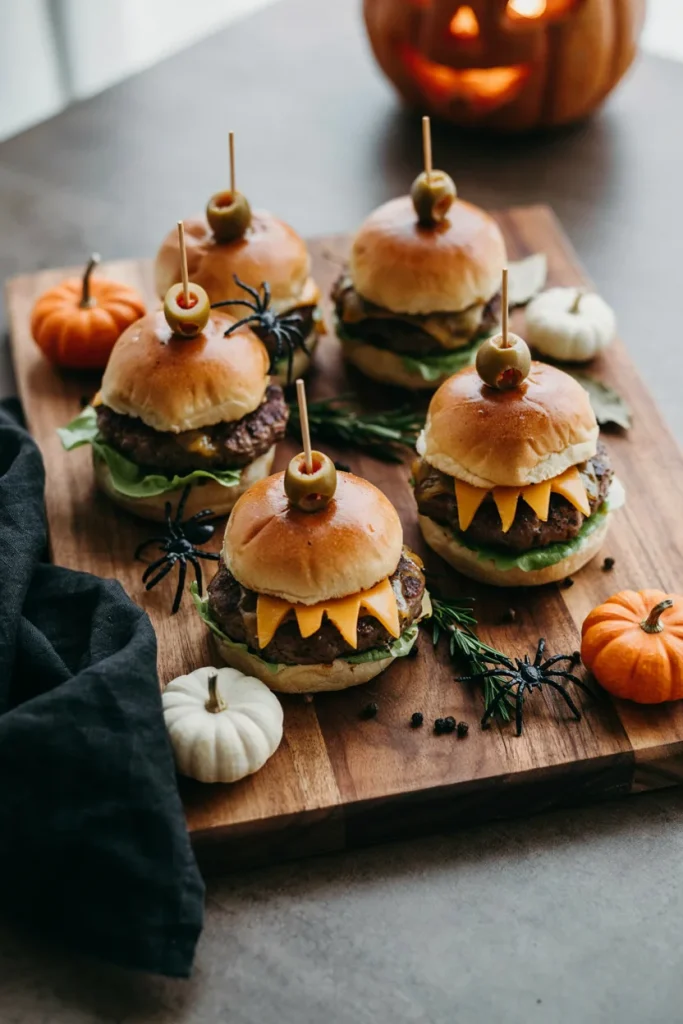
Jagged cheddar teeth and wobbly olive eyes on toothpicks give these sliders a personality most burgers don’t have — kids “monster-fy” their own.
Prep Time: 15 min | Cook Time: 10 min | Total Time: 25 min | Servings: 8 sliders | Difficulty: Easy
Ingredients
- 1 lb ground beef
- 8 slider buns
- 4 slices cheddar cheese, cut into jagged “teeth”
- 16 pitted olives (for eyes)
- Toothpicks
Instructions
- Form ground beef into 8 slider patties and season lightly.
- Cook patties in a skillet or grill about 4 minutes per side.
- Top each patty with a jagged cheese “teeth” slice and let it melt slightly.
- Assemble on buns and skewer 2 olives on a toothpick for eyes atop each burger.
- Serve warm.
Effort: Bake Required
Full cooking involved, but a slider press speeds up shaping.
Pair It With
A drop of food coloring in the bun dough for a tinted, extra-eerie bite.
11. Witch’s Broomsticks
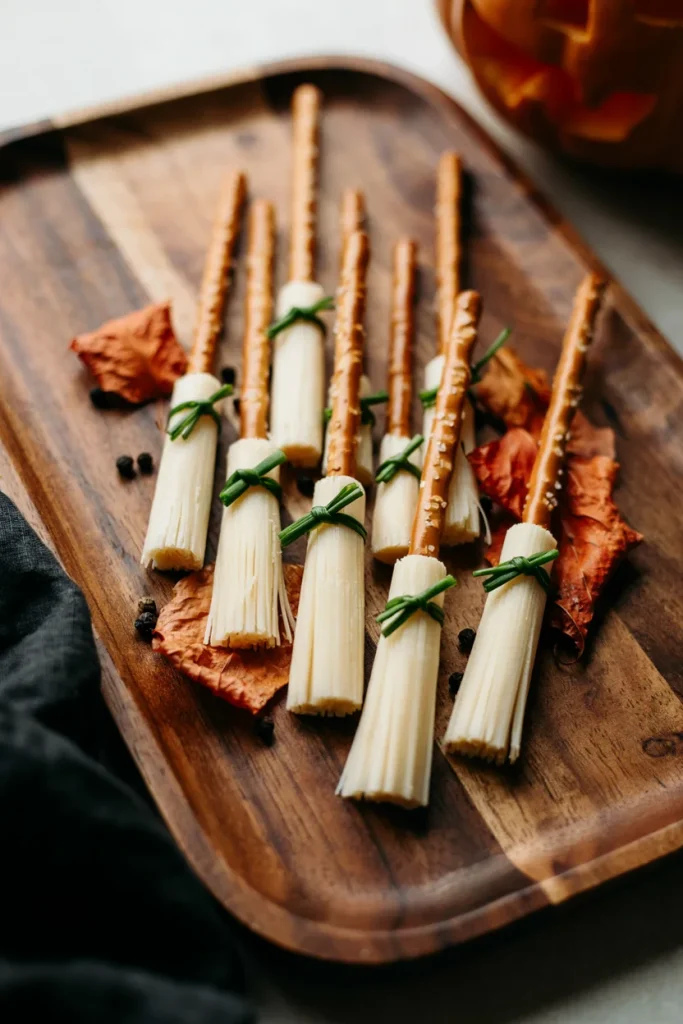
The fringed cheese “bristles” against a straight pretzel handle is a shape kids recognize before you even explain it.
Prep Time: 5 min | Cook Time: 0 min | Total Time: 5 min | Servings: 8 broomsticks | Difficulty: Easy
Ingredients
- 8 string cheese sticks
- 8 thick pretzel sticks
Instructions
- Cut about a third of the way down each string cheese stick.
- Peel and fringe that cut end into thin strips to look like bristles.
- Insert a pretzel stick into the uncut end as the broom handle.
- Serve immediately or chill until ready.
Effort: No-Bake
Slice, fringe, and poke in a pretzel — under five minutes.
Why You’ll Love It
Protein on the table without anyone noticing it’s the healthy option.
12. Pumpkin Veggie Tray
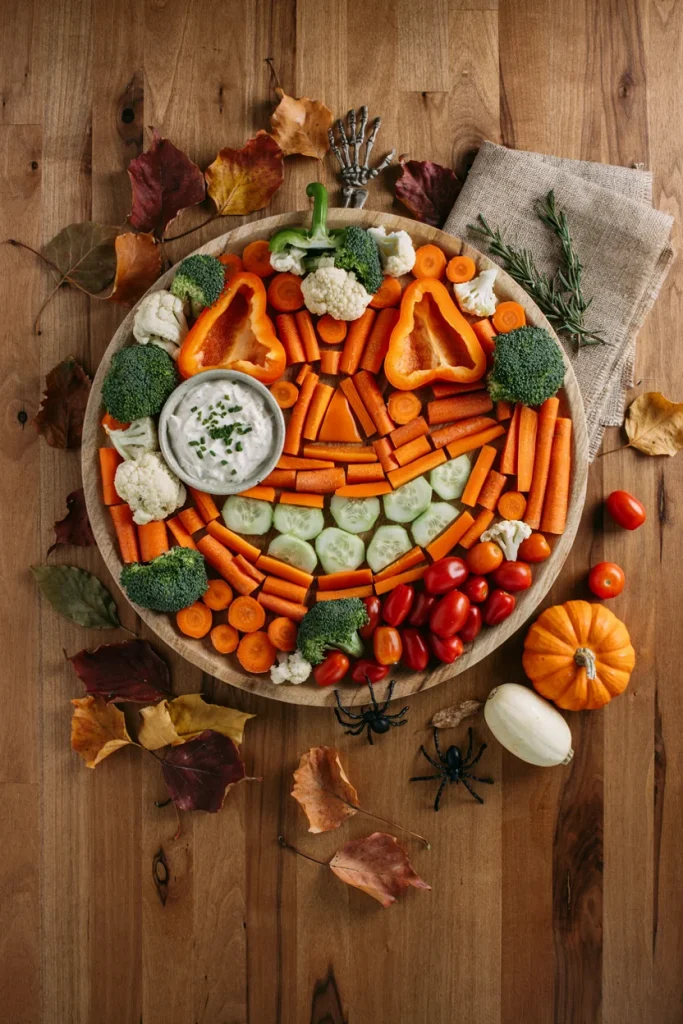
Arranged into a pumpkin outline with a bell pepper “stem,” this tray gets attention a flat veggie plate never would.
Prep Time: 15 min | Cook Time: 0 min | Total Time: 15 min | Servings: 10-12 | Difficulty: Easy
Ingredients
- Baby carrots
- Cucumber, sliced
- Cherry tomatoes
- 1 green bell pepper, cut into a stem shape
- Ranch dip, for serving
Instructions
- Arrange carrots and cucumber slices in a circular pumpkin outline on a round platter.
- Fill in the center with cherry tomatoes.
- Place the bell pepper stem piece at the top center.
- Add a small bowl of ranch dip in the middle or off to the side.
Effort: No-Bake
Just arranging — no cooking, no prep beyond slicing.
Budget Tip
The cheapest item on this list and the one that stretches furthest for a crowd.
13. Bloody Finger Sandwiches
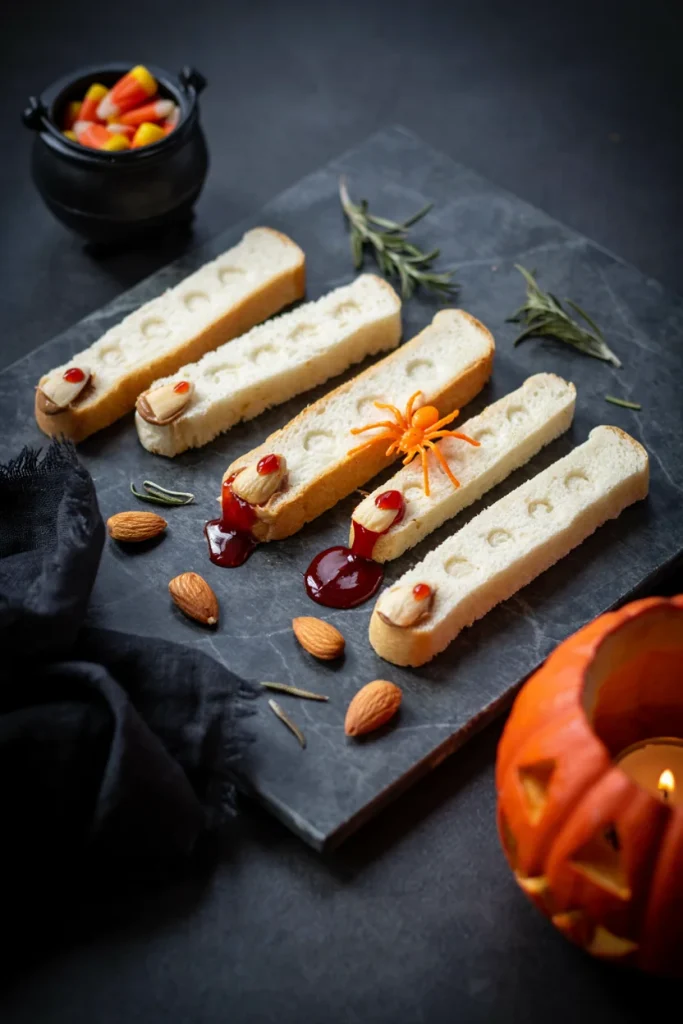
A single sliced almond “nail” and a swipe of red icing is all it takes to turn a normal sandwich into the gross-out hit of the table.
Prep Time: 10 min | Cook Time: 0 min | Total Time: 10 min | Servings: 8 sandwiches | Difficulty: Easy
Ingredients
- 8 slices bread
- Peanut butter and jelly (or sunflower butter for nut-free)
- 8 sliced almonds (or red bell pepper strips for nut-free)
- Red decorating icing
Instructions
- Make sandwiches as usual, then trim crusts.
- Cut each sandwich into finger-shaped strips.
- Press a sliced almond into one end of each strip as the “nail.”
- Dot red icing around the nail for a bloody effect.
Effort: No-Bake
Trim and decorate — no cooking involved.
Good to Know
Skip the almond and swap in a strip of red bell pepper for nut-free parties.
14. Ghost Popcorn Bags
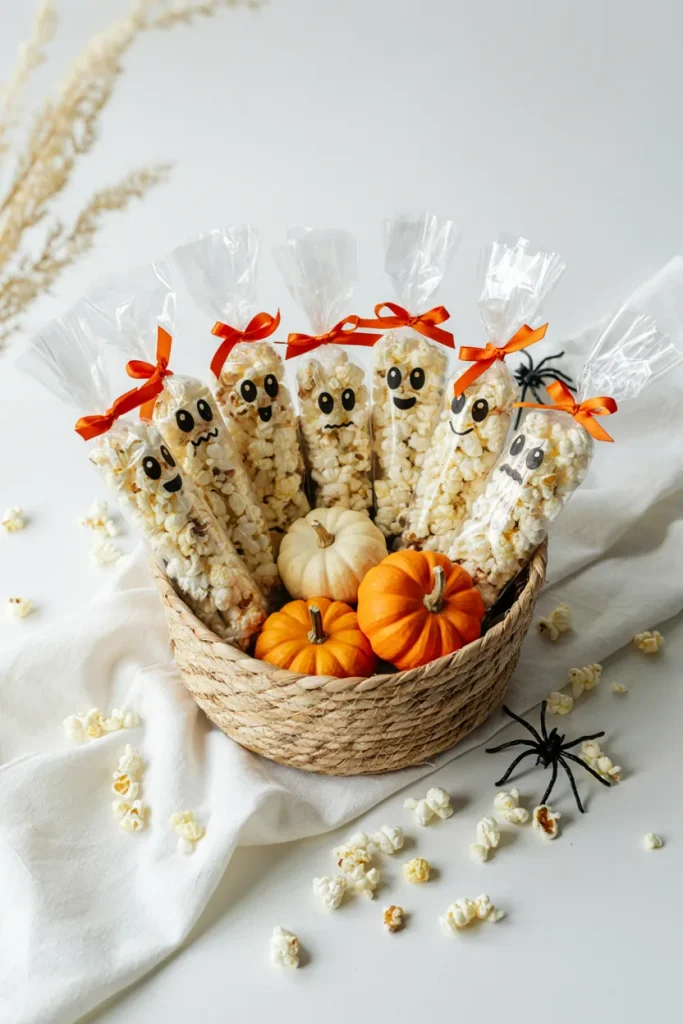
A goofy marker-drawn face on a clear bag of popcorn turns a grab-and-go snack into something kids want as a keepsake, not just a snack.
Prep Time: 10 min | Cook Time: 0 min | Total Time: 10 min | Servings: 8 bags | Difficulty: Easy
Ingredients
- 8 clear cellophane treat bags
- 8 cups popped popcorn
- Black permanent marker
- Orange ribbon
Instructions
- Fill each bag with 1 cup of popcorn.
- Draw a simple ghost face on the front of each bag with marker.
- Tie the top closed with orange ribbon.
Effort: No-Bake
Fill, draw, tie — done in one sitting.
Best For
Doubling as a party favor so there’s less to send home separately.
Pick by Effort & Age
Short on time or working with little ones? Use this to skip straight to what fits your night.
| Effort Level | Best Age Group | Try These |
|---|---|---|
| No-Bake | Toddlers & preschoolers (soft, easy to hold) | Witch’s Broomsticks, Pumpkin Veggie Tray, Ghost Popcorn Bags |
| Quick (15 min) | All ages | Jack-o’-Lantern Quesadillas, Ghost Rice Krispie Treats, Pumpkin Pie Smoothies |
| Bake Required | School-age & up (more standing time) | Mummy Hot Dogs, Mini Monster Burgers, Scary Face Mini Pizzas |
DIY Food Crafts for Kids
15. Decorate-Your-Own Monster Cookies
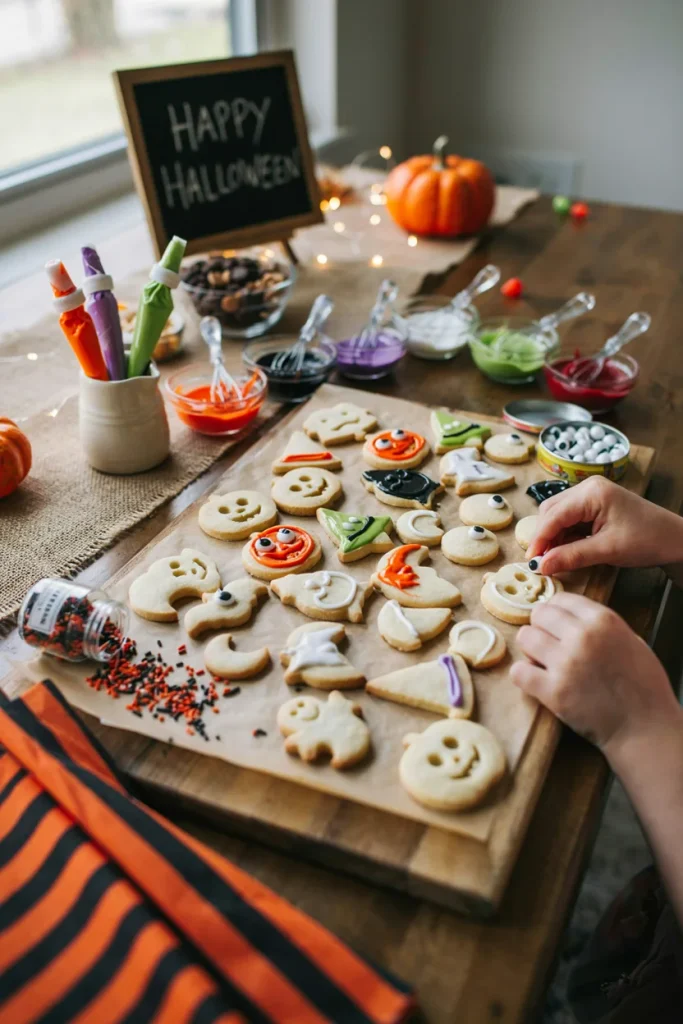
Handing over the piping bag is the whole trick — every cookie comes out lopsided and completely one-of-a-kind, which is exactly what makes this station a hit.
Prep Time: 10 min | Cook Time: 0 min | Total Time: 10 min | Servings: 12 cookies | Difficulty: Easy
Ingredients
- 12 plain sugar cookies
- Assorted colored frosting
- Candy eyes, sprinkles, mini chocolate chips
Instructions
- Set out plain cookies, small cups of frosting, and toppings in bowls.
- Let kids frost and decorate their own cookies however they like.
- Let sit a few minutes to set before eating.
Effort: Quick (15 min setup)
Prep the toppings ahead; the “cooking” is just letting kids decorate.
Mom Tip
Corral toppings in a muffin tin so the mess stays contained to one spot.
16. Build-a-Boo Banana Ghosts
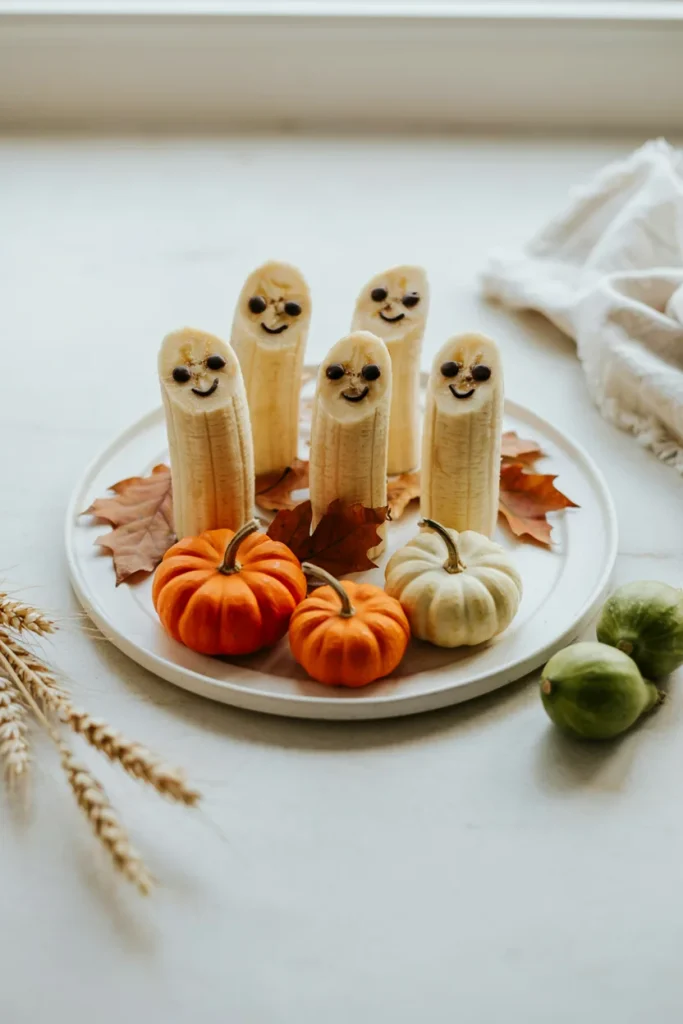
Standing upright on a popsicle stick, these read as little ghosts before you even add the face — the shape alone does the work.
Prep Time: 10 min | Cook Time: 0 min | Total Time: 10 min | Servings: 8 ghosts | Difficulty: Easy
Ingredients
- 4 bananas, halved
- 8 popsicle sticks
- Mini chocolate chips
Instructions
- Insert a popsicle stick into the flat end of each banana half.
- Stand each half upright on a plate.
- Press mini chocolate chips into the top for a ghost face.
- Serve right away, or freeze for a colder treat.
Effort: No-Bake
No cooking; freeze in yogurt for a colder treat if you want.
Why You’ll Love It
A fruit-based option that still feels like a real Halloween treat.
17. Apple Monster Mouths
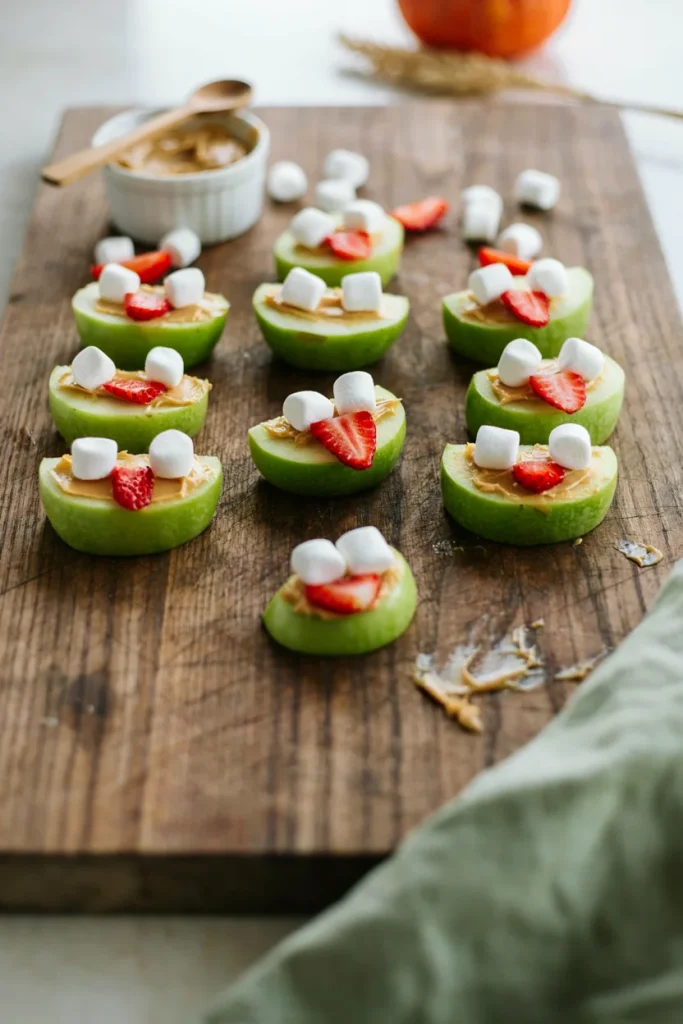
Marshmallow “teeth” wedged between apple slice “lips” gets an instant laugh — the strawberry tongue peeking out seals the joke.
Prep Time: 10 min | Cook Time: 0 min | Total Time: 10 min | Servings: 8 mouths | Difficulty: Easy
Ingredients
- 2 red apples, sliced into wedges
- Sunflower seed butter (or peanut butter)
- Mini marshmallows
- 1 strawberry, sliced thin
Instructions
- Spread sunflower butter on the inside of two apple wedges.
- Press mini marshmallows along the edge of one wedge as teeth.
- Tuck a strawberry slice inside as the tongue.
- Sandwich the wedges together and serve.
Effort: No-Bake
Slice, spread, stick — no oven time.
Good to Know
Sunflower butter keeps this nut-free without changing the flavor kids expect.
18. Scary Face Mini Pizzas
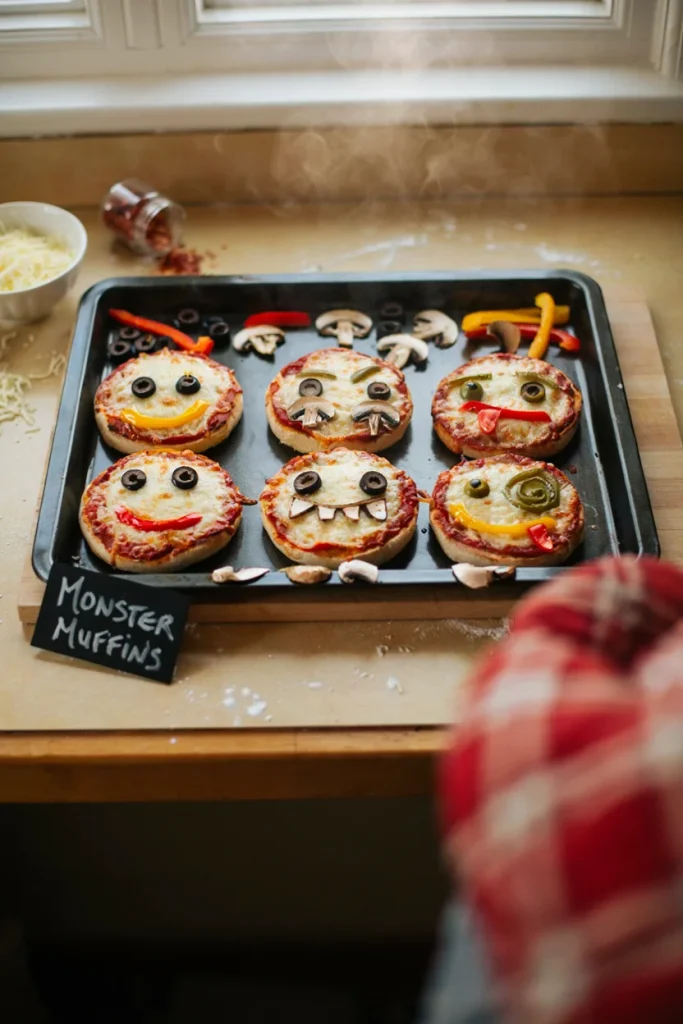
Kids design the face, you bake the batch — olives, peppers, and mushrooms arranged into expressions that range from silly to actually a little unsettling.
Prep Time: 15 min | Cook Time: 10 min | Total Time: 25 min | Servings: 8 mini pizzas | Difficulty: Easy
Ingredients
- 8 English muffin halves
- 1 cup pizza sauce
- 2 cups shredded mozzarella
- Sliced olives, peppers, and mushrooms for faces
Instructions
- Preheat oven to 400°F.
- Spread sauce on each English muffin half and top with cheese.
- Let kids arrange olives, peppers, and mushrooms into a face.
- Bake 8-10 minutes until the cheese melts.
Effort: Bake Required
About 8–10 minutes in the oven until the cheese melts.
Mom Tip
A squeeze bottle of pizza sauce keeps little hands from over-saucing.
19. Candy Eyeball S’mores Station
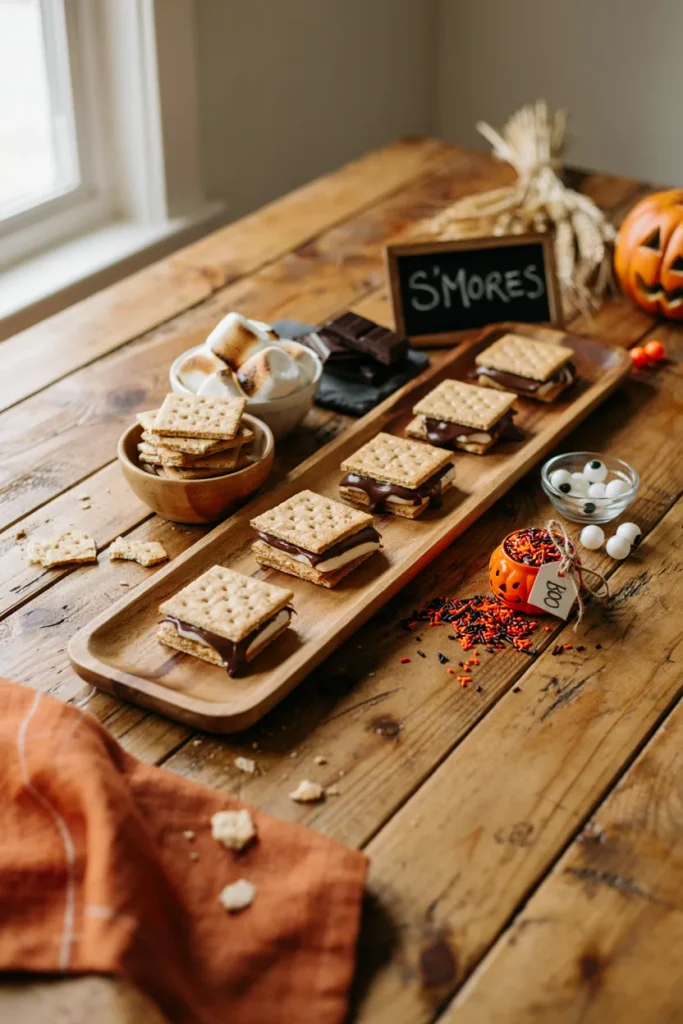
A bowl of candy eyeballs is the one swap that turns a familiar s’more into something distinctly Halloween — kids stack their own, so every one looks a little different.
Prep Time: 10 min | Cook Time: 0 min | Total Time: 10 min | Servings: 8 s’mores | Difficulty: Easy
Ingredients
- 16 graham cracker squares
- 8 chocolate squares
- 8 marshmallows, toasted
- Candy eyeballs
Instructions
- Set up graham crackers, chocolate, marshmallows, and candy eyeballs on a tray.
- Toast marshmallows in the oven or microwave.
- Let kids stack their own s’mores, pressing candy eyeballs into the marshmallow.
Effort: Quick (15 min)
Toast in the oven or microwave — no open flame needed.
Pair It With
Swap regular marshmallows for Halloween Peeps for extra seasonal color.
Halloween Drinks for Kids
20. Witch’s Brew Punch
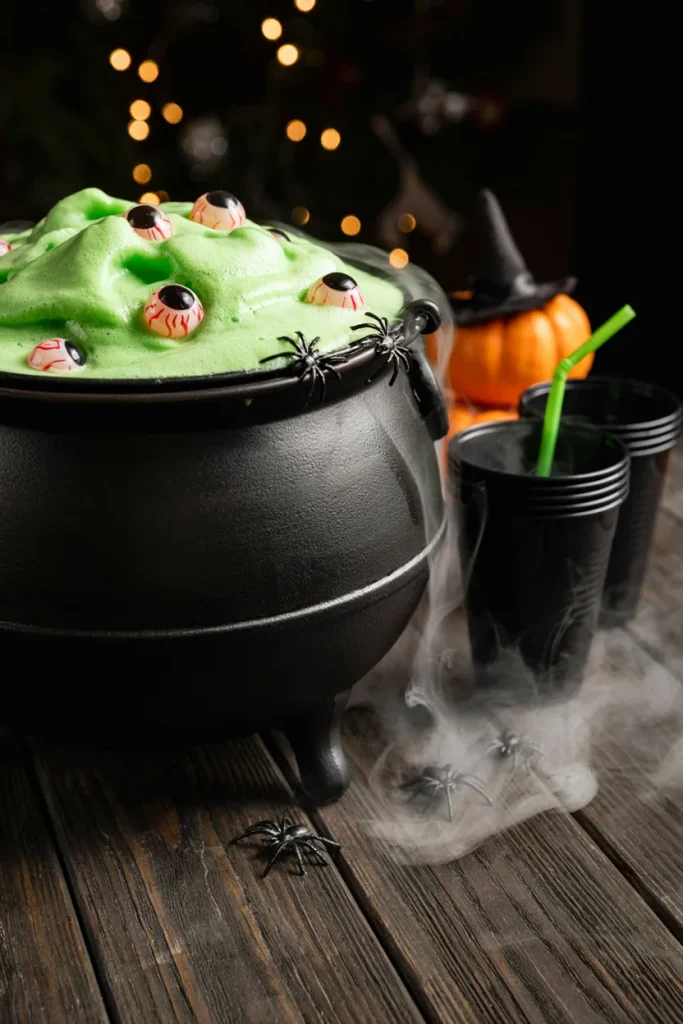
Sherbet foaming on top of soda gives this punch real movement in the bowl — add a few floating gummy eyeballs and it looks alive before anyone pours a cup.
Prep Time: 10 min | Cook Time: 0 min | Total Time: 10 min | Servings: 12 cups | Difficulty: Easy
Ingredients
- 2 liters lemon-lime soda, chilled
- 1 quart lime sherbet
- Gummy eyeball candies
- Dry ice (optional)
Instructions
- Add scoops of lime sherbet to a punch bowl.
- Pour chilled soda over the sherbet.
- Float gummy eyeballs on top.
- Add dry ice for fog, if using, right before serving.
Effort: No-Bake
Stir and serve — no cooking involved.
Good to Know
If you use dry ice for fog, handle it with heat-resistant gloves and keep it out of kids’ reach.
21. Pumpkin Pie Smoothies
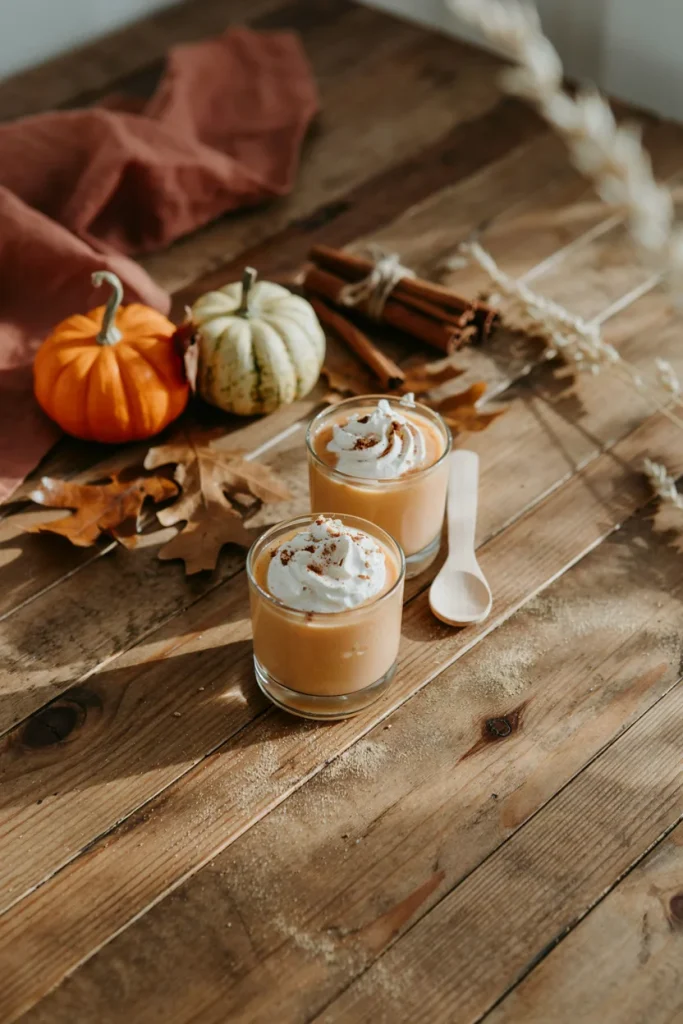
A swirl of whipped cream and a dusting of nutmeg on top makes this taste like dessert while quietly being the healthiest drink on the table.
Prep Time: 10 min | Cook Time: 0 min | Total Time: 10 min | Servings: 6 smoothies | Difficulty: Easy
Ingredients
- 1 cup pumpkin puree
- 2 cups milk
- 2 frozen bananas
- 1 tsp pumpkin pie spice
- Whipped cream, for topping
- Ground nutmeg, for topping
Instructions
- Blend pumpkin puree, milk, bananas, and pumpkin pie spice until smooth.
- Pour into small cups.
- Top with whipped cream and a dash of nutmeg.
Effort: Quick (15 min)
One blender run start to finish.
Why You’ll Love It
Cozy fall flavor without the sugar crash that follows soda-based drinks.
22. Bloody Shirley Temples
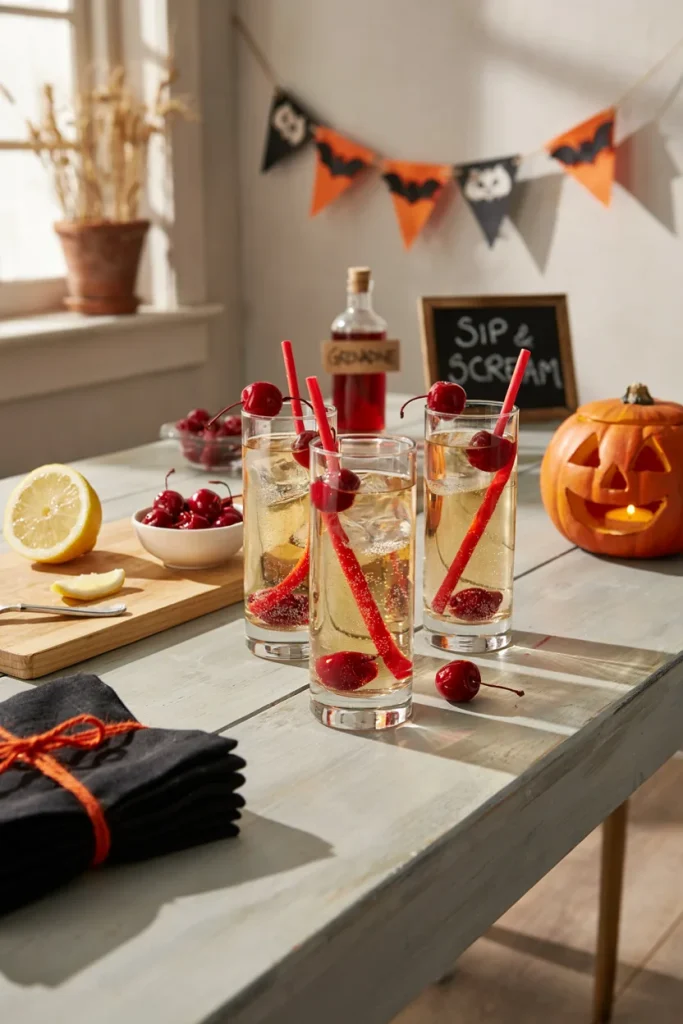
Grenadine sinking through Sprite creates a “bleeding” effect right in the glass — the red licorice straw is the cheeky finishing touch.
Prep Time: 5 min | Cook Time: 0 min | Total Time: 5 min | Servings: 1 drink | Difficulty: Easy
Ingredients
- 1 cup Sprite or lemon-lime soda
- 1 tbsp grenadine
- 1 maraschino cherry
- Red licorice straw
Instructions
- Pour soda into a clear glass.
- Slowly drizzle grenadine down the inside of the glass so it sinks.
- Drop in the cherry and add a red licorice straw.
Effort: No-Bake
Pour and stir — nothing else required.
Best For
Any age; it’s the most classic, least fussy drink on this list.
23. Green Slime Juice
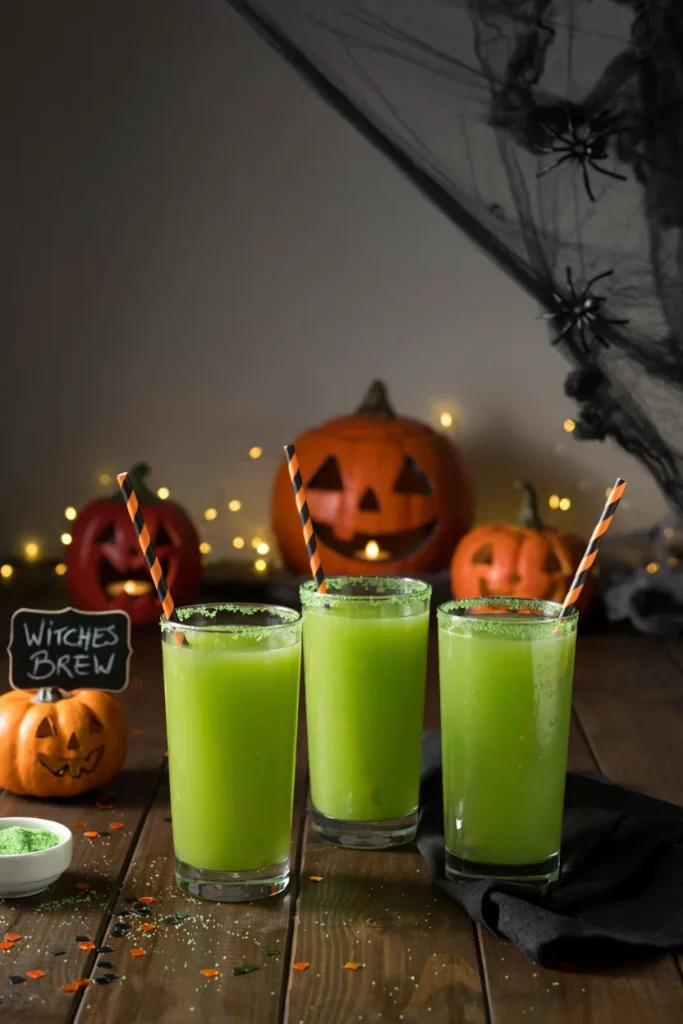
A sugar-rimmed glass turns an ordinary green juice mix into something that looks deliberately “slimy” the second the light hits it.
Prep Time: 5 min | Cook Time: 0 min | Total Time: 5 min | Servings: 4 drinks | Difficulty: Easy
Ingredients
- 2 cups green apple juice
- 2 cups lemon-lime soda
- Green sanding sugar, for rimming
- Orange-and-black striped straws
Instructions
- Rim glasses with green sanding sugar.
- Mix apple juice and soda together.
- Pour into rimmed glasses and add striped straws.
Effort: No-Bake
Mix two juices and rim the cup — no cooking.
Styling Tips
Striped paper straws make it look finished with almost no extra effort.
24. Vampire Float
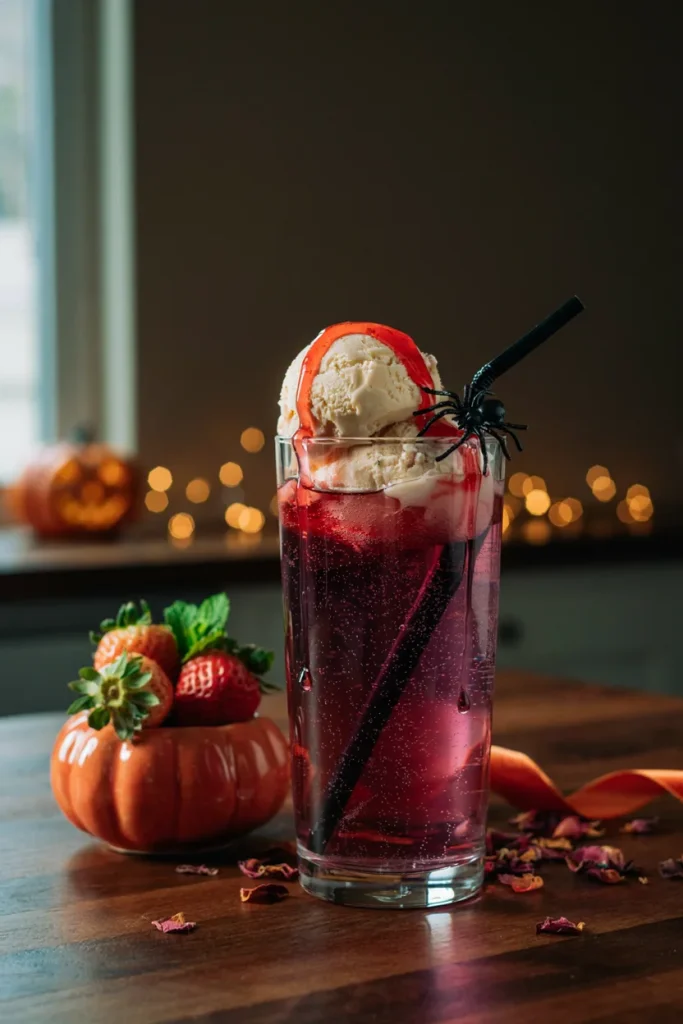
Strawberry syrup drizzled down the side of a fizzing grape soda float looks exactly like the “blood” it’s meant to be — dramatic, but entirely kid-safe.
Prep Time: 5 min | Cook Time: 0 min | Total Time: 5 min | Servings: 4 floats | Difficulty: Easy
Ingredients
- 4 scoops vanilla ice cream
- 2 cups grape soda
- Strawberry syrup, for drizzling
Instructions
- Place a scoop of vanilla ice cream in each tall glass.
- Pour grape soda over the ice cream.
- Drizzle strawberry syrup down the inside of the glass.
- Serve with a straw immediately.
Effort: No-Bake
Scoop, pour, drizzle — no cooking involved.
Pair It With
A pair of vampire teeth for photos before the ice cream melts.
Nut-Free & Allergy Swap Guide
A few small swaps keep the table safer for guests with common allergies, without anyone feeling left out.
| Recipe | Common Allergen | Easy Swap |
|---|---|---|
| Apple Monster Mouths | Peanut/tree nut (peanut butter) | Sunflower seed butter |
| Bloody Finger Sandwiches | Tree nut (almond “nail”) | Thin strip of red bell pepper |
| Dracula Denture Cookies | Tree nut (almond fangs) | Skip the fangs, keep the marshmallow teeth |
| Any frosted treat | Egg (some frostings) | Use a store-bought egg-free frosting |
According to the Food Allergy Research & Education organization, food allergies affect roughly 1 in 13 children in the U.S. — worth a quick check with parents before the party if you’re not sure who’s coming.
Bonus Quick-Grab Snacks
25. Spooky Spider Crackers
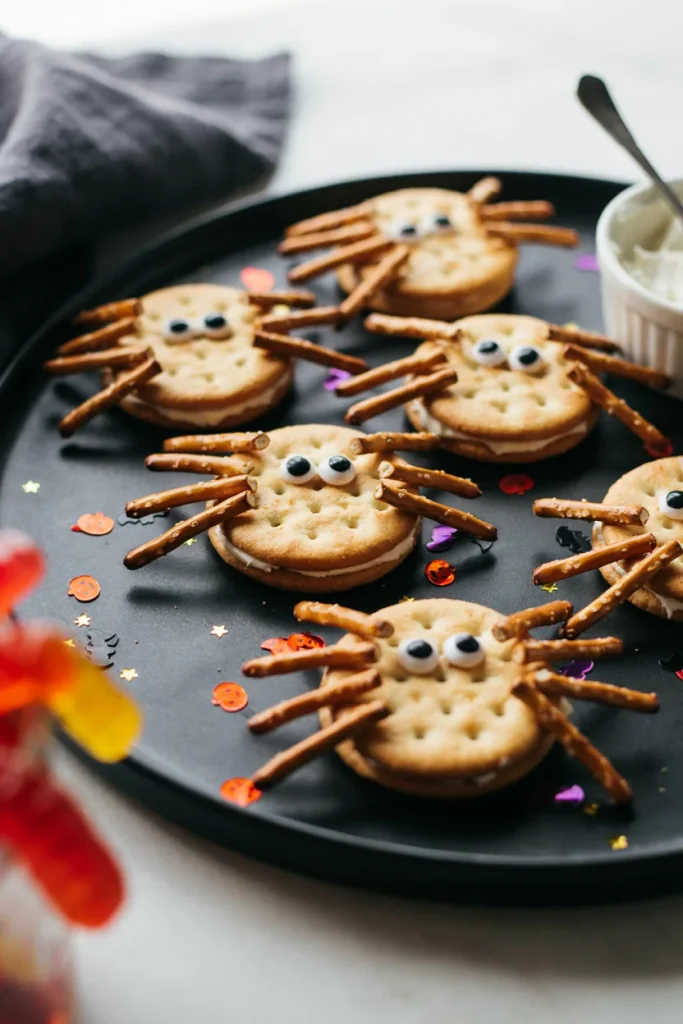
Pretzel-stick legs fanned out from a cracker sandwich look unmistakably spider-shaped the moment they’re plated — crunchy, a little creepy, gone fast.
Prep Time: 10 min | Cook Time: 0 min | Total Time: 10 min | Servings: 12 spiders | Difficulty: Easy
Ingredients
- 24 Ritz crackers
- Sunflower butter or cream cheese
- Thin pretzel sticks
- Candy eyes
Instructions
- Spread filling on the bottom cracker of each pair.
- Press 8 pretzel sticks into the filling around the edges as legs.
- Top with the second cracker and press gently.
- Add candy eyes on top with a dab of filling.
Effort: No-Bake
Assembly only, ready in minutes.
Good to Know
Sunflower butter instead of cream cheese keeps this nut-free too.
26. Frankenstein Rice Krispie Treats
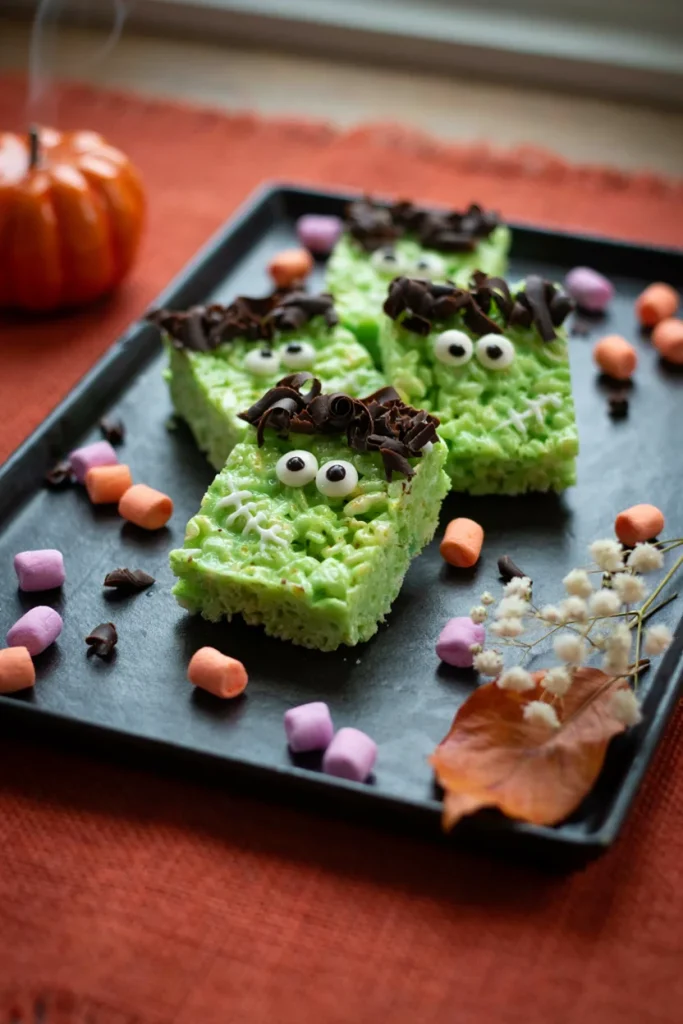
Tinted green before pressing into squares, these treats get their monster look from the color alone — chocolate “hair” and candy eyes finish the face.
Prep Time: 15 min | Cook Time: 5 min | Total Time: 30 min | Servings: 12 treats | Difficulty: Easy
Ingredients
- 6 tbsp butter
- 1 (10 oz) bag mini marshmallows
- Green food coloring
- 6 cups Rice Krispies cereal
- Melted chocolate, for hair
- Candy eyes
Instructions
- Melt butter, add marshmallows and green food coloring, and stir until melted.
- Fold in cereal and press into a greased pan.
- Cool, then cut into squares.
- Add melted chocolate “hair” and candy eyes to each square.
Effort: Quick (15 min)
Same base recipe as classic Rice Krispie treats, just tinted before pressing.
Styling Tips
Display on a dedicated Halloween serving tray for instant table impact.
27. Halloween Trail Mix
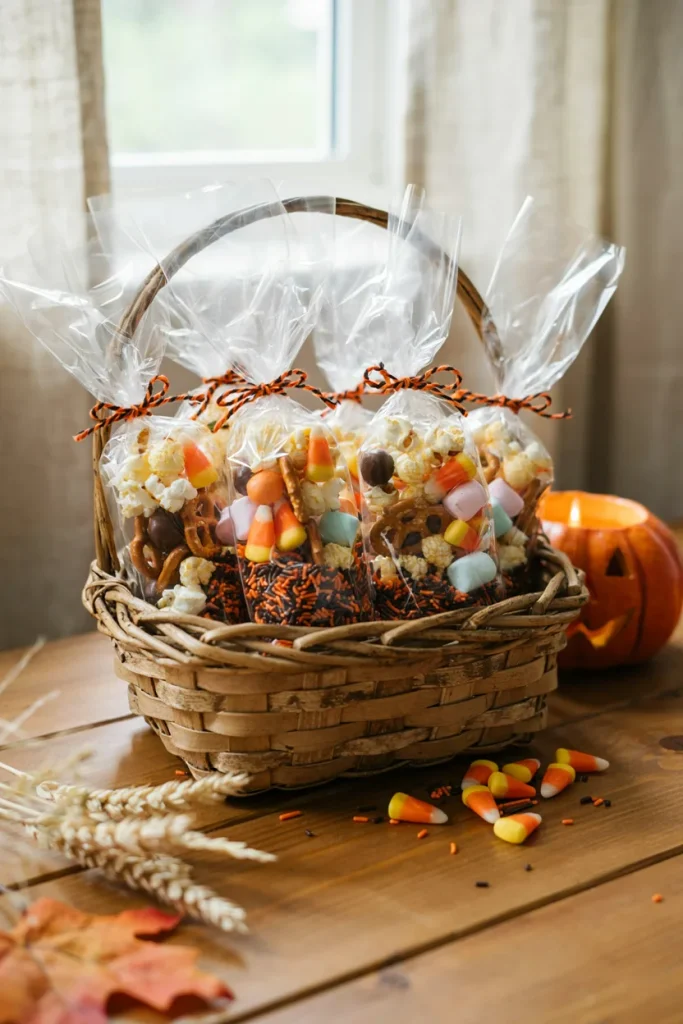
Bagged and tied ahead of time, this mix does double duty as a party favor and a make-ahead lifesaver for the night everything else runs late.
Prep Time: 10 min | Cook Time: 0 min | Total Time: 10 min | Servings: 8 bags | Difficulty: Easy
Ingredients
- 4 cups popcorn
- 2 cups pretzels
- 1 cup candy corn
- 1 cup chocolate chips
- Clear treat bags and orange/black twine
Instructions
- Toss all ingredients together in a large bowl.
- Portion into clear bags.
- Tie each bag closed with orange or black twine.
Effort: No-Bake
Mix and bag — the most make-ahead-friendly item on this list.
Budget Tip
Stretches a little of several bulk ingredients into a lot of servings.
28. Ghost Cheese Sticks
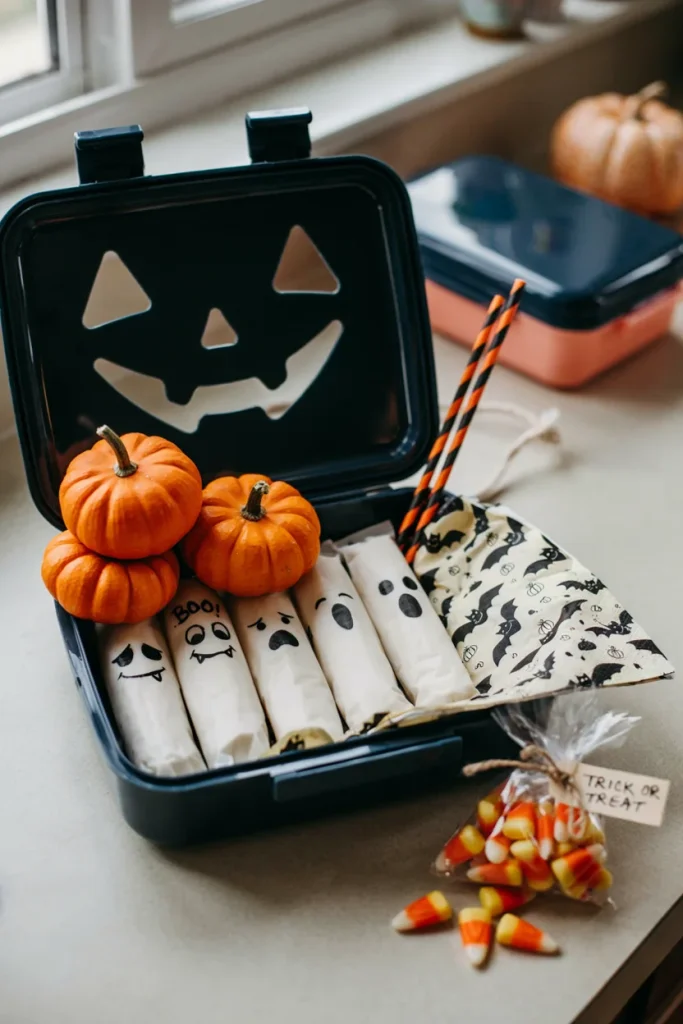
A quick marker face drawn right on the wrapper is the entire craft — no unwrapping, no mess, and it still gets a laugh every time.
Prep Time: 5 min | Cook Time: 0 min | Total Time: 5 min | Servings: 8 sticks | Difficulty: Easy
Ingredients
- 8 individually wrapped string cheese sticks
- Black permanent marker
Instructions
- Draw a simple ghost face directly on each cheese stick wrapper.
- Serve chilled.
Effort: No-Bake
Draw and go — under two minutes for a whole batch.
Best For
Lunchbox snacks and classroom parties where mess-free matters most.
29. Witch Finger Breadsticks
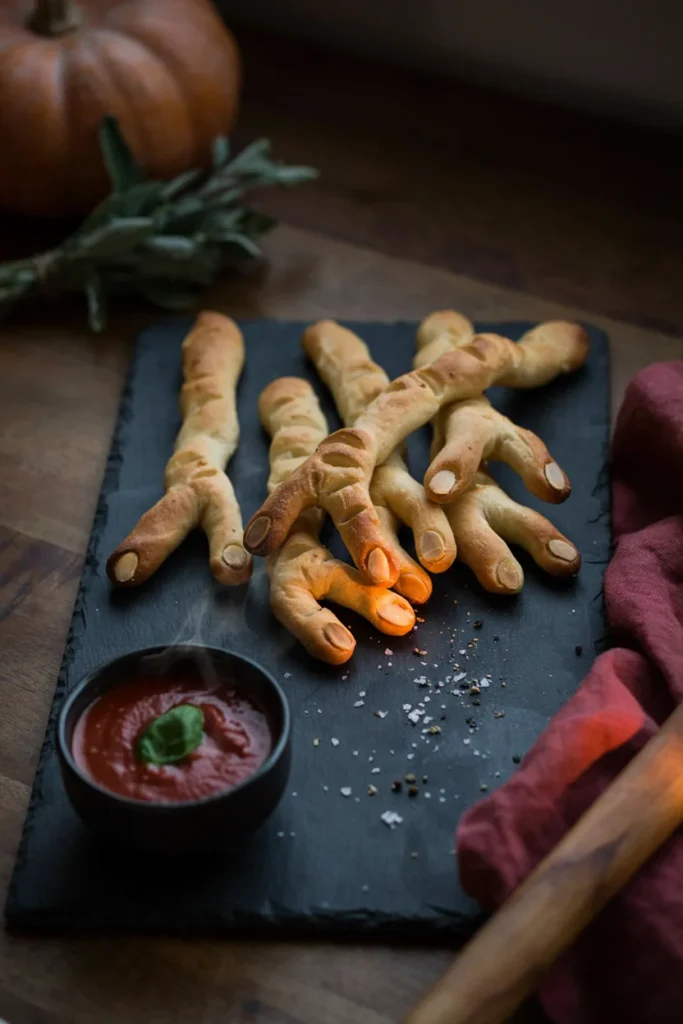
Scored knuckles and an almond “nail” on baked dough get real gasps at the table — then they’re gone in seconds once the marinara comes out.
Prep Time: 15 min | Cook Time: 15 min | Total Time: 30 min | Servings: 8 breadsticks | Difficulty: Easy
Ingredients
- 1 tube refrigerated breadstick dough
- 8 sliced almonds (or red bell pepper for nut-free)
- Marinara sauce, for serving
Instructions
- Shape breadstick dough into finger shapes and score knuckle lines with a knife.
- Press an almond into one end as the nail.
- Bake according to package directions, about 12-15 minutes.
- Serve with marinara for dipping.
Effort: Bake Required
Shape and bake refrigerated dough — about 15 minutes.
Good to Know
Swap the almond for a sliver of red bell pepper to keep it nut-free.
30. Monster Jello Cups
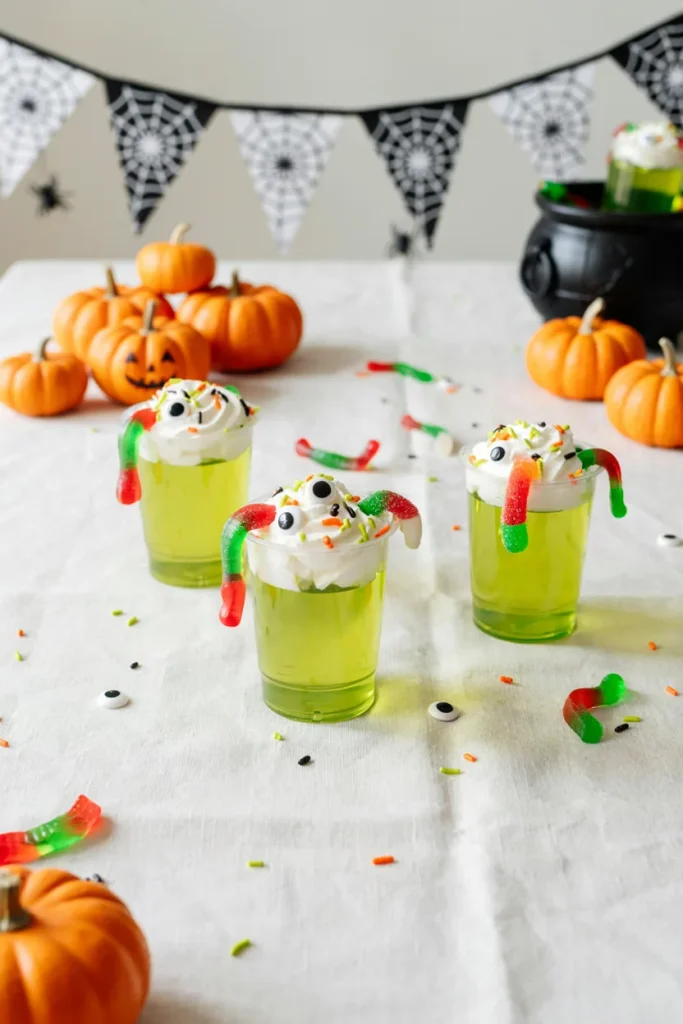
Candy eyeballs stuck to the outside of the cup, not just on top, is the small detail that makes these look more finished than a standard Jell-O cup.
Prep Time: 15 min | Cook Time: 0 min | Total Time: 2 hr 15 min (incl. chilling) | Servings: 6 cups | Difficulty: Easy
Ingredients
- 1 (3 oz) box green Jell-O
- 6 gummy worms
- 12 candy eyeballs
- Edible glue or a dab of frosting, to stick eyeballs to the cup exterior
Instructions
- Prepare Jell-O according to package directions.
- Pour into small clear cups and drop in a gummy worm.
- Chill until set, about 2 hours.
- Stick candy eyeballs to the outside of each cup with a dab of frosting.
Effort: Quick (15 min prep, chills overnight)
Prep is fast; the fridge does the rest of the work.
Mom Tip
Make the night before — one less thing on your party-day list.
Party Table Styling Tips
A few small choices make the whole table look pulled-together without extra work.
- Stick to finger foods: Skip anything needing a fork. Themed paper plates and napkins handle the rest.
- Use themed serveware: A cauldron-style bowl or a stackable tray set does most of the decorating for you.
- Label the food with fun names: “Witch Warts” (grapes) and “Monster Mash” (trail mix) get picky eaters to actually try things.
- Mix store-bought with homemade: Pair a few DIY hits with ready-made Halloween cookie packs to save time.
- Pre-portion when you can: Snack cups keep little hands from pawing through a shared bowl.
- Go vertical: A tiered serving tray adds height and saves table space.
Common Mistakes to Avoid
- Serving fork-required food: Kids eat standing up and moving around — stick to finger foods or expect a mess.
- Skipping allergen labels: A small card noting nuts or dairy takes two minutes and prevents a real problem.
- An all-sugar table: Balance sweets with a savory option or two so no one crashes an hour in.
- No make-ahead plan: Pick at least half your menu from the No-Bake column so party day isn’t all cooking.
- No signage: Fun labels aren’t just cute — they help kids (and allergy-conscious parents) know what they’re grabbing.
Halloween Party Food Shopping Checklist
Save or print this before your store run so nothing gets left off the list.
- Candy eyes (multiple packs — you’ll use more than you think)
- Crescent roll dough (for mummy hot dogs)
- String cheese
- Pretzel sticks
- Orange and black frosting or candy melts
- Clear treat bags and ribbon or twine
- Paper straws (orange/black striped)
- Themed paper plates and napkins
- Sunflower butter (nut-free swap)
- Dry ice (optional, for the punch bowl)
FAQ: Halloween Party Foods for Kids
What are some fun Halloween snacks for a school party?
Stick to individually portioned, nut-free options like ghost popcorn bags, ghost cheese sticks, or pumpkin quesadillas. No-Bake picks keep classroom setup simple and mess-free.
How can I make Halloween food kid-friendly but still spooky?
Lean silly over scary — candy eyes, bright colors, and playful shapes like ghosts and pumpkins land better with kids than anything realistic or gory.
What’s a good mix of healthy and fun foods for Halloween?
Pair sweet treats like mummy cupcakes with lighter options like the pumpkin veggie tray or apple monster mouths. Smoothies and fruit-based treats feel festive without being sugar bombs.
How far in advance can I make Halloween party foods?
Decorated cookies, trail mix, and Jell-O cups hold up a day or two ahead. Save anything hot or melty — mummy hot dogs, mini pizzas — for party day.
What drinks should I serve at a kids’ Halloween party?
Non-caffeinated options like witch’s brew punch, vampire floats, and pumpkin smoothies are always a hit. Balance with water so it’s not soda all afternoon.
What are good nut-free Halloween snack options?
Apple monster mouths made with sunflower butter, ghost cheese sticks, veggie trays, and popcorn bags are all naturally or easily made nut-free.
How many snacks should I plan per kid?
Plan for 3–4 small items per child — one sweet, one savory, and a drink covers most party lengths without excess leftovers.
What are easy no-bake Halloween treats for kids?
Witch hat cookies, monster eyeball donuts, and candy corn parfaits all come together with zero oven time — good picks when you’re short on time.
Related Posts You’ll Love
- 20 Spooky Kids Halloween Party Ideas — games and decor to round out the bash
- 23 Cutest Halloween Movies for Toddlers — perfect for a cozy night after all the snacks
- 100 Super Fun Family Activities for Halloween — keep the fun going all October
- Trunk or Treat Setup Ideas — an interactive twist guests will love
- Boo Basket Ideas for Kids — more seasonal gifting inspiration
Final Thoughts
You don’t need to attempt all 30+ of these — pick a handful across sweet, savory, and drinks, lean on the No-Bake column when time’s tight, and let the kids handle the decorating stations. That’s a table that looks like way more effort than it actually was.